
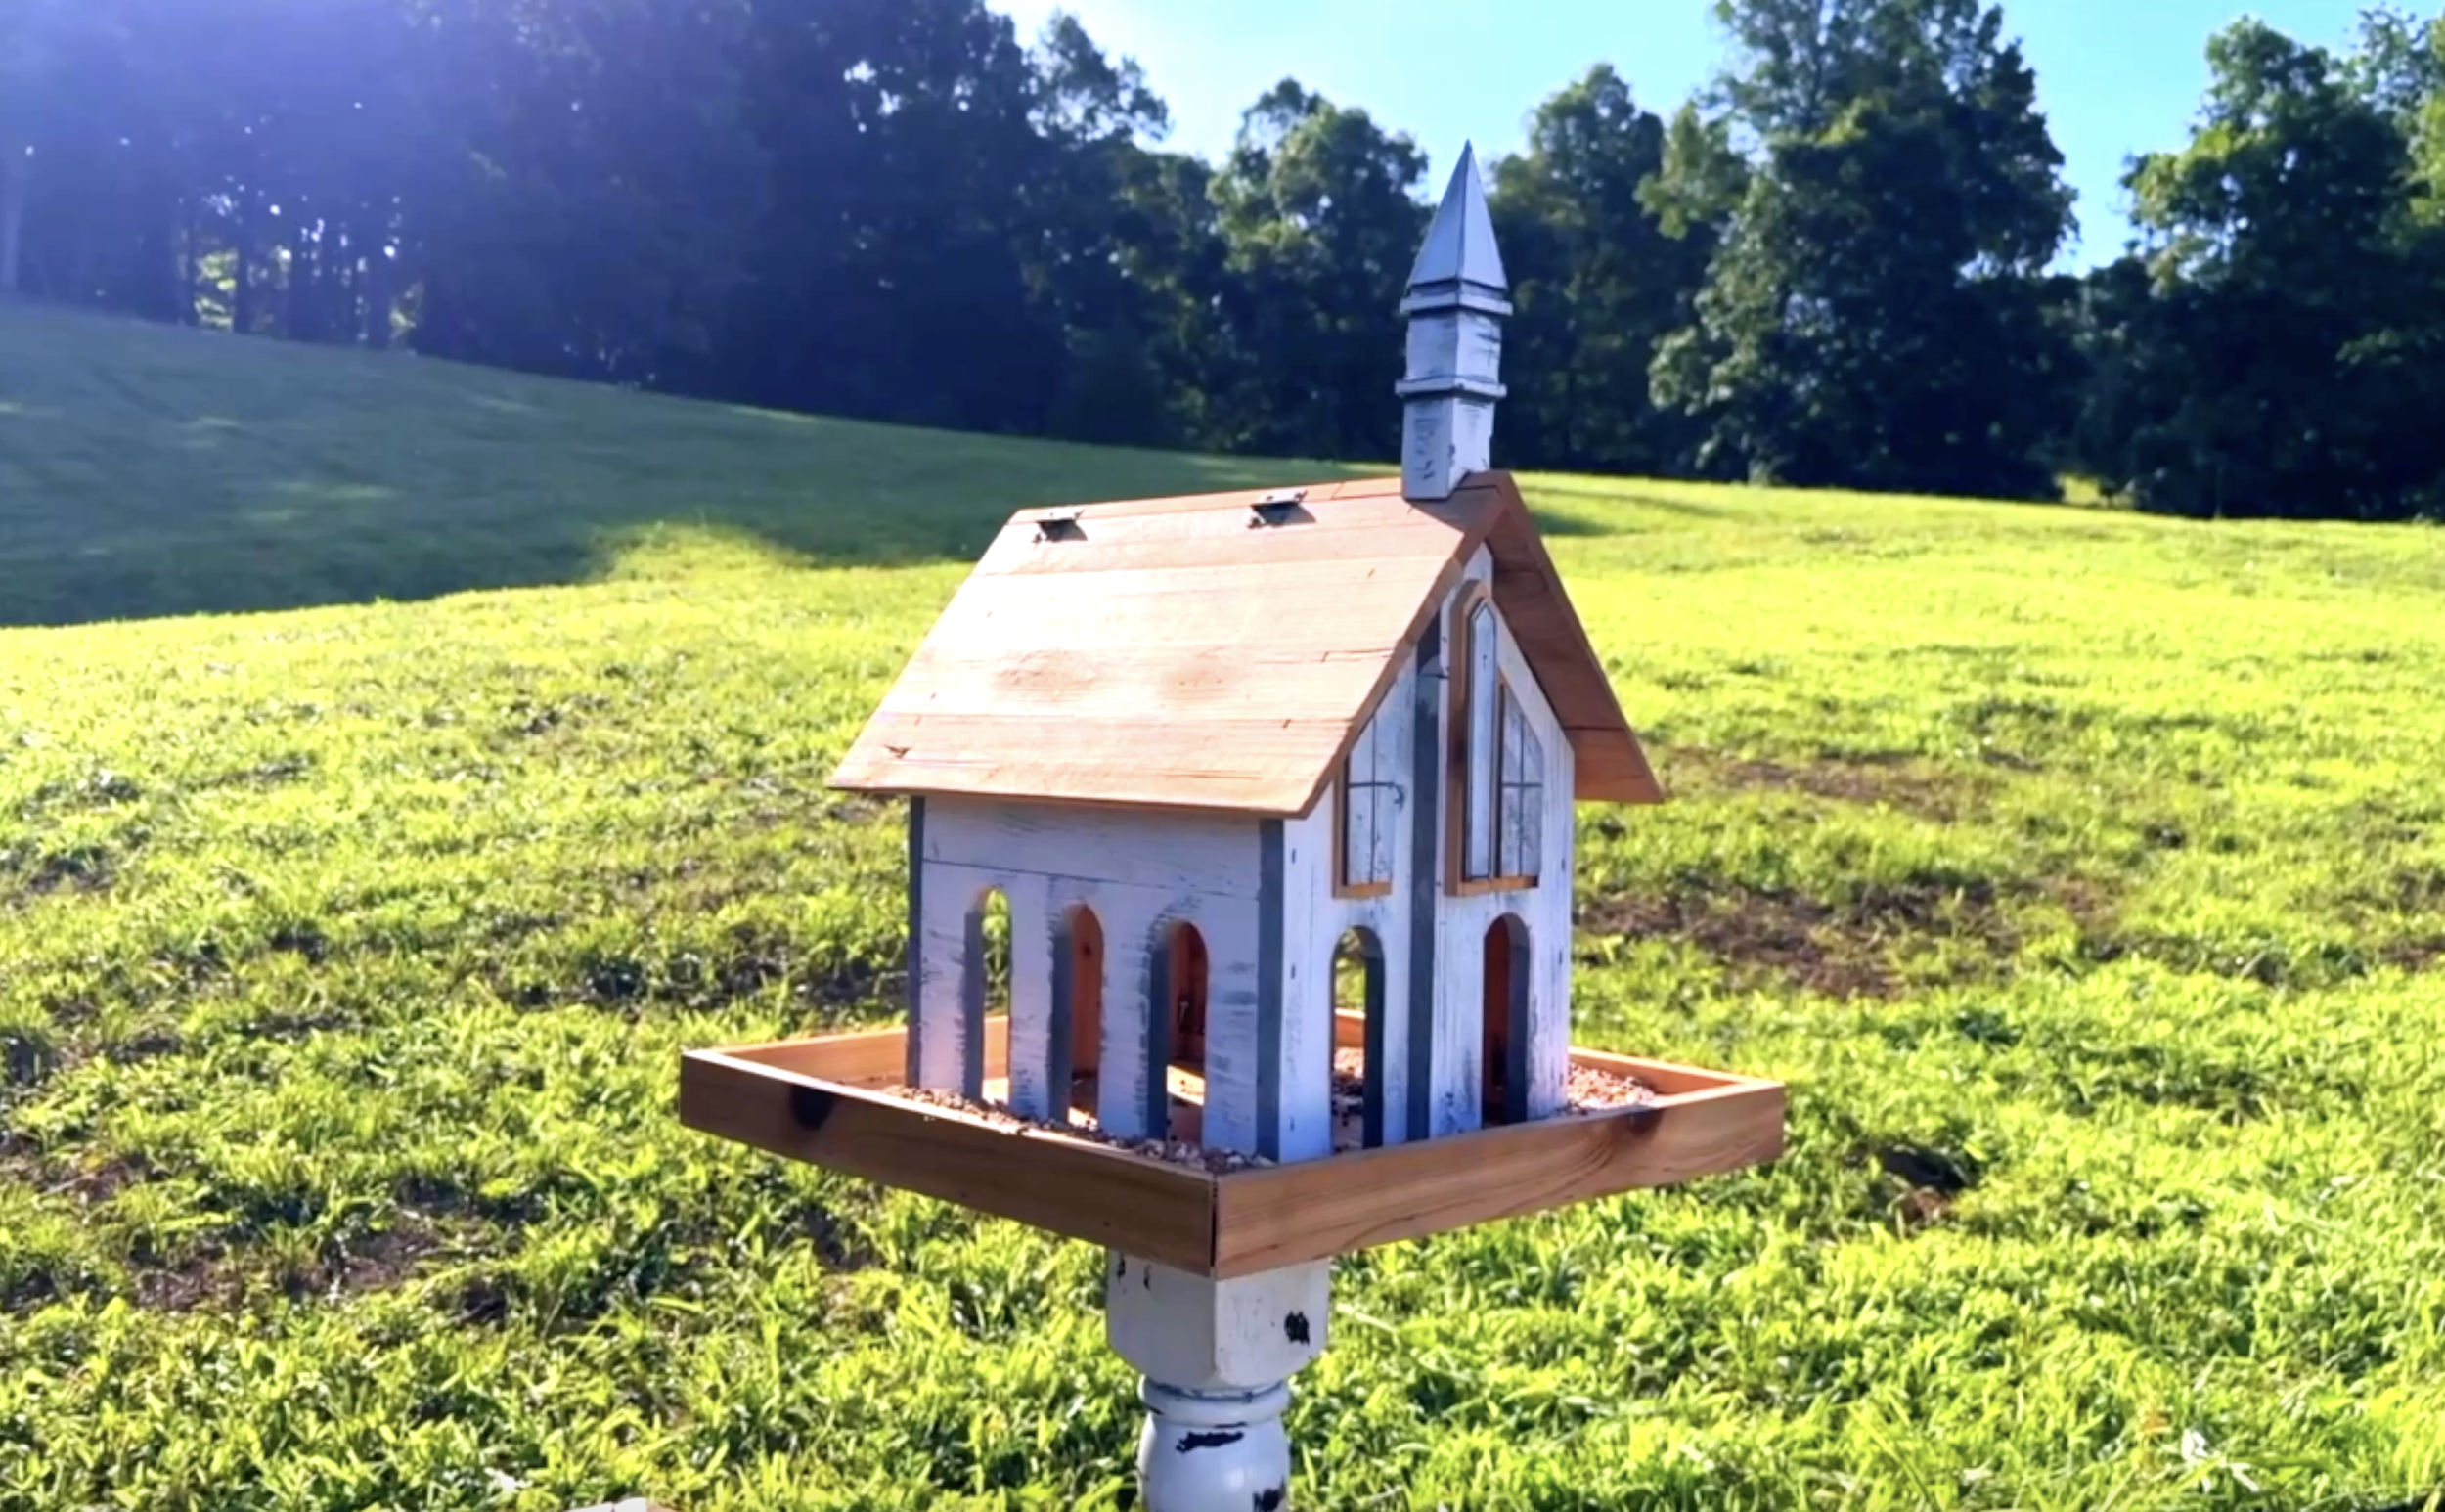
DIY Church Bird Feeder Plans (Step-by-Step Guide)

If you've ever walked through a country town and admired those old white churches sitting on a hill, you're not alone. There's something timeless about their simple design, tall steeples, and classic charm.
That's exactly what inspired this bird feeder.
Over the years, nostalgic bird feeders have been some of the best-selling woodworking projects I've ever built. But one design that kept getting requested was a church-style bird feeder. So instead of buying one, I designed my own version using inexpensive fence pickets and a few simple woodworking techniques.
The result is a decorative bird feeder that looks like an old country church, holds plenty of bird seed, and makes a great addition to a porch, garden, or backyard.
In this guide, I'll walk you through the entire build step-by-step so you can make one yourself.
Materials & Tools
Lumber
Fence pickets (main structure)
Small piece of 2x2 material for steeple
Wood glue
Hardware
1¼" Pocket Hole Screws
1" Jewelry Box Hinges
Brad Nails or Crown Staples
CA Glue (Optional)
Tools
Table Saw
Miter Saw
Jigsaw
Drill
Pocket Hole Jig
Forstner Bit, Hole Saw, or Spade Bit (1½")
Let’s Get Going!
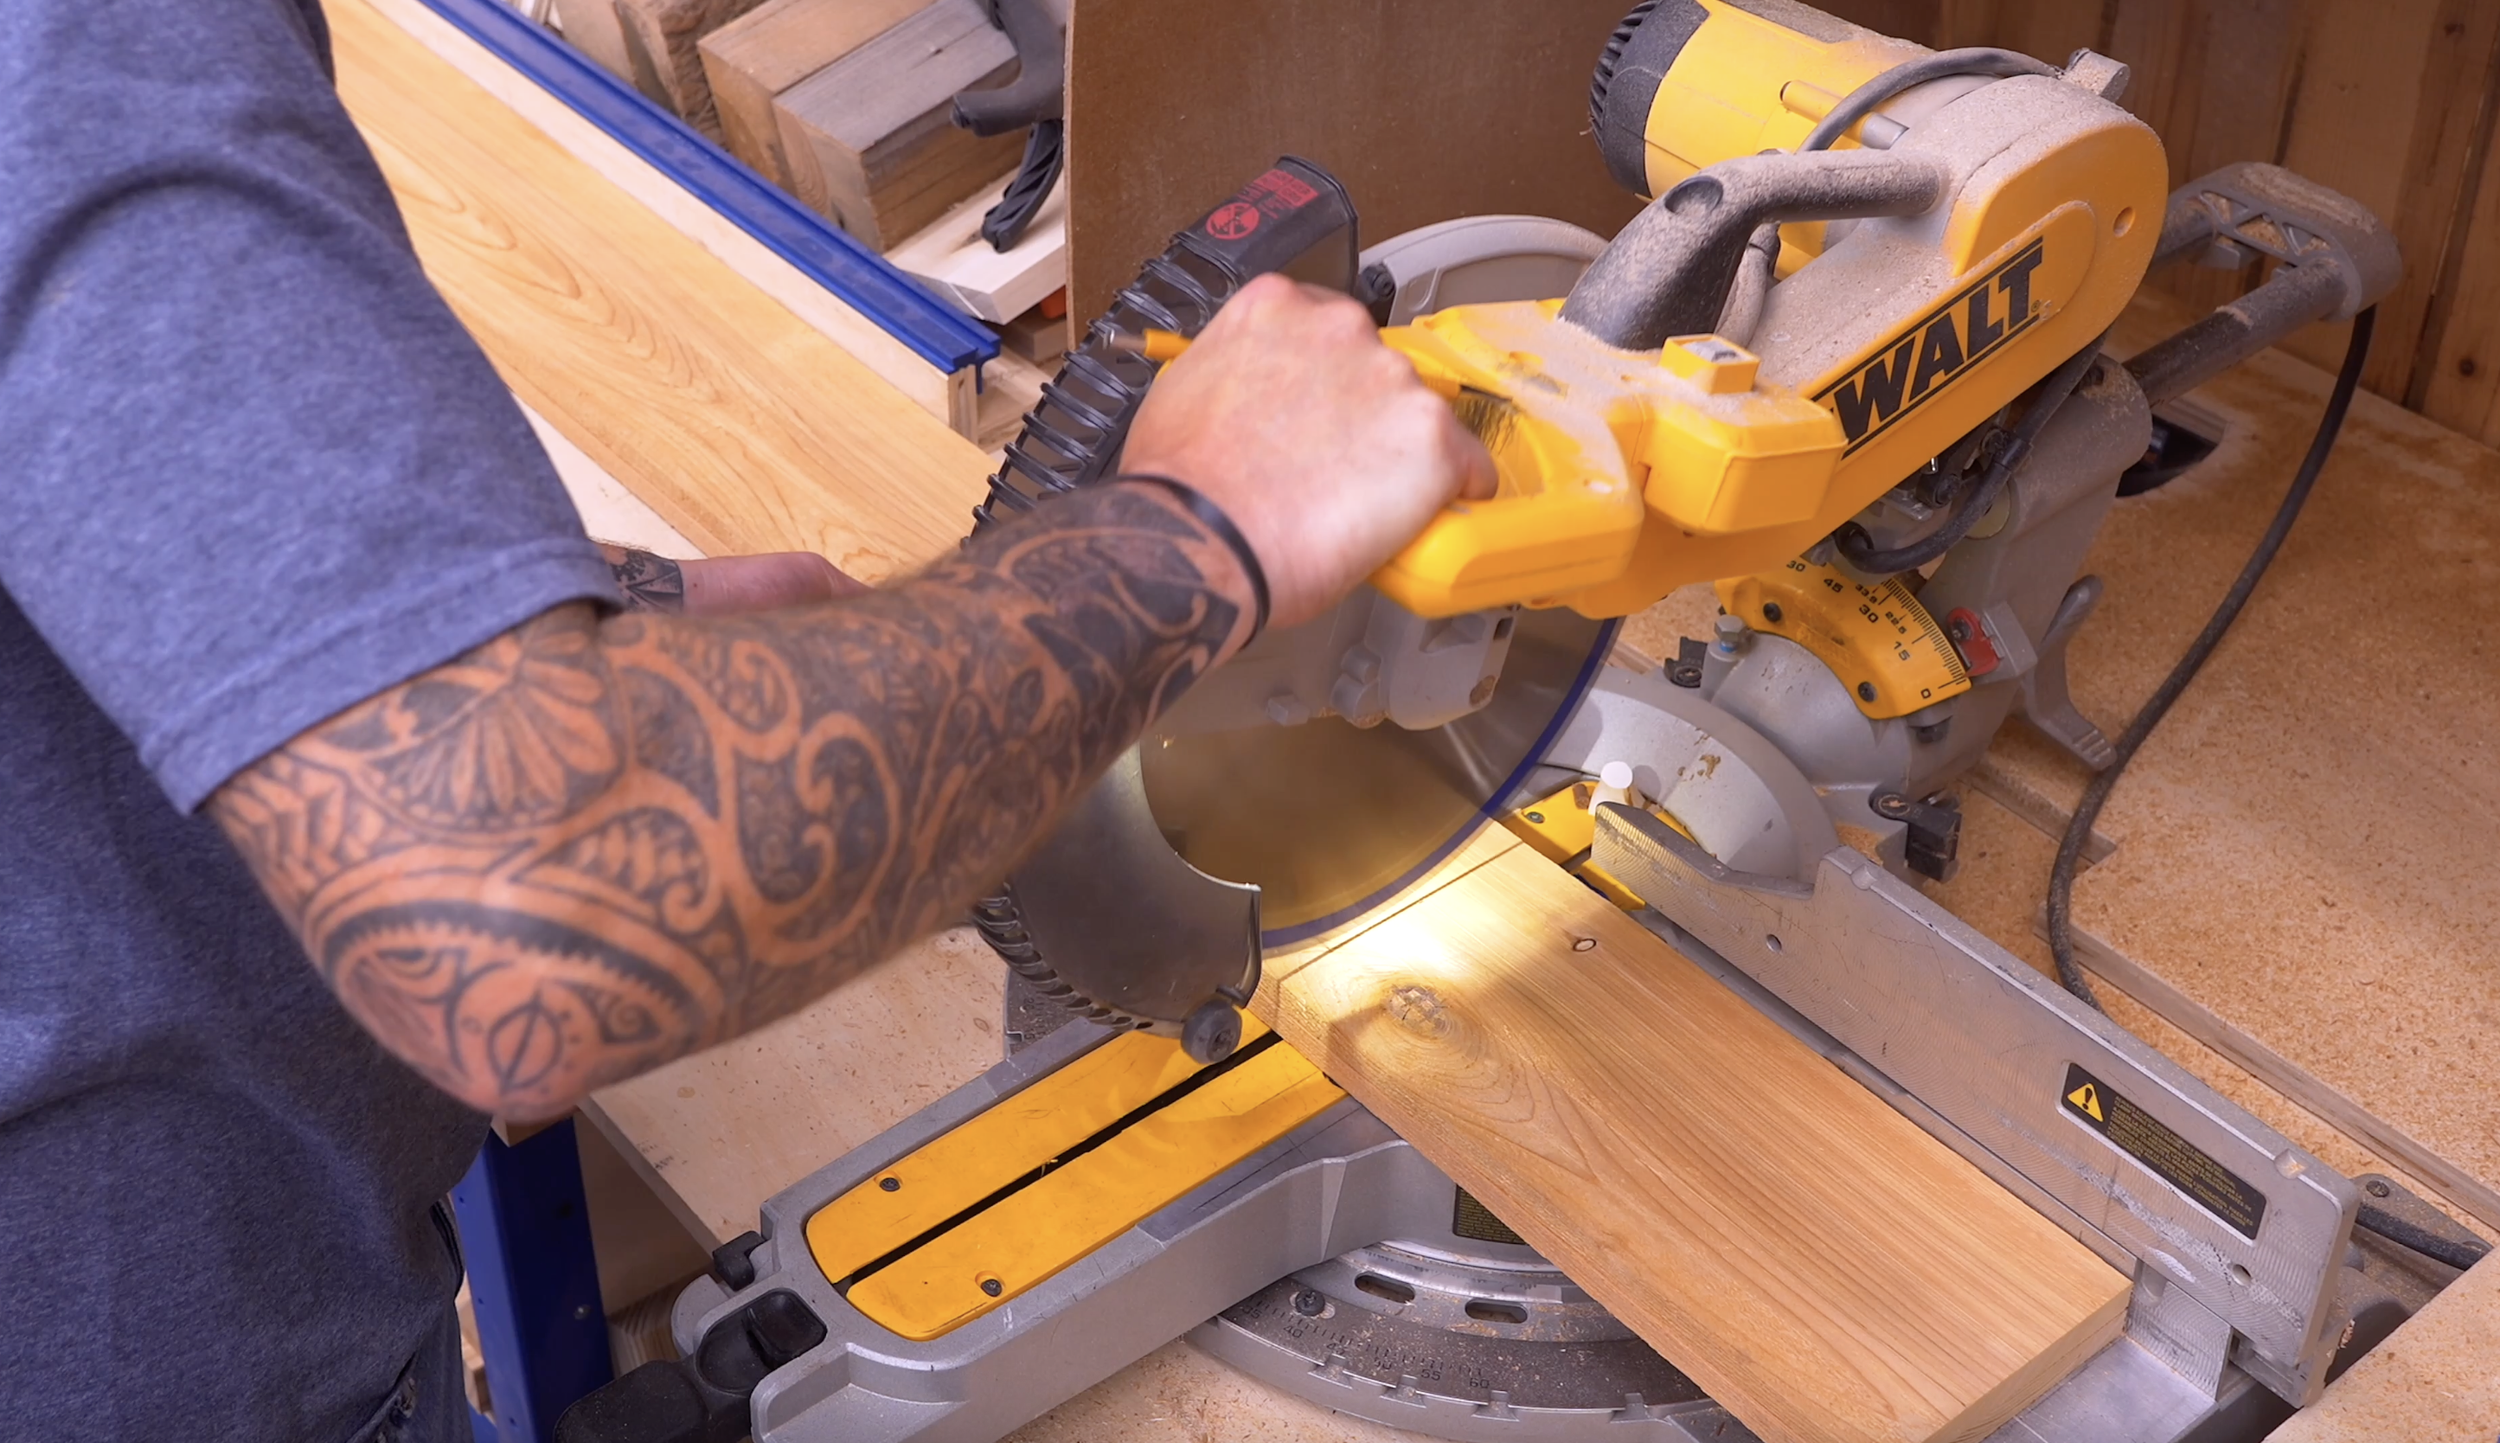
Step 1: Cut the Front and Back Walls
Cut:
4 boards at 12" long
Rip all four boards to 4¼" wide
These pieces become the front and rear walls of the church.
Create the Roof Peak
Set your miter saw to 48 degrees.
Cut one end of each board to create the steep church roof angle. This gives the feeder its tall, narrow church appearance.

Step 2: Cut the Base Parts
Front/Back Base Boards
(4) boards @ 34 inches
Side & Center Boards
(6) boards @ 18 ½ inches
These pieces create both the top and bottom frames.
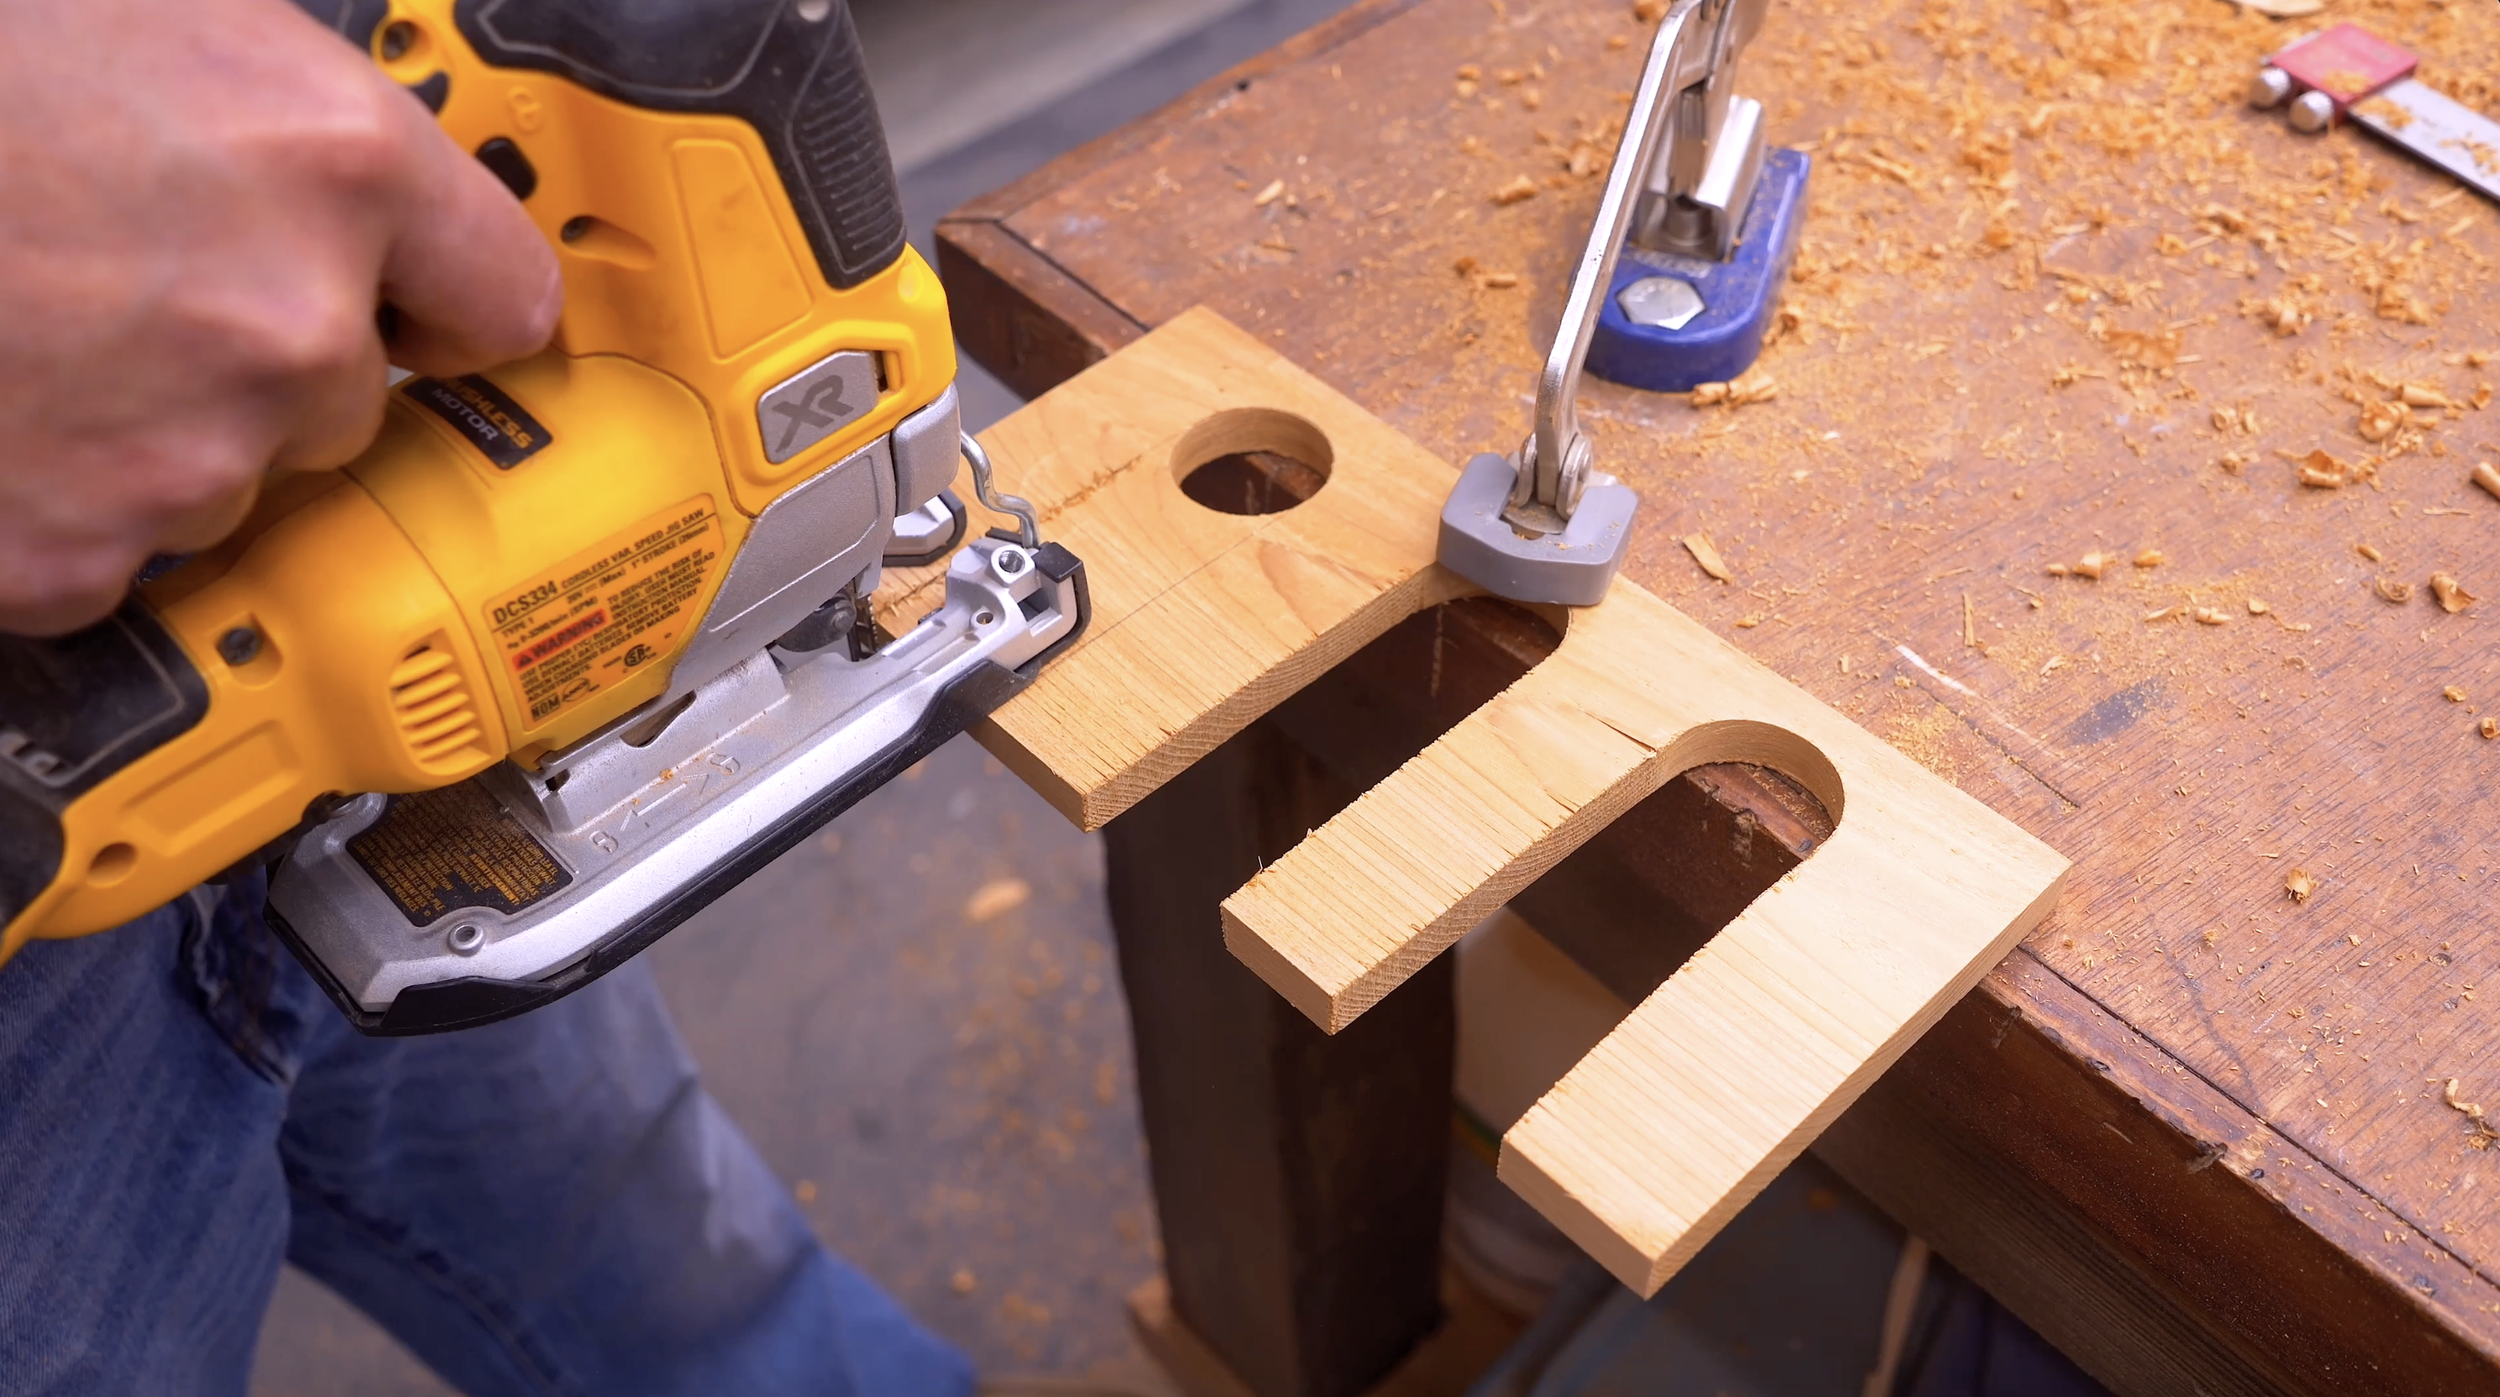
Step 3: Create the Decorative Church Windows
The windows aren't just decorative.
They also serve as the openings where birds access the seed.
Window Size
Each opening is:
4½" tall
1½" wide
Mark the first window on one front board:
Measure up 4½" from the bottom
Measure in 1⅜" from each side
This creates the correct spacing.
Create the Arch
Using a 1½" Forstner bit:
Align the bit with your layout lines
Drill the rounded arch top
Then use a jigsaw to complete the opening.
Once the first window is finished, use it as a template for every remaining window.
Side Windows
Each side receives three windows.
Trace the first opening onto the side pieces, spacing each window so they touch the previous layout marks. This leaves approximately 1⅜" between openings.
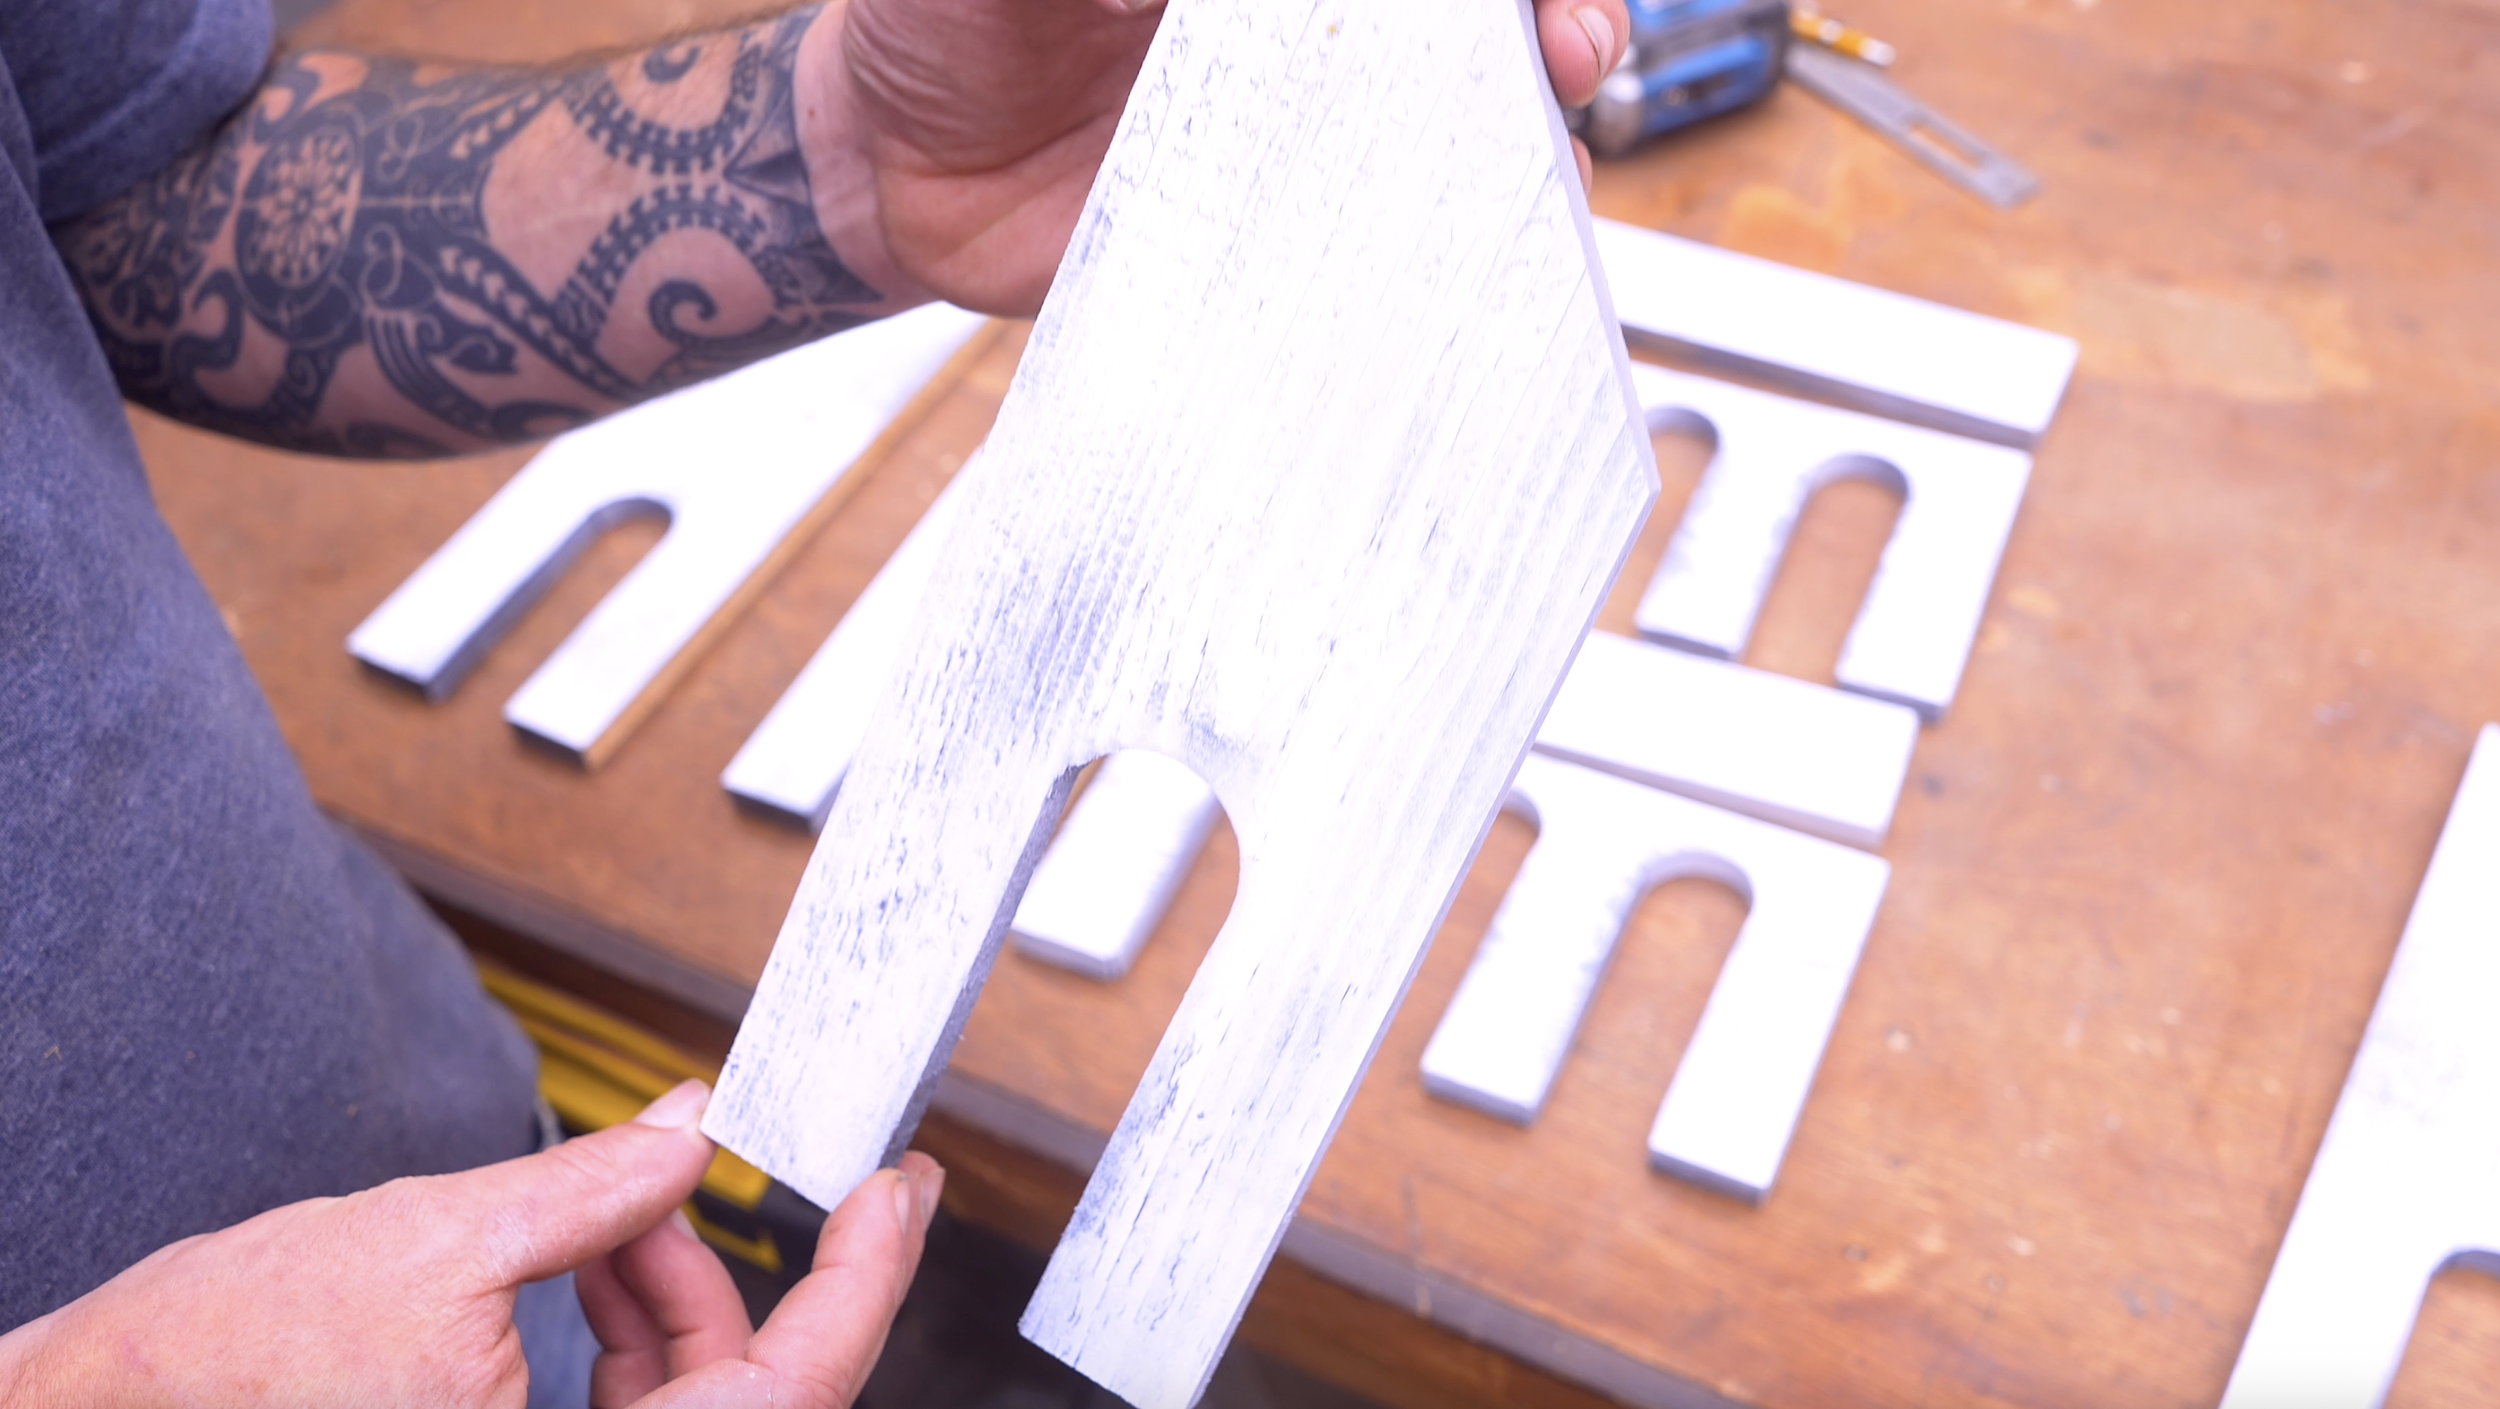
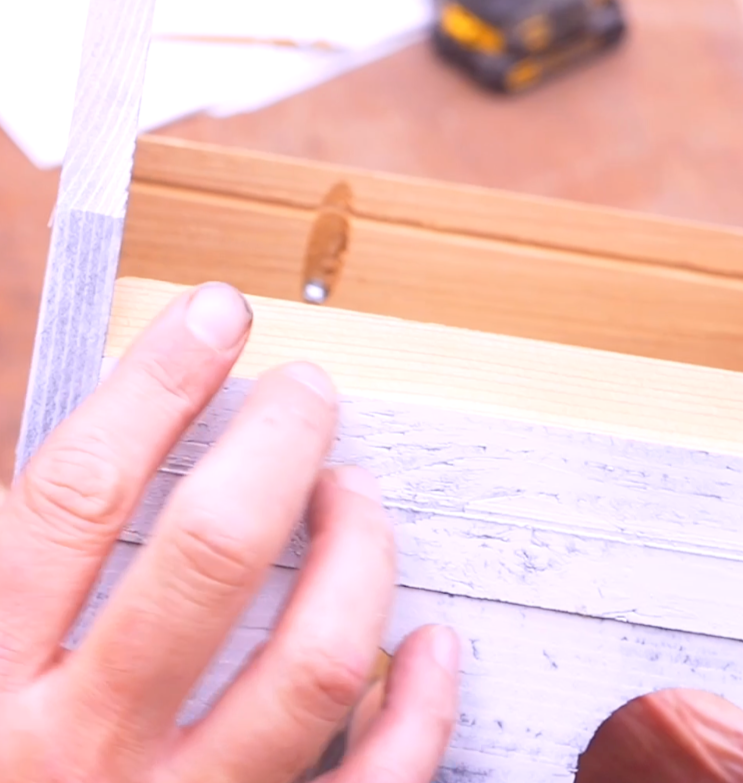
Step 4: Paint or Finish the Walls
For an authentic old-country-church look:
Spray the parts black
Allow to dry
Apply a light coat of white paint
This creates a weathered whitewashed appearance.
You can also:
Leave cedar natural
Use solid white paint
Apply stain and clear coat
The finish is completely customizable.

Step 5: Build the Tapered Roof
One of the most unique parts of this project is the layered tapered roof.
Cut Roof Boards
Cut:
4 boards at 14" long
Rip them into:
8 boards measuring 2" x 14"
These boards will form both sides of the roof.
Create the Taper
Tilt your table saw blade to 3 degrees.
Cut pairs of boards while gradually adjusting the fence:
3/8"
5/16"
3/16"
1/8"
This creates a gradual taper from top to bottom when assembled.
Roof Supports
Rip additional strips:
¾" wide
Cut:
6 supports at 6" long
Glue the roof boards together and attach support strips:
2¼" from each edge
One centered support
This creates two complete roof panels.
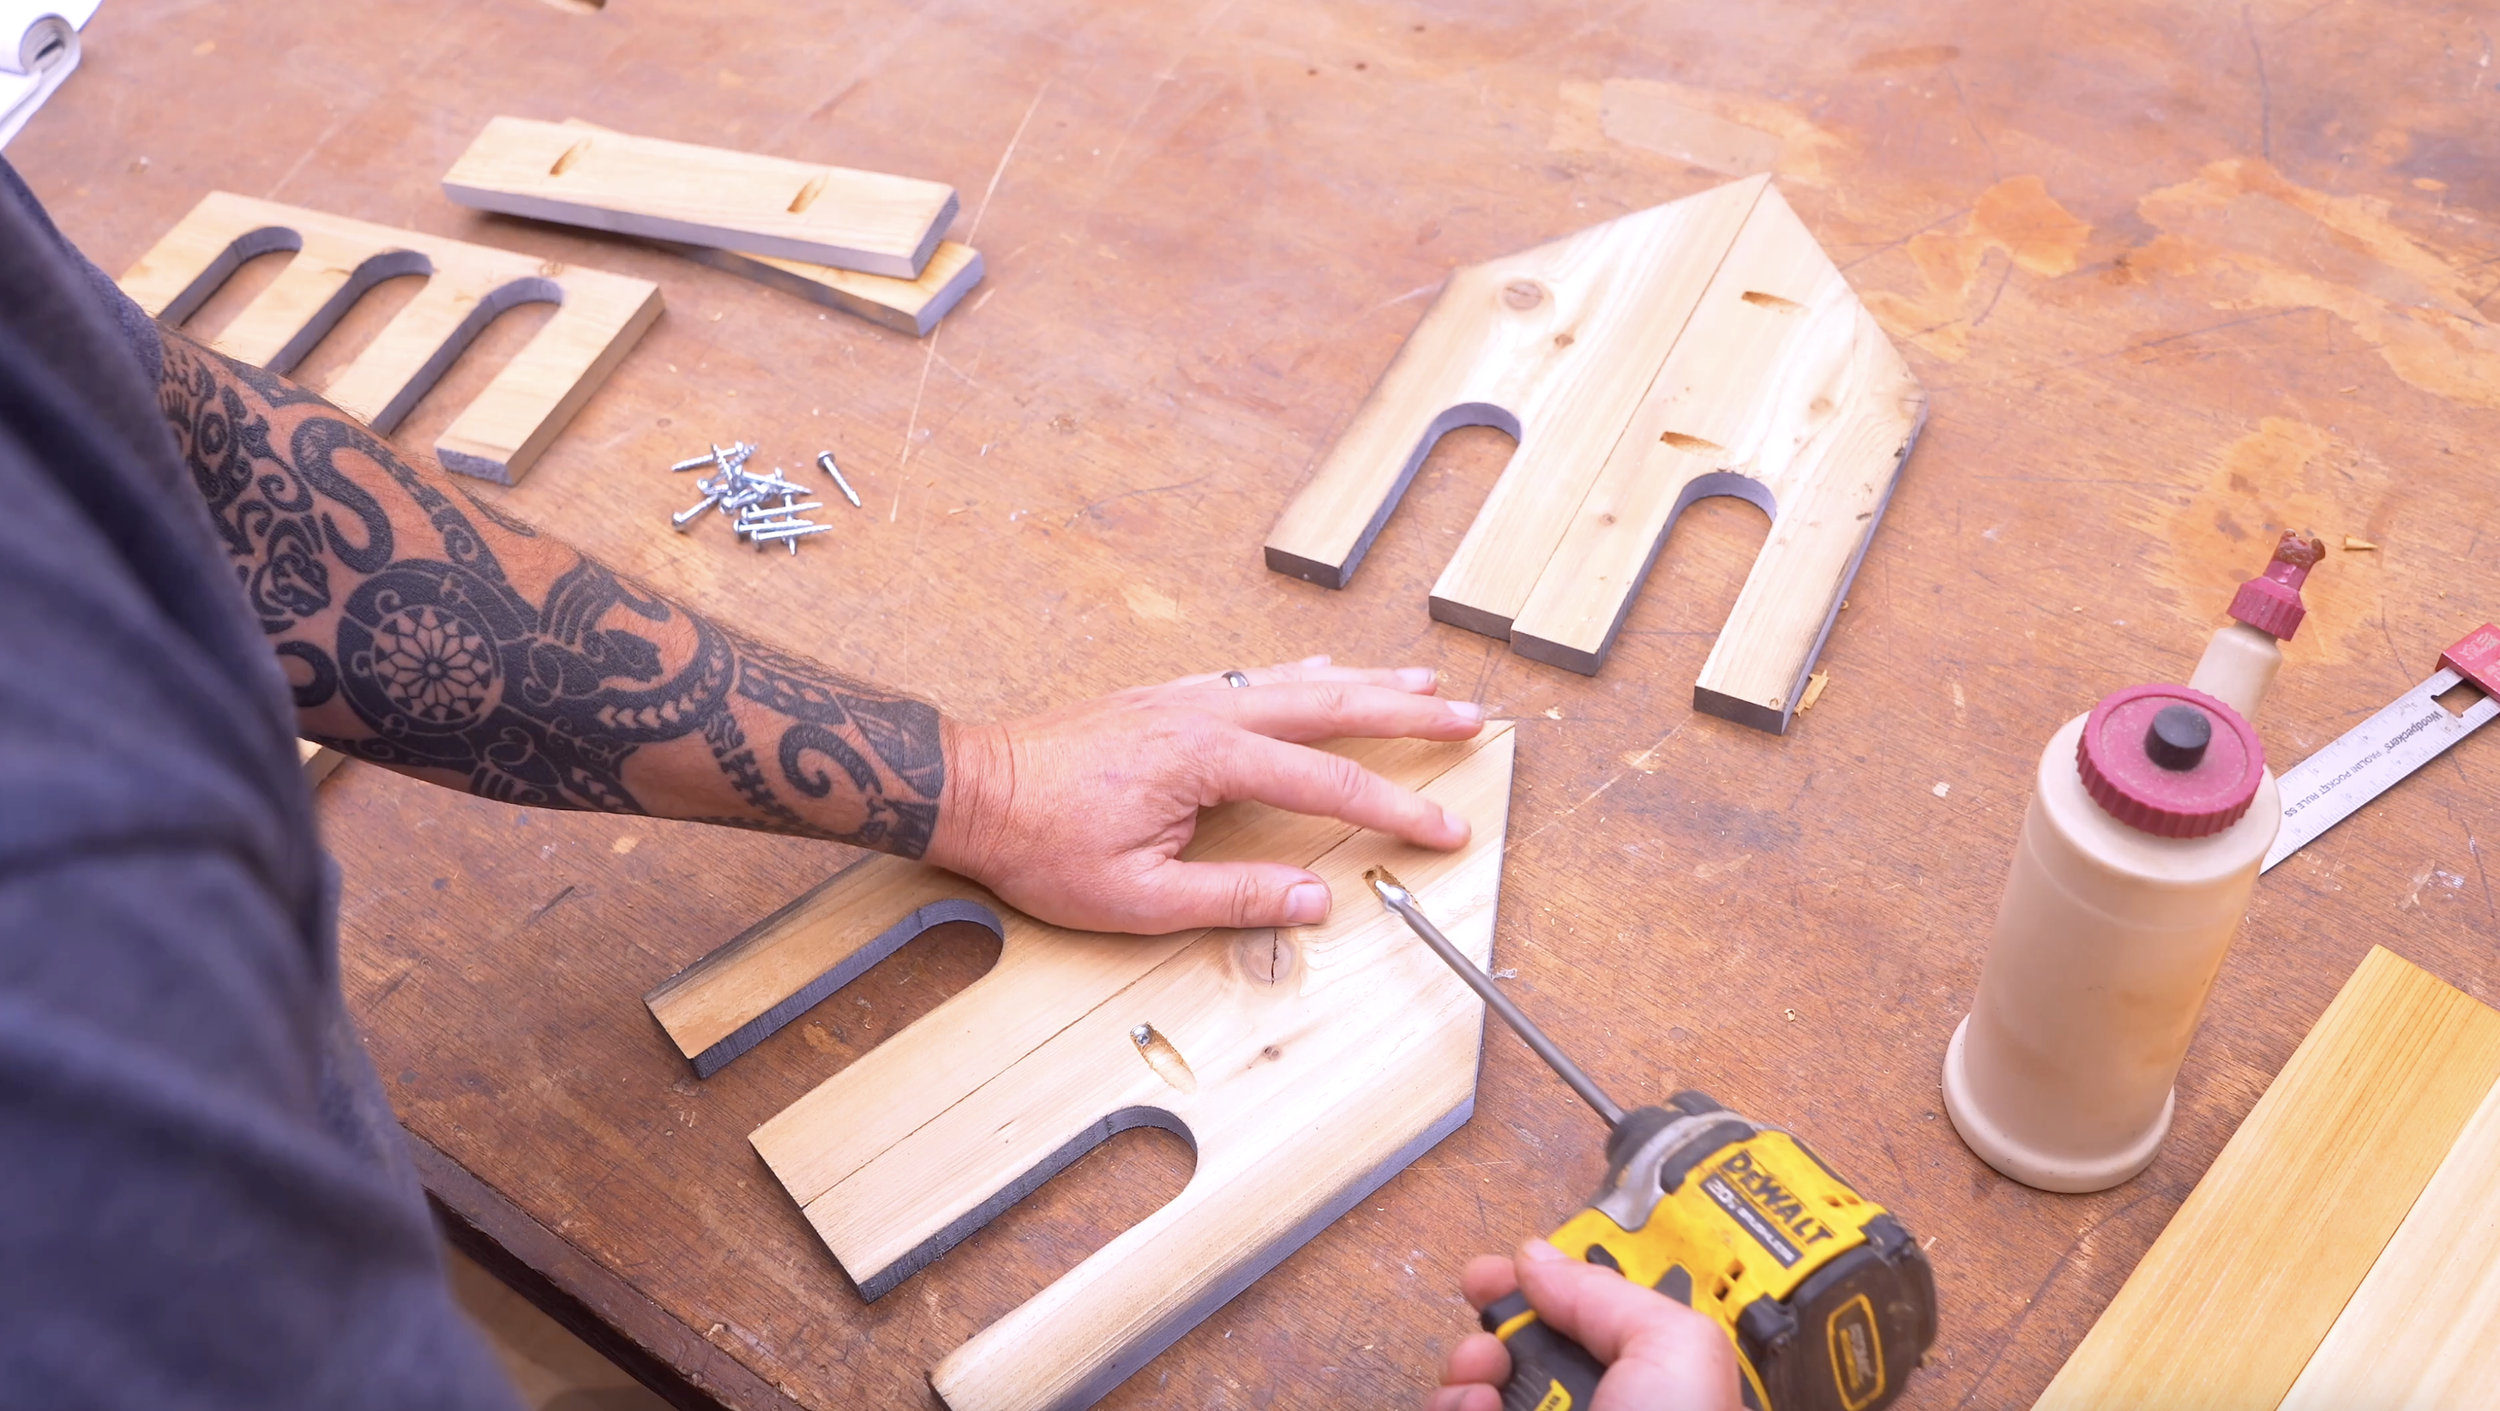
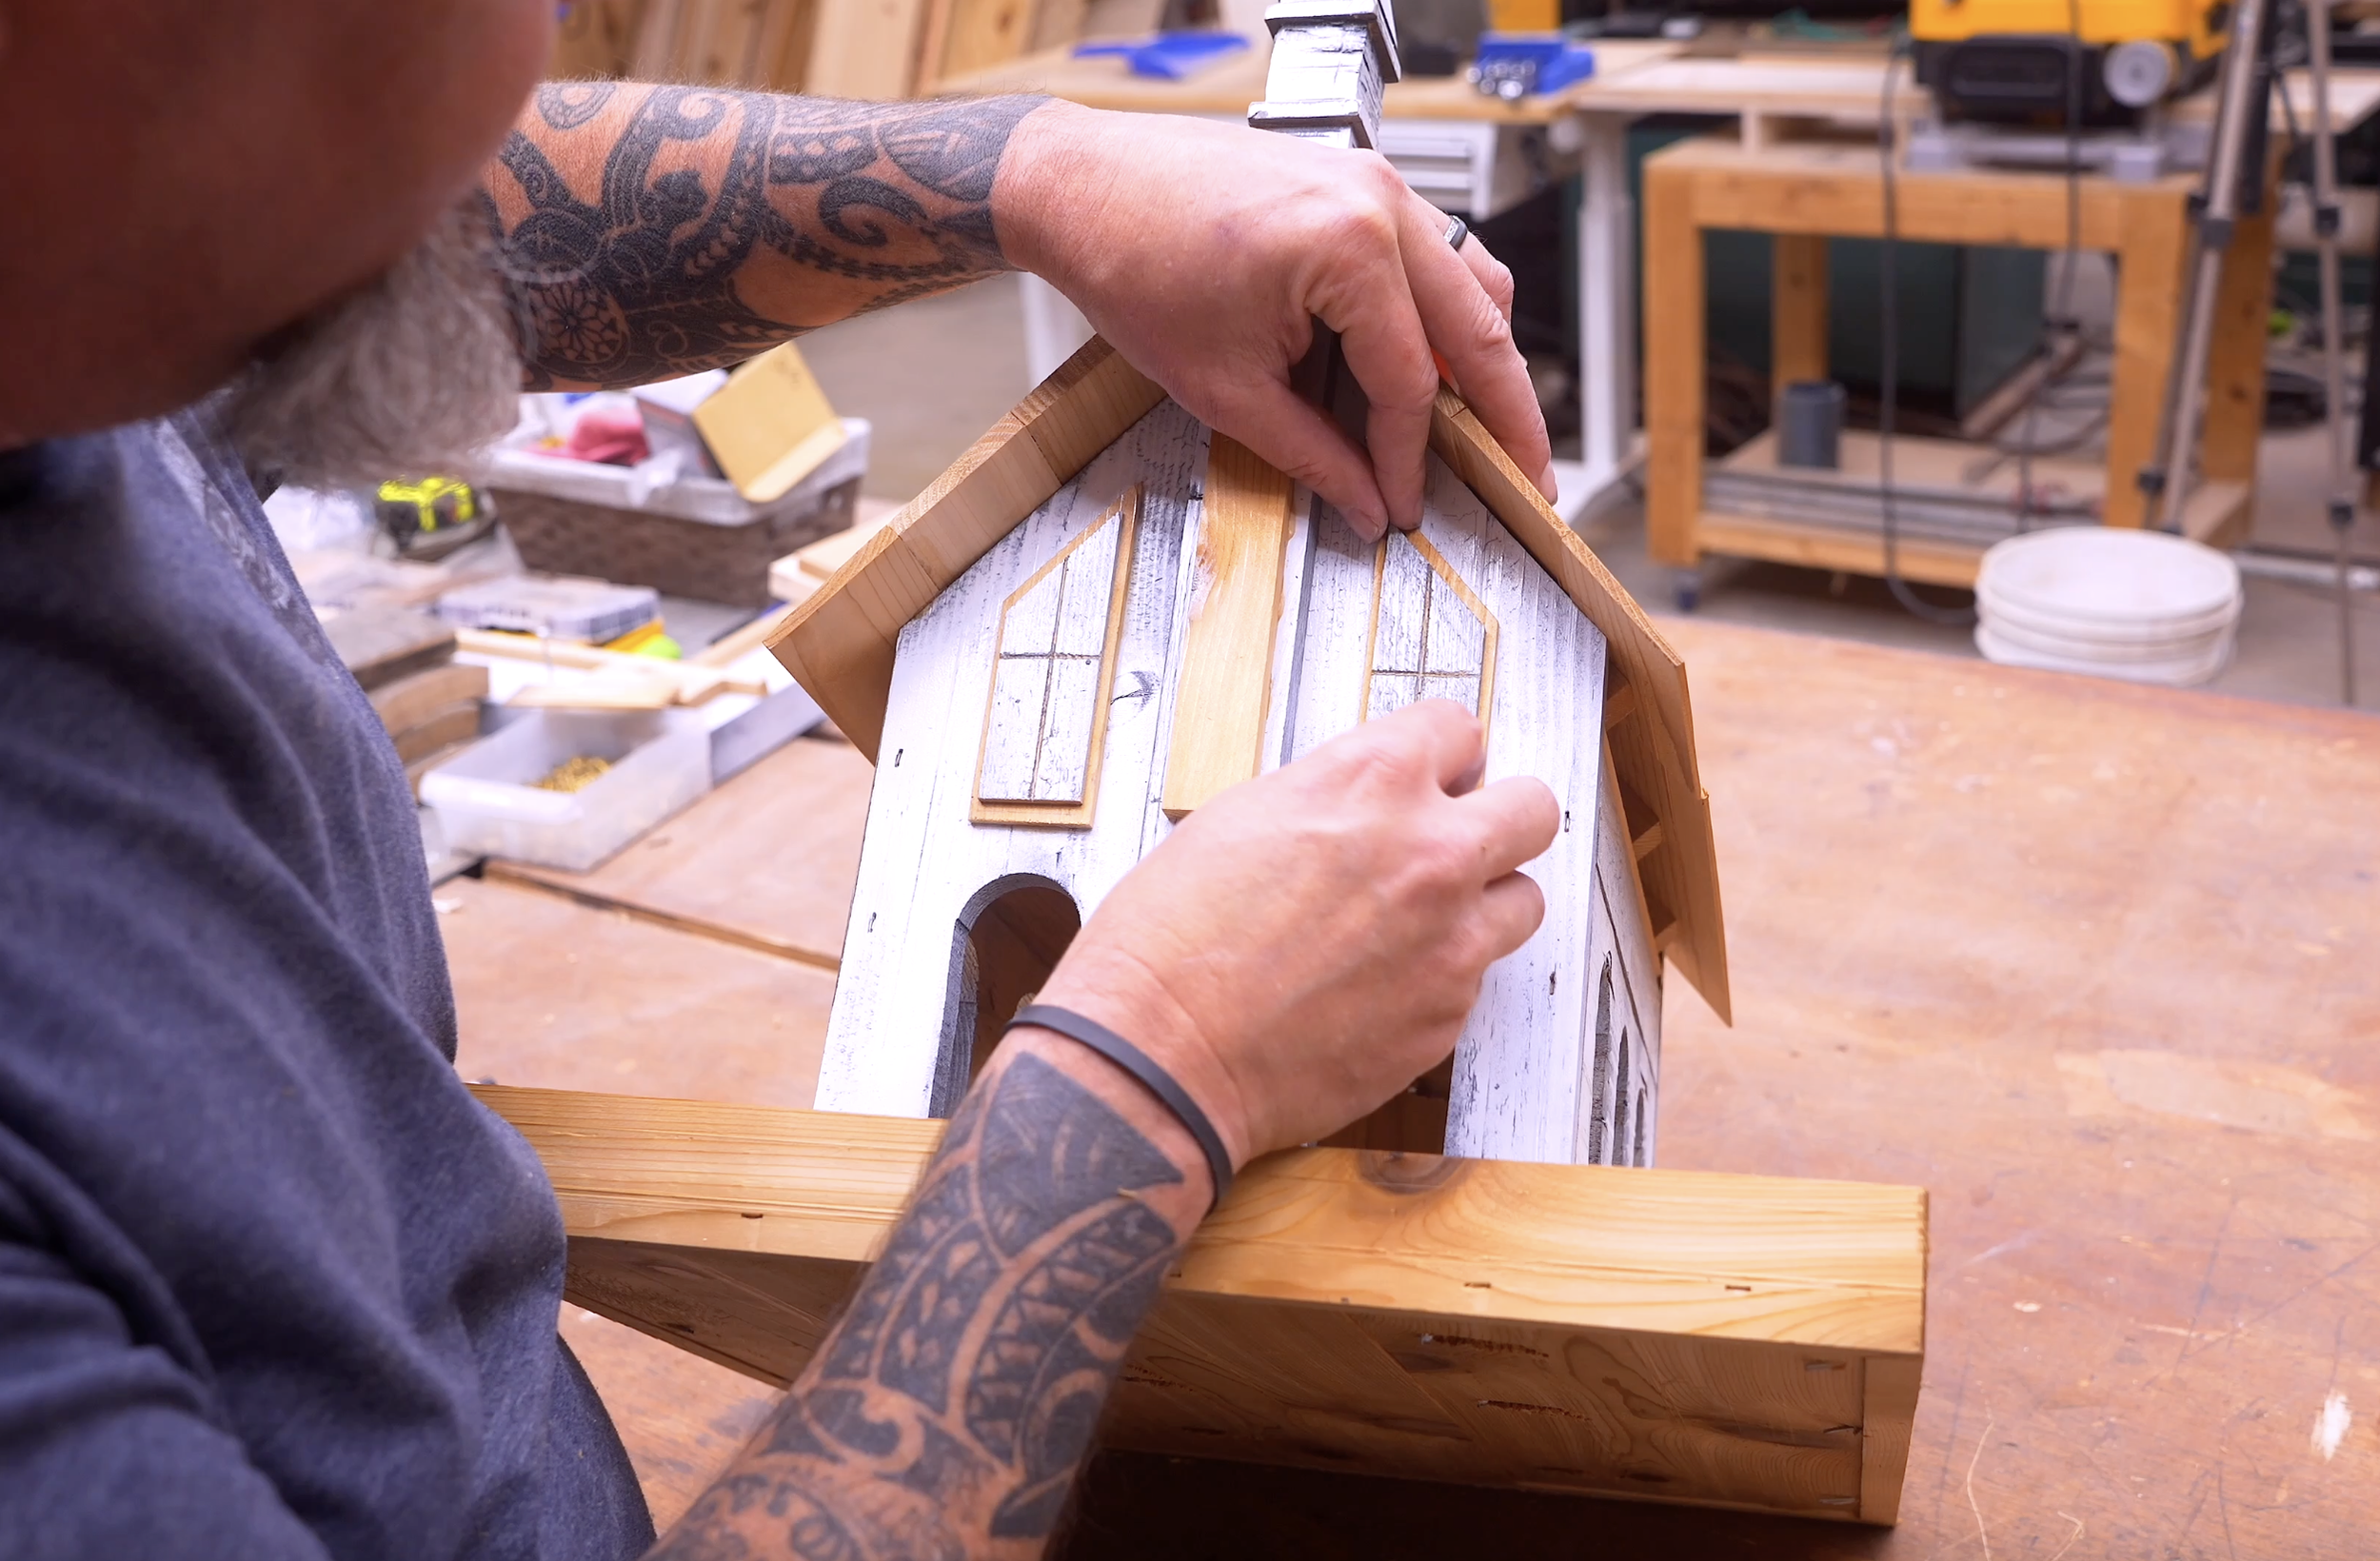
Step 6: Assemble the Front, Back, and Side Walls
Join:
Front and Back
Add pocket holes to one board and connect the matching piece.
Side Walls
Use pocket holes in the 2" side section and attach it to the 5" section.
Use:
Wood glue
1¼" pocket hole screws
This creates four completed wall assemblies.
Step 7: Cut the Roof Seat Angle
Set your table saw to 48 degrees.
Rip the top edges of both side walls so the roof panels sit tightly against them.
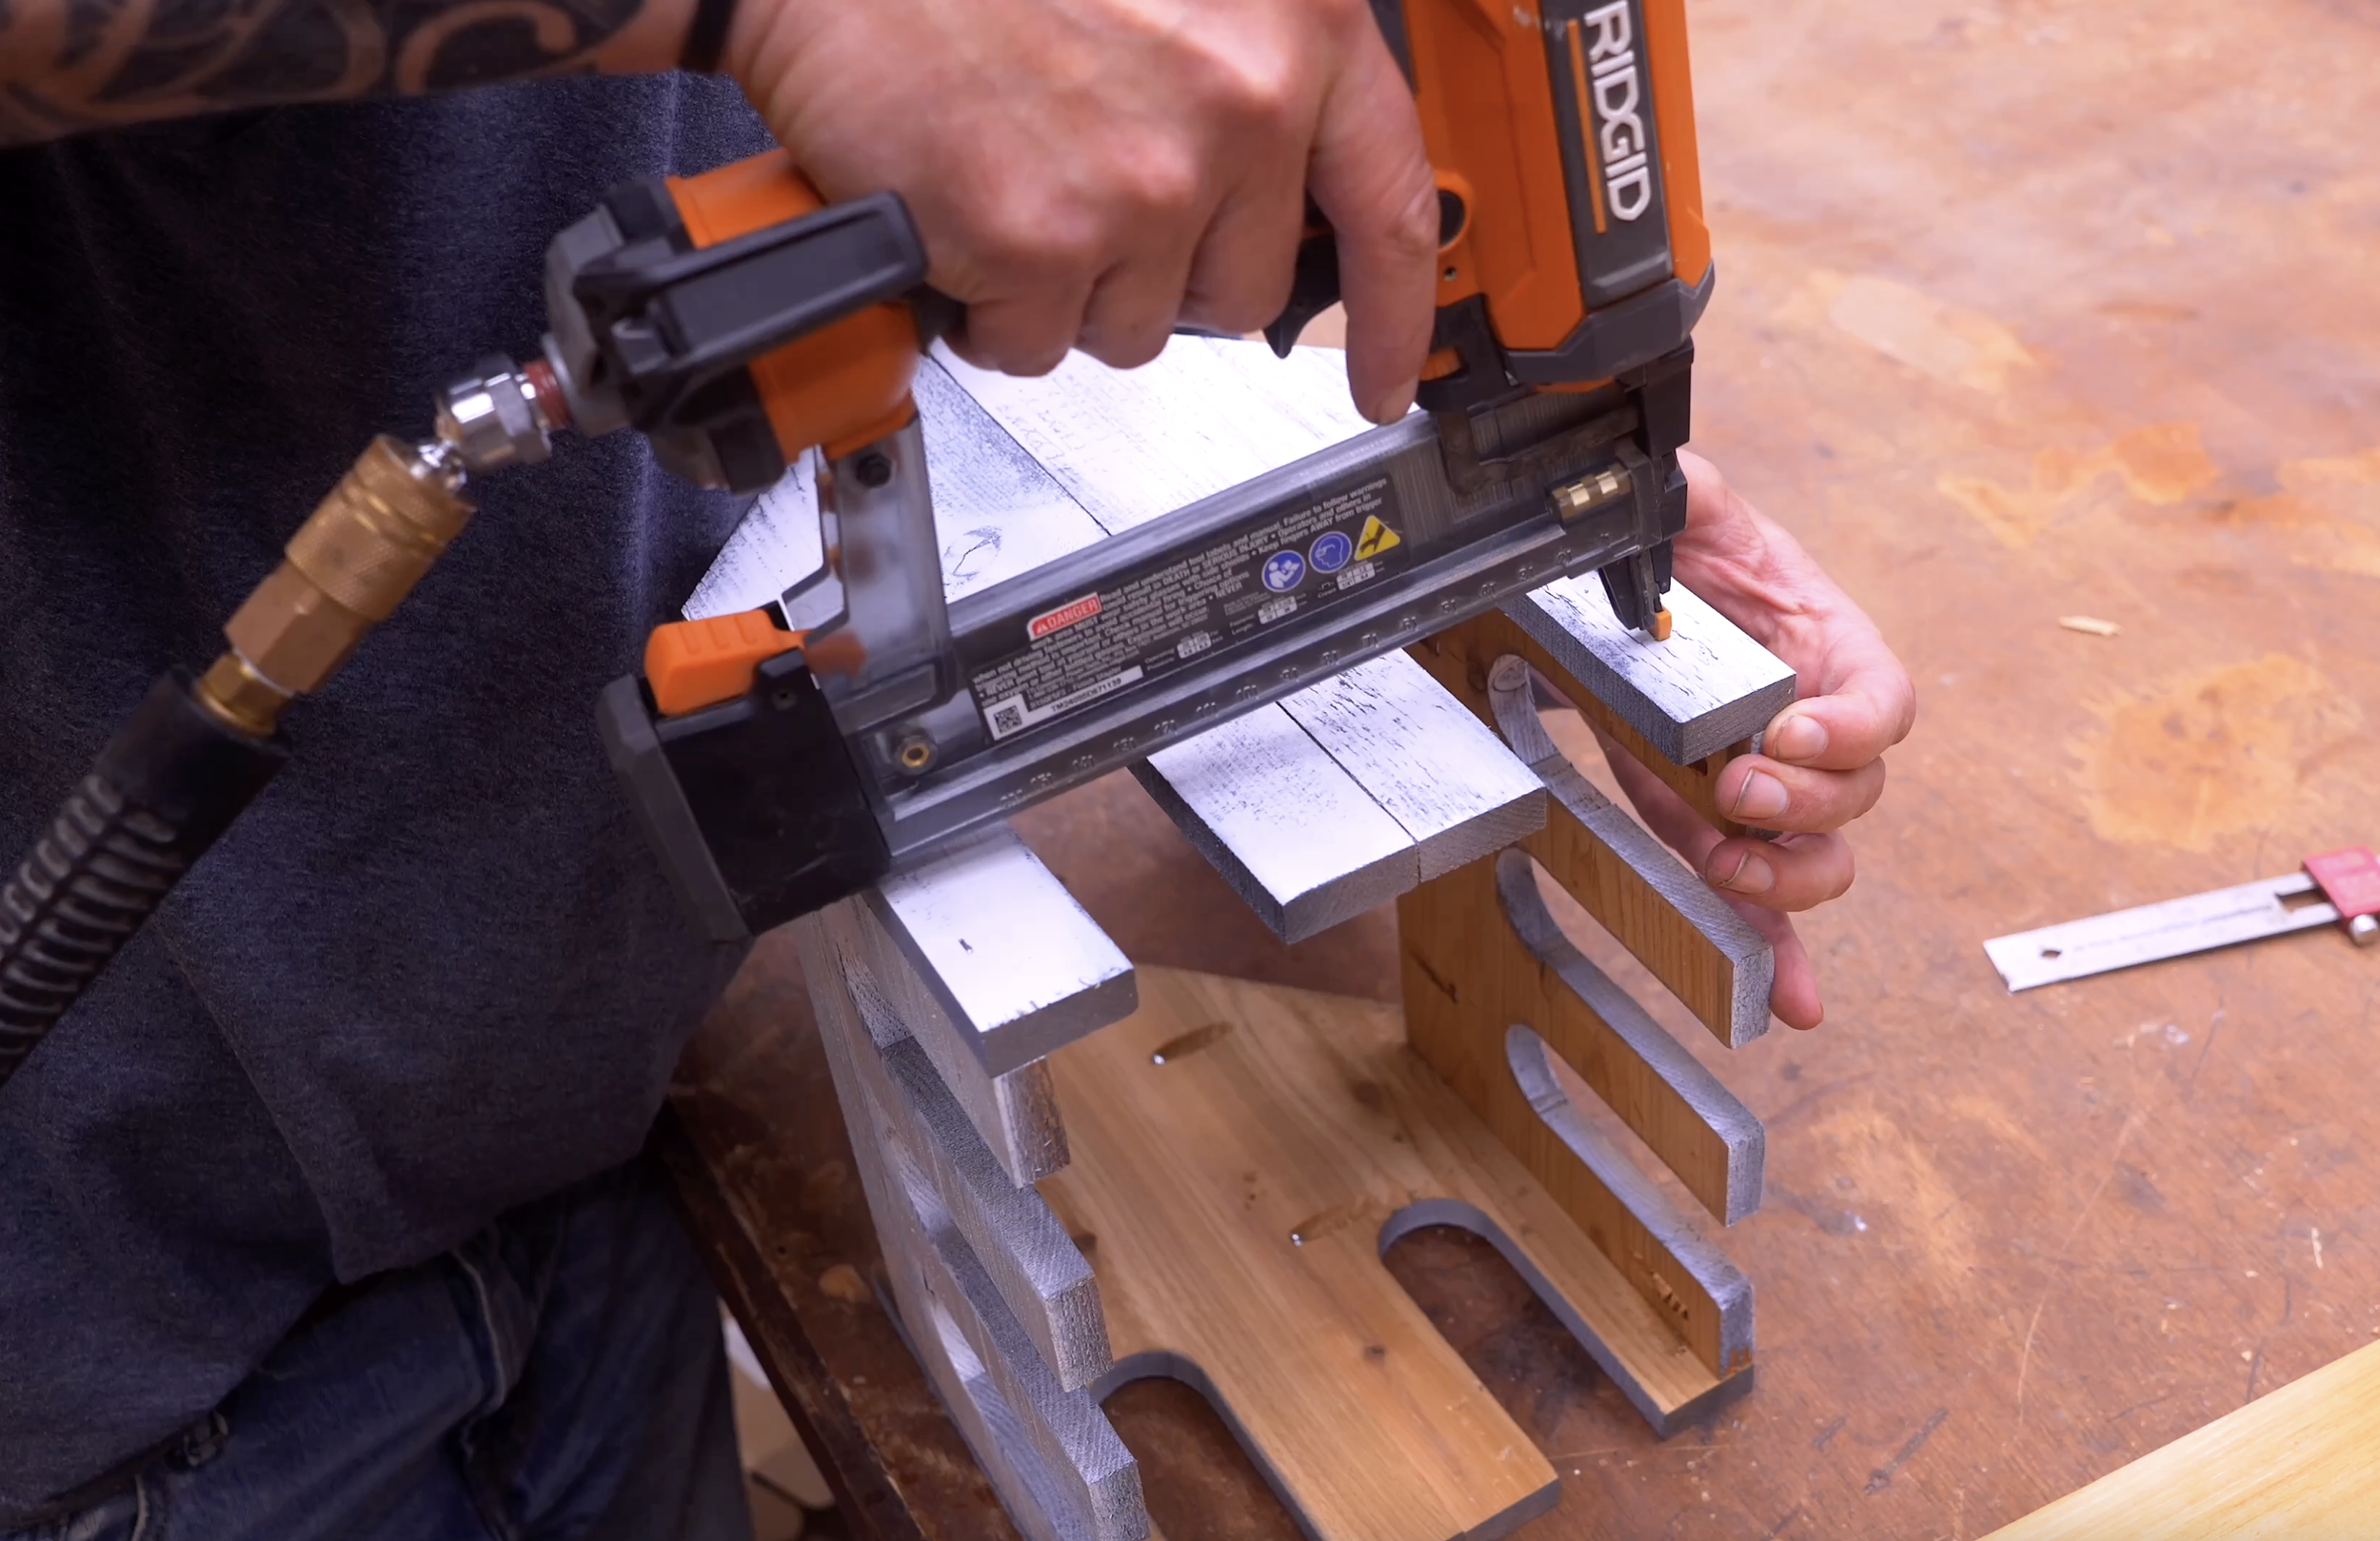
Step 8: Assemble the Church Body
Join:
Front wall
Back wall
Two side walls
Use:
Wood glue
Crown staples or brad nails
At this point, the feeder begins to resemble a small church.

Step 9: Build the Seed Tray Base
Cut:
3 boards at 5" x 15"
Join them together using:
Pocket holes
Wood glue
This becomes the floor of the feeder.
Add Seed Tray Trim
Cut four trim pieces:
16" tip-to-tip
45-degree mitered corners
Attach around the perimeter.
These walls keep seed contained inside the tray.

Step 10: Attach the Church Body to the Base
Center the feeder body on the seed tray.
Secure using:
Pocket hole screws
The feeder is now structurally complete.
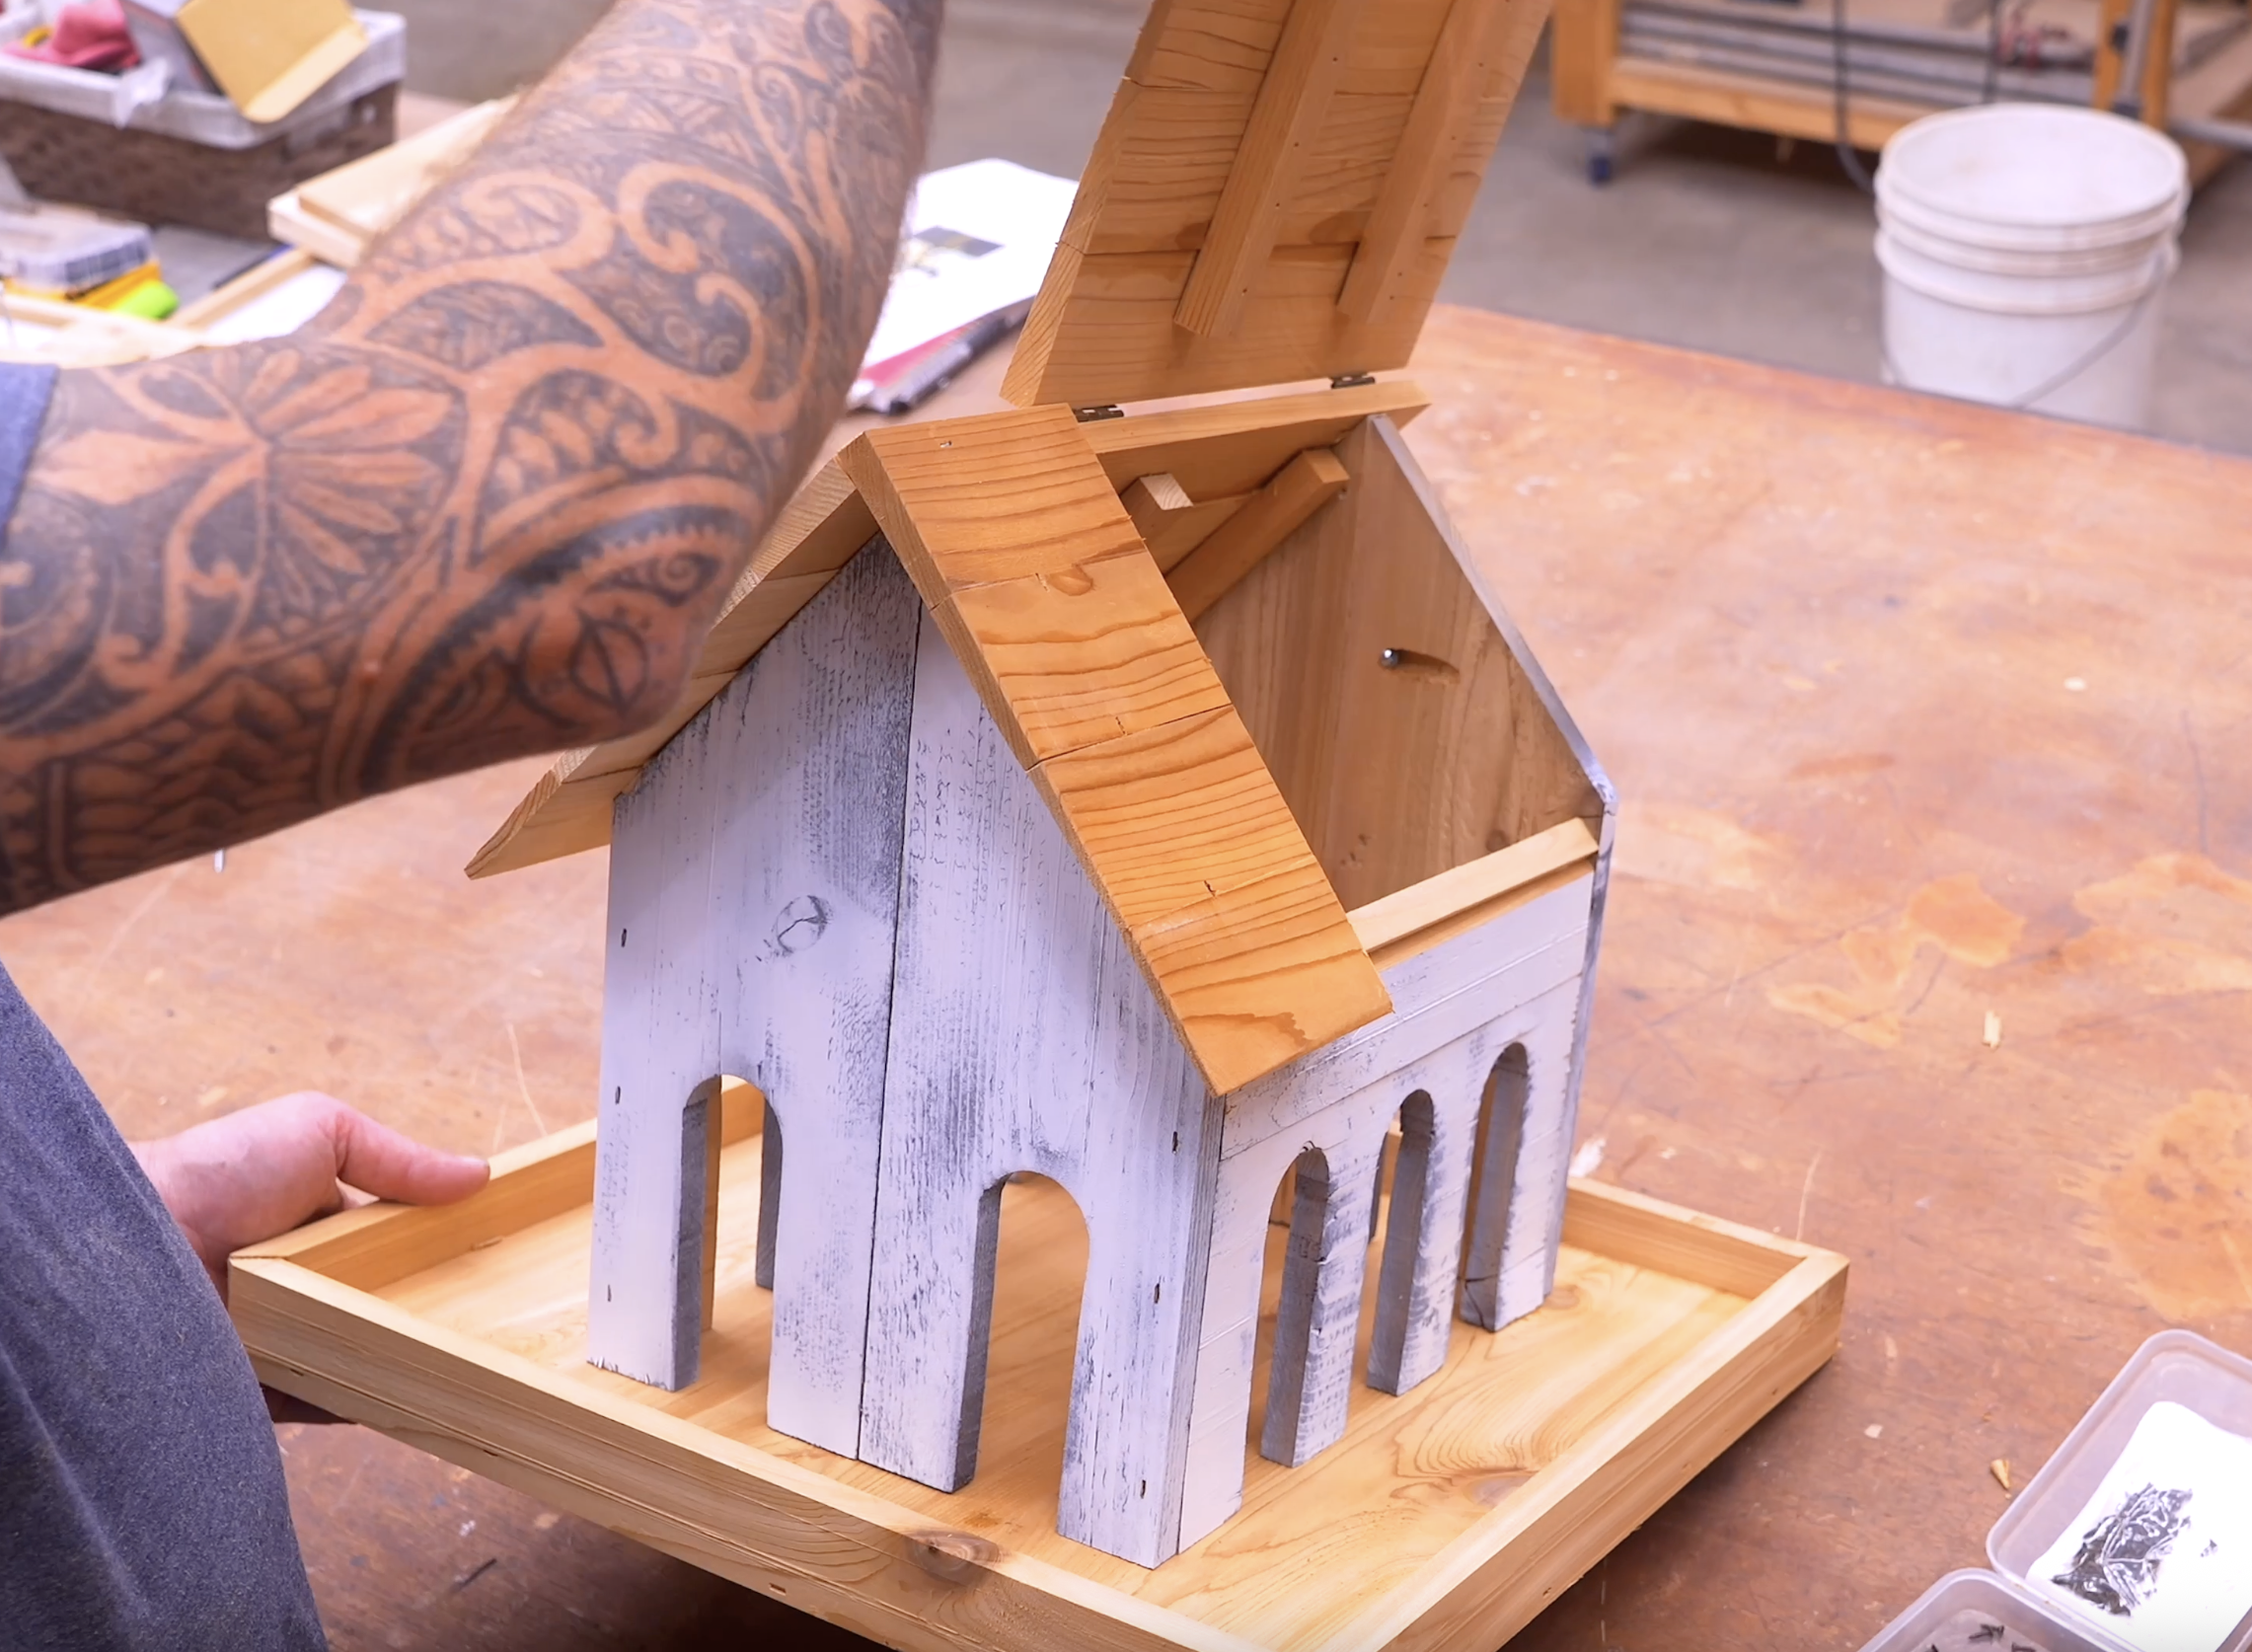
Step 11: Install the Roof
Right Roof Panel
Install flush with the front and rear walls.
Allow:
1½" roof overhang
Left Roof Panel
Install the front section first.
The rear section becomes the hinged refill lid.
Add Hinges
Install:
1" jewelry box hinges
This allows easy access for filling bird seed.
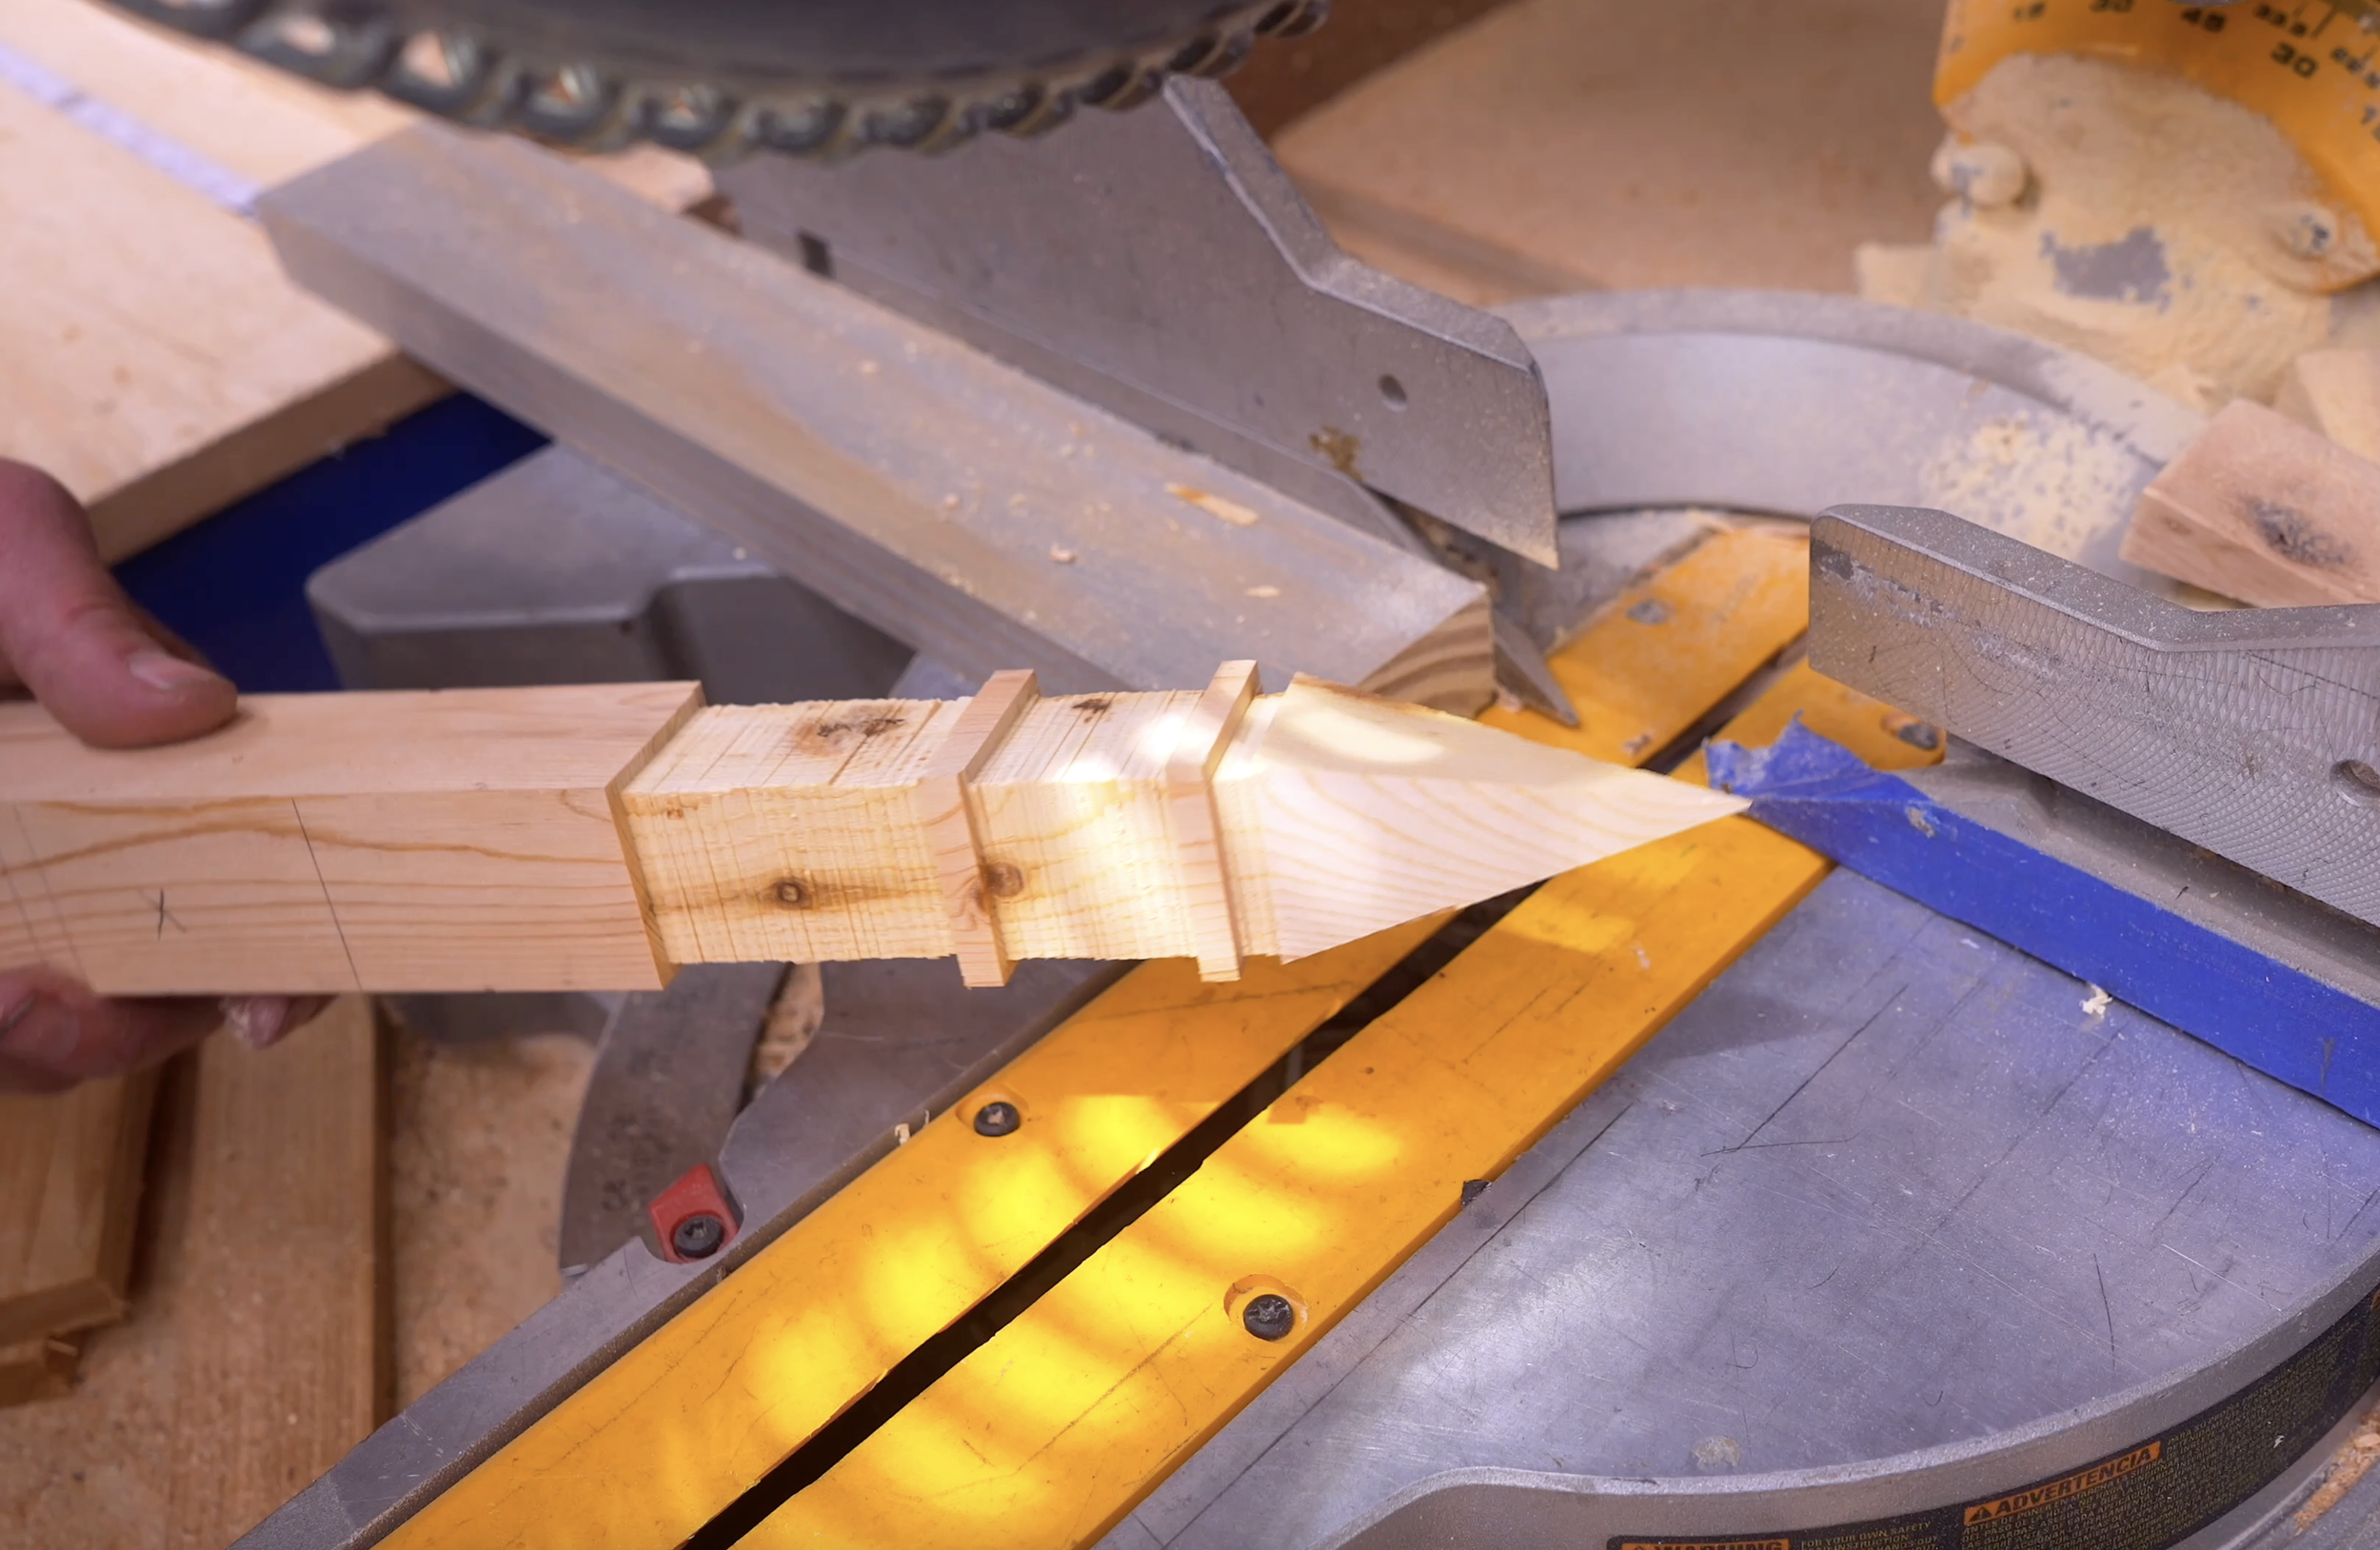
Step 12: Build the Church Steeple
Using 2x2 material:
Overall Length
7"
Pointed Section
Approximately 3¾"
For a simpler version:
Cut 45-degree angles on all four sides
OR…You can create a custom jig. Either method creates a convincing church steeple appearance.
Step 13: Add Decorative Front Details
Cut:
One center decorative board
1½" wide x 12" long
Add 48-degree cuts to match the roof pitch.
Attach to the front of the feeder.
Decorative Window Trim
Cut thin strips approximately:
1/8" thick
For side accents:
4½" long pieces
48-degree angled tops
For center window trim:
6" long
1" wide
Attach using:
Wood glue
CA glue
These small details dramatically improve the finished appearance.
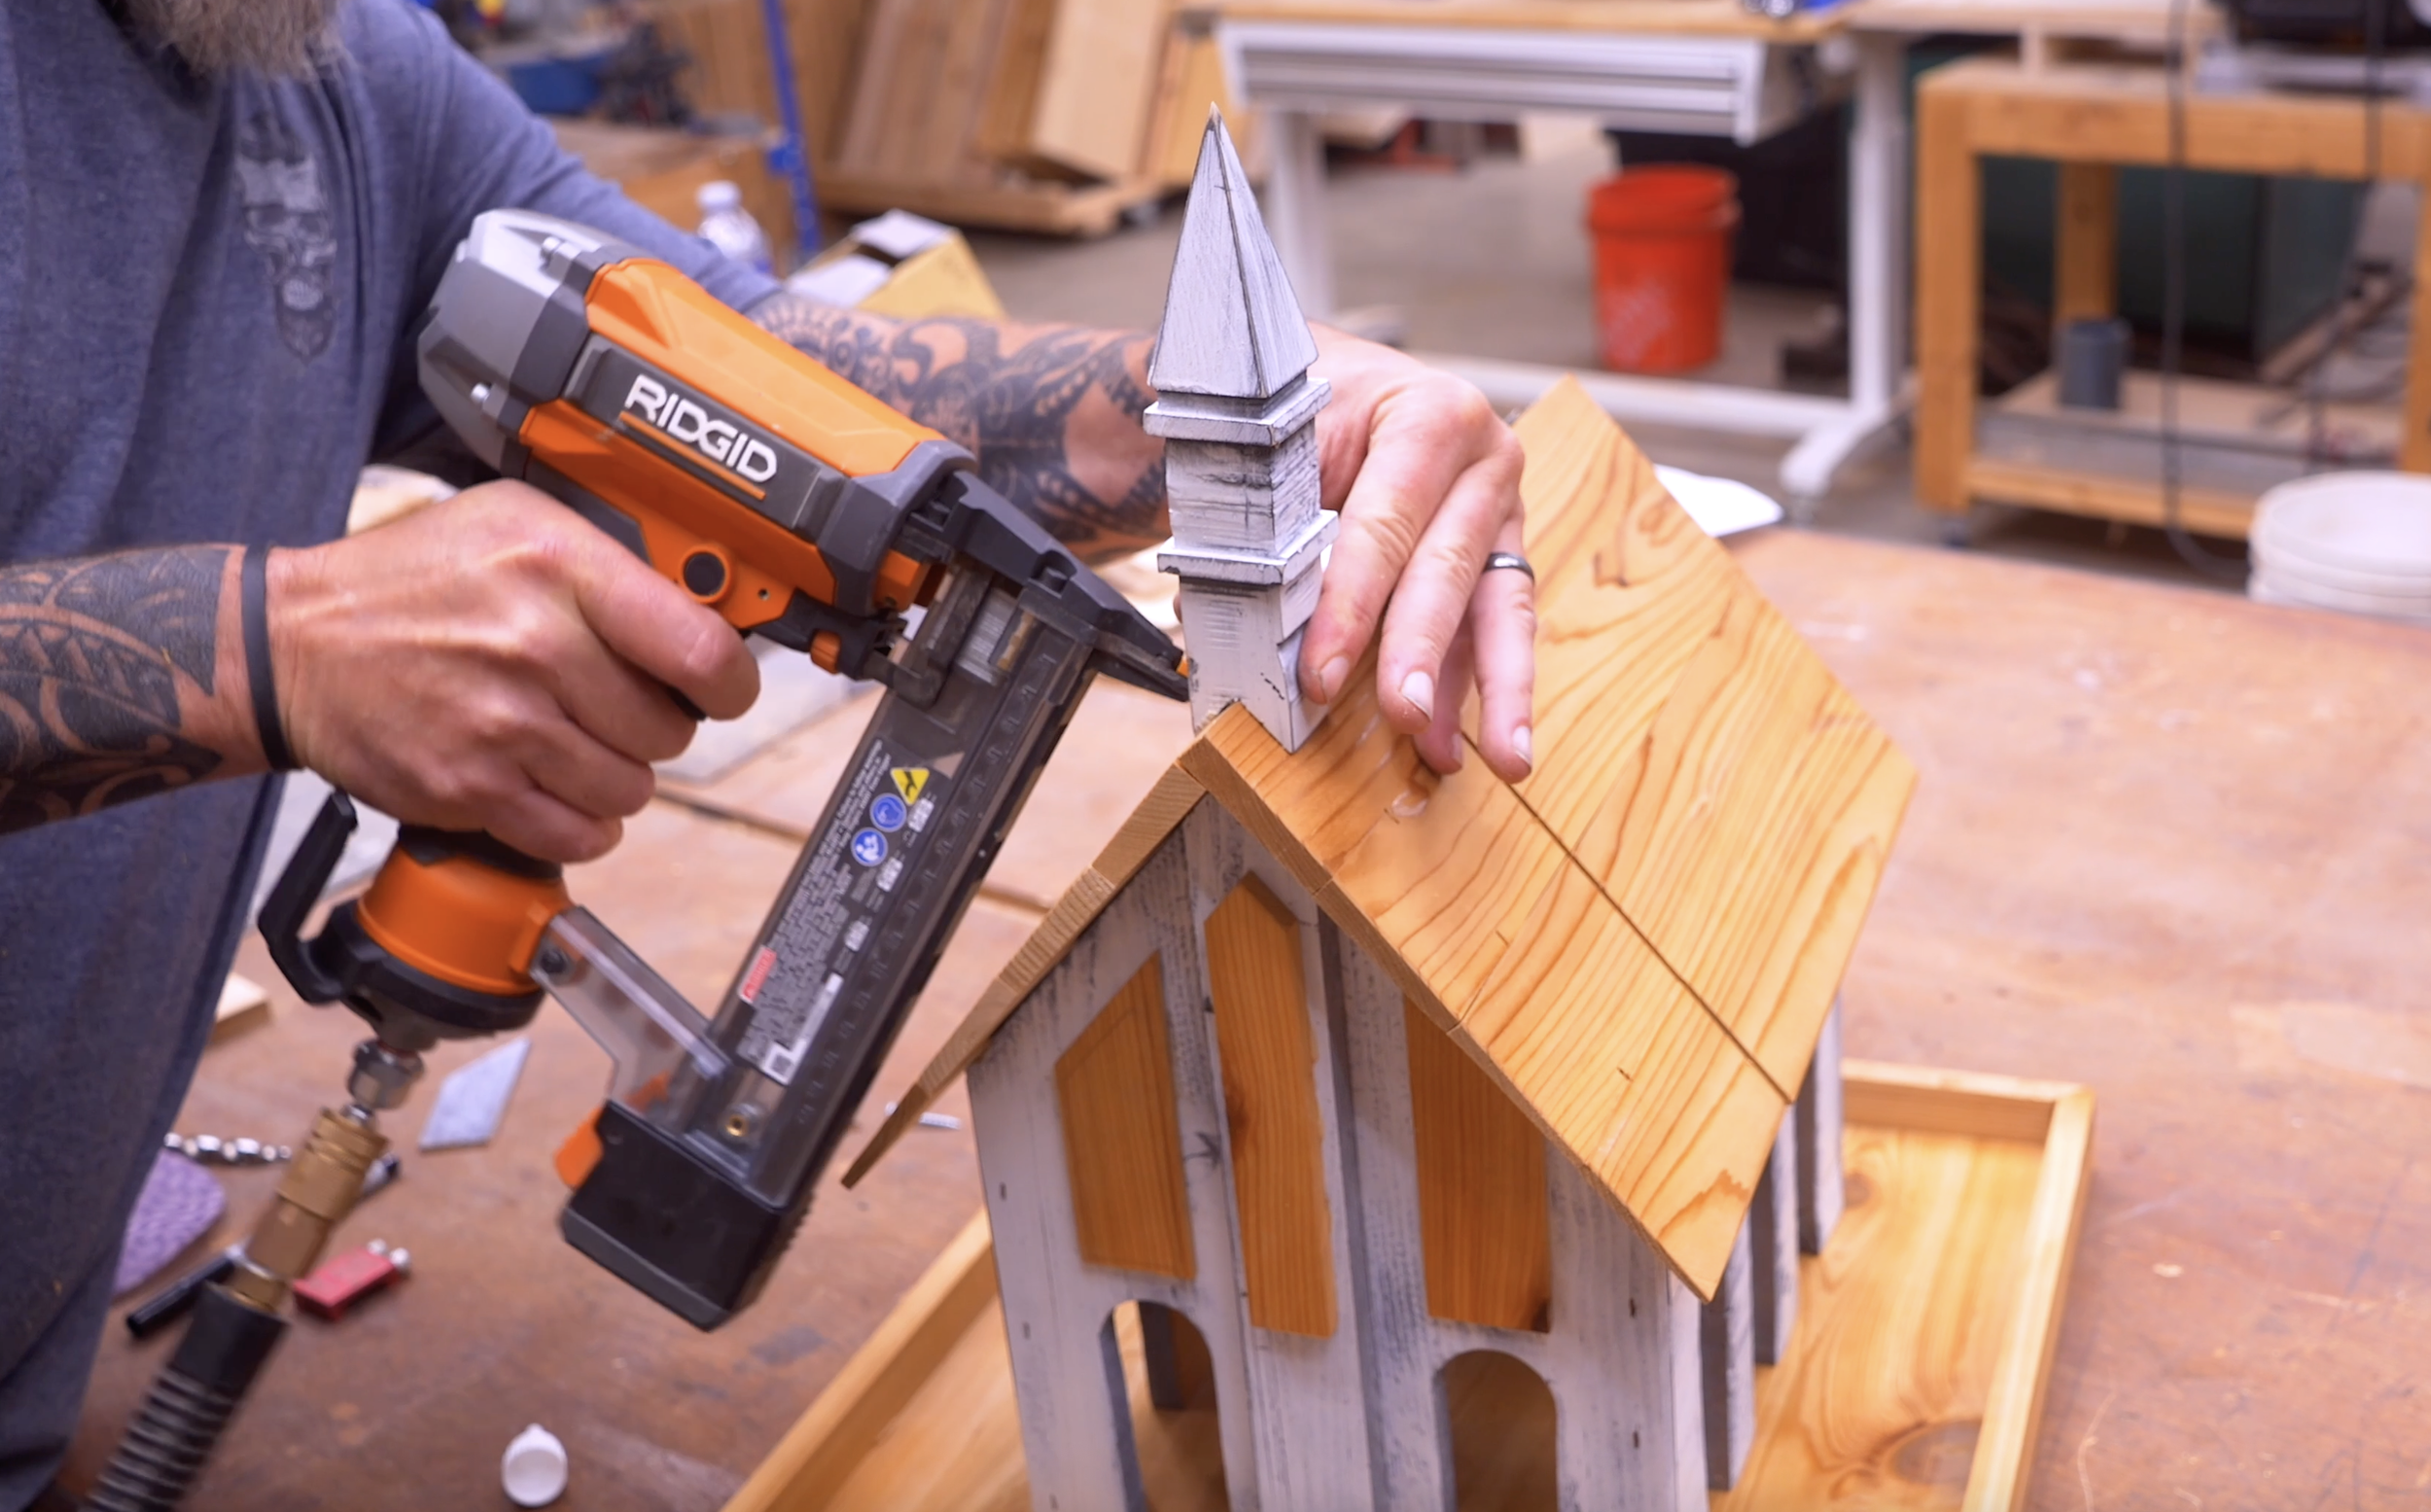
Step 14: Install the Steeple
Modify the bottom of the steeple so it straddles the roof peak.
Position:
7/8" from the roof edge
Glue and secure in place.
This final detail transforms the feeder from a simple birdhouse-style feeder into a recognizable country church.
Finishing Ideas
You can customize this project in several ways:
Traditional Church
Whitewashed walls
Natural cedar roof
Dark steeple
Rustic Farmhouse
Gray stain
Distressed finish
Primitive Country Style
Cream paint
Weathered edges
Dark walnut roof
Ready To Build?
One of the best things about woodworking is taking a simple idea and turning it into something unique.
This Old Country Church Bird Feeder starts as a few fence pickets and some scrap lumber, but by adding thoughtful details like arched windows, a steeple, a tapered roof, and a weathered finish, it becomes a piece that people notice.
And that's often what separates an average project from one people actually want to buy.
If you're looking for a bird feeder that stands out from the crowd, this one is hard to beat.
And if you’re ready…
You already know the next step.
👉 Get up, get out, and get your build on.
Whether you’re new to woodworking or a seasoned pro, this project offers the perfect mix of functionality and creativity. Below I have the YouTube video linked for a step-by-step video tutorial for you to follow along with. If you’re a more “plans in the hand” person, click “Get Plan” down below for downloadable instructions. And if you’re ready to dive deeper into woodworking, check out my new course, “Woodworking Kickstart” (which is also linked below). It’s packed with step-by-step lessons to help you build confidence and skills, whether you’re a total beginner or an experienced DIYer. You’ll be building with confidence in no time.
Remember, creativity doesn’t have to be expensive; all you need is a little inspiration and a willingness to try.
Get Easy Step-By-Step Directions to build this by clicking the button below
⭐ 10,044 5 Star Reviews
📚 113 Plans to Choose From
🧩 Lego-Like Assembly Steps
📏 Exact Measurements
📋 Detailed cut and part list
🔍 X-Ray Views
🚀 Instant Delivery
