
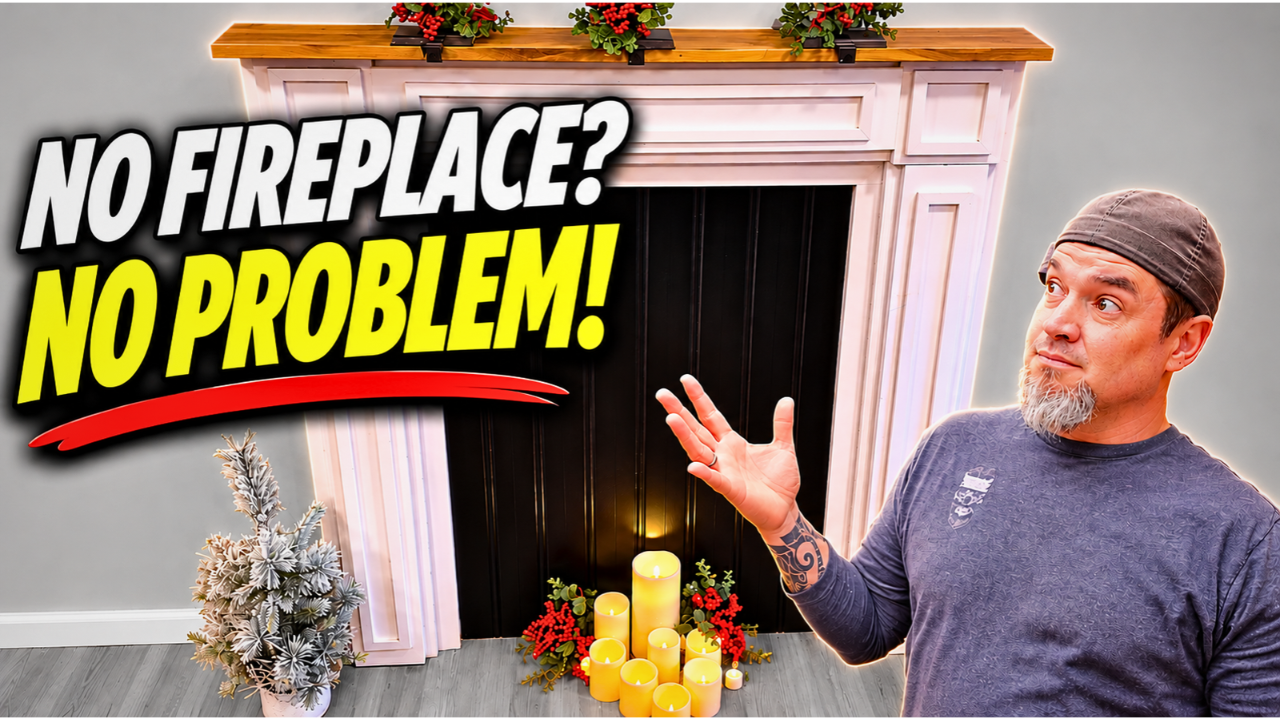
Have you ever wanted a fireplace in your home, especially around the holidays, but your house simply doesn't have one? Maybe you've always pictured hanging Christmas stockings from a beautiful mantel, decorating a fireplace for fall, or creating a cozy focal point in your living room.
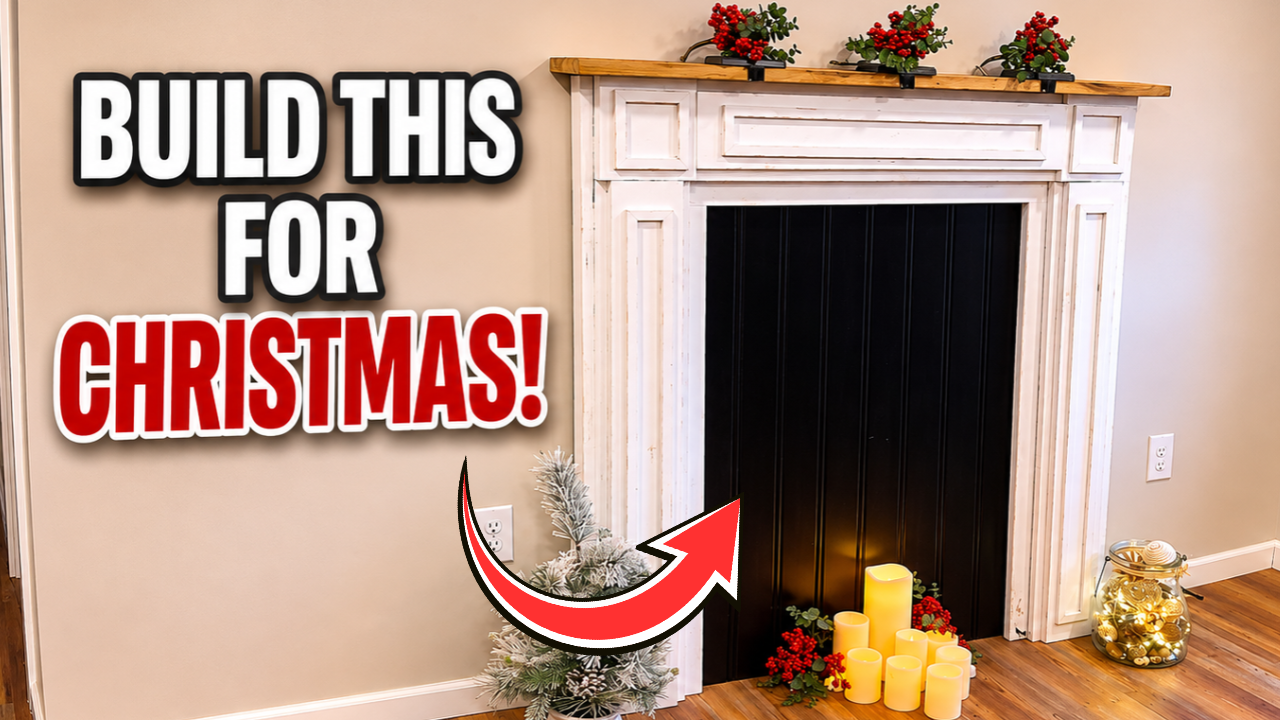
Well, I've got a woodworking project that might be exactly what you're looking for! Today, I'm going to show you how to build a DIY faux fireplace mantel using ordinary construction lumber.
That's right! We're going to take some basic building materials and transform them into a beautiful decorative fireplace that looks right at home in just about any room.
And here's the cool part: this isn't a complicated build. We're using simple joinery, layered boards, and decorative trim to create the illusion of a traditional fireplace without having to install an actual fireplace.
So, are you ready to build something awesome? Let's get our build on!
Materials
2x10 Lumber
1x8 Lumber
1x6 Lumber
3/8-inch Beadboard Paneling
Wood Glue
Brad Nails
2½-inch Pocket-Hole Screws
Wood Screws
Sandpaper
Wood Filler
Paint, Stain, or Wood Finish
Tools
Miter Saw
Table Saw
Pocket-Hole Jig
Brad Nailer
Drill/Driver
Palm Sander
Clamps
Step 1: Cut the Main Frame and Create the Backing Grooves
We're going to begin with the structure that forms the foundation of our decorative fireplace.
For this, I'm using 2x10 lumber. I chose wider boards because I wanted the finished fireplace to have plenty of depth and dimension instead of looking like a couple of thin boards nailed together.
Cut the Main Frame Pieces
Start by cutting your 2x10 lumber to the following lengths:
One 48-inch board for the top of the frame
Two 42-inch boards for the vertical sides
The 48-inch board will become the top of our frame, and the two 42-inch boards will form the vertical sides. When assembled, these three pieces create the basic inverted U-shaped structure of our fireplace.
Create the Recessed Backing Grooves
Now, before we put these pieces together, there's something I want to do that will make installing the backing a whole lot easier. We're going to cut a recessed channel, also called a rabbet, along the inside back edge of each frame board. This will allow our backing material to sit inside the frame instead of being attached directly to the back surface.
Why does that matter? Because I want the fireplace to sit close against the wall without having a sheet of paneling sticking out behind it. And since I'm going to paint the backing black, this recessed area will help create the illusion of a dark fireplace opening.
For my build, I'm using 3/8-inch paneling. Set your table saw to create a rabbet approximately 1 inch wide and deep enough to accommodate the backing material.
Make the first cut along the inside back edge of each board. Then adjust your table saw for the second cut to remove the remaining material and create the L-shaped recess. You'll need this groove on all three frame pieces.
When you lay the pieces together, the rabbets should face inward and form a continuous recessed area around the back of the fireplace opening. Once that's done, we're ready for assembly.
Step 2: Assemble the Fireplace Frame and Add the First Trim Layer
Assemble the Main Frame
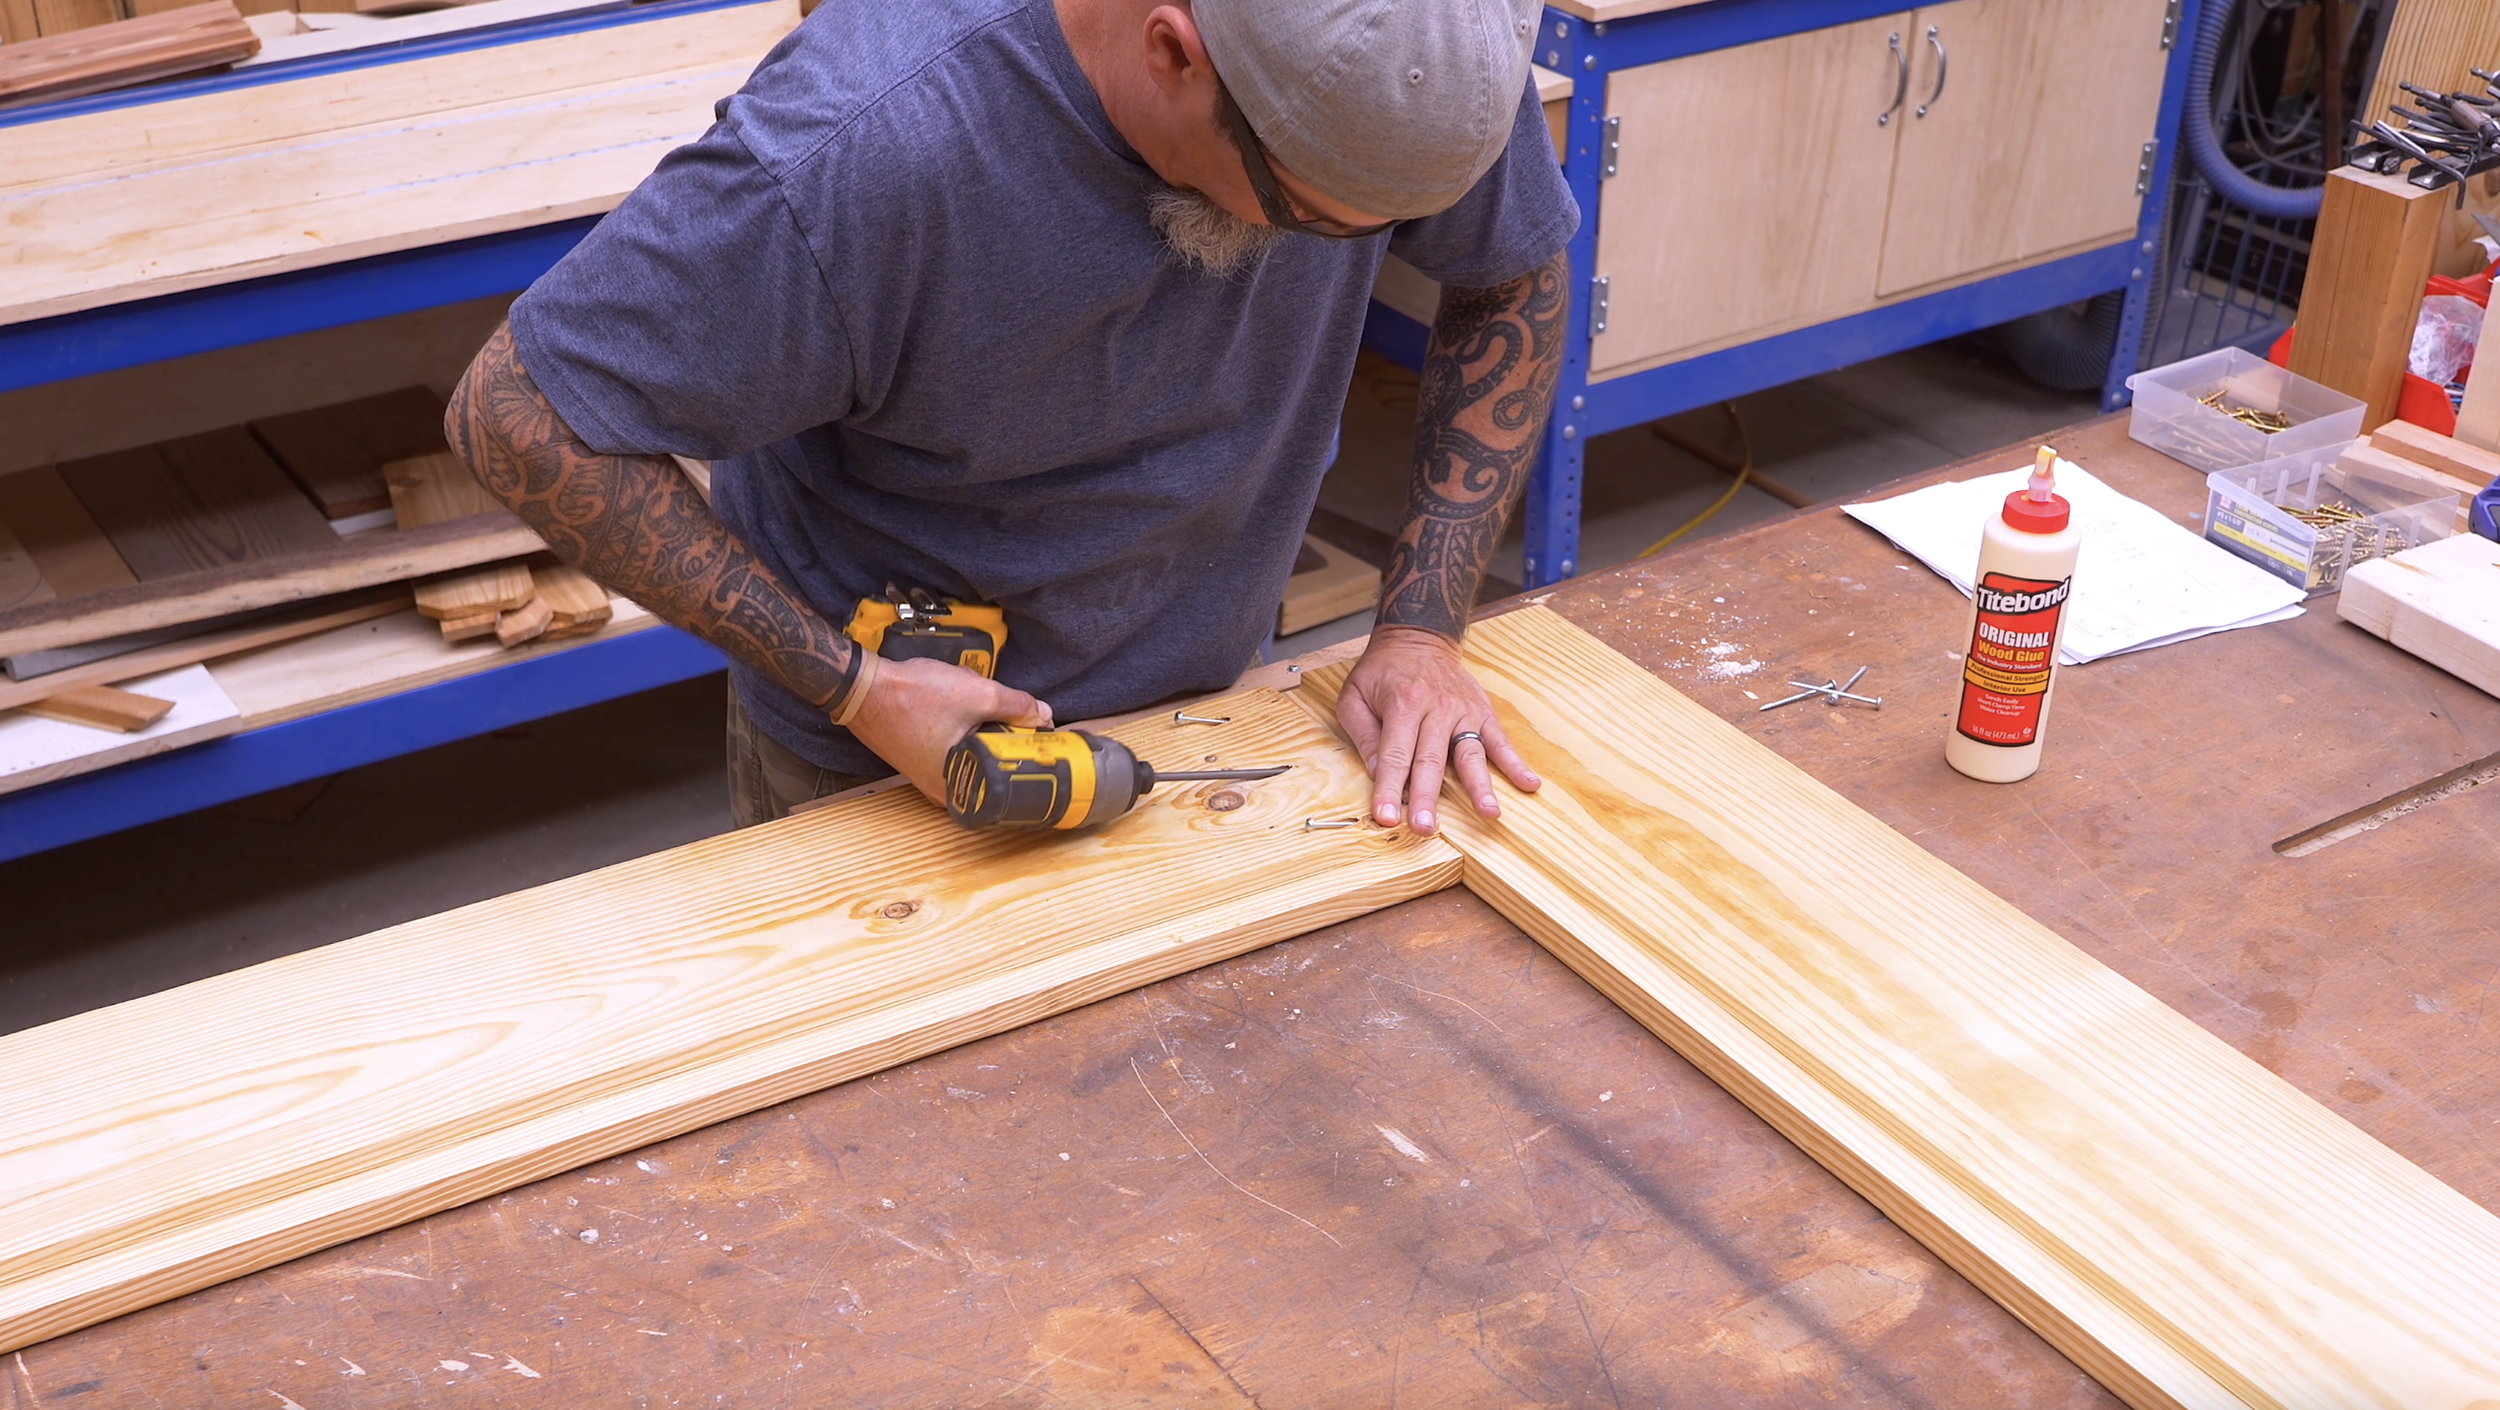
Take your two 42-inch sideboards and drill three pocket holes into the upper end of each one. These will connect the sideboards to our 48-inch top board. Arrange the pieces into an inverted U shape, with the top board spanning between the two upright sides. Apply wood glue at the joints. Then secure everything using 2½-inch pocket-hole screws.
Make sure the corners are square and the backing grooves line up correctly. Once everything is assembled, you'll have the main frame of your decorative fireplace. Now we're going to start adding some character!
Cut the First Decorative Trim Layer
For the first layer, we're using 1x8 lumber, which measures approximately 7¼ inches wide.
Cut the following pieces:
Two 44-inch boards for the vertical trim
One 48-inch board for the horizontal top trim
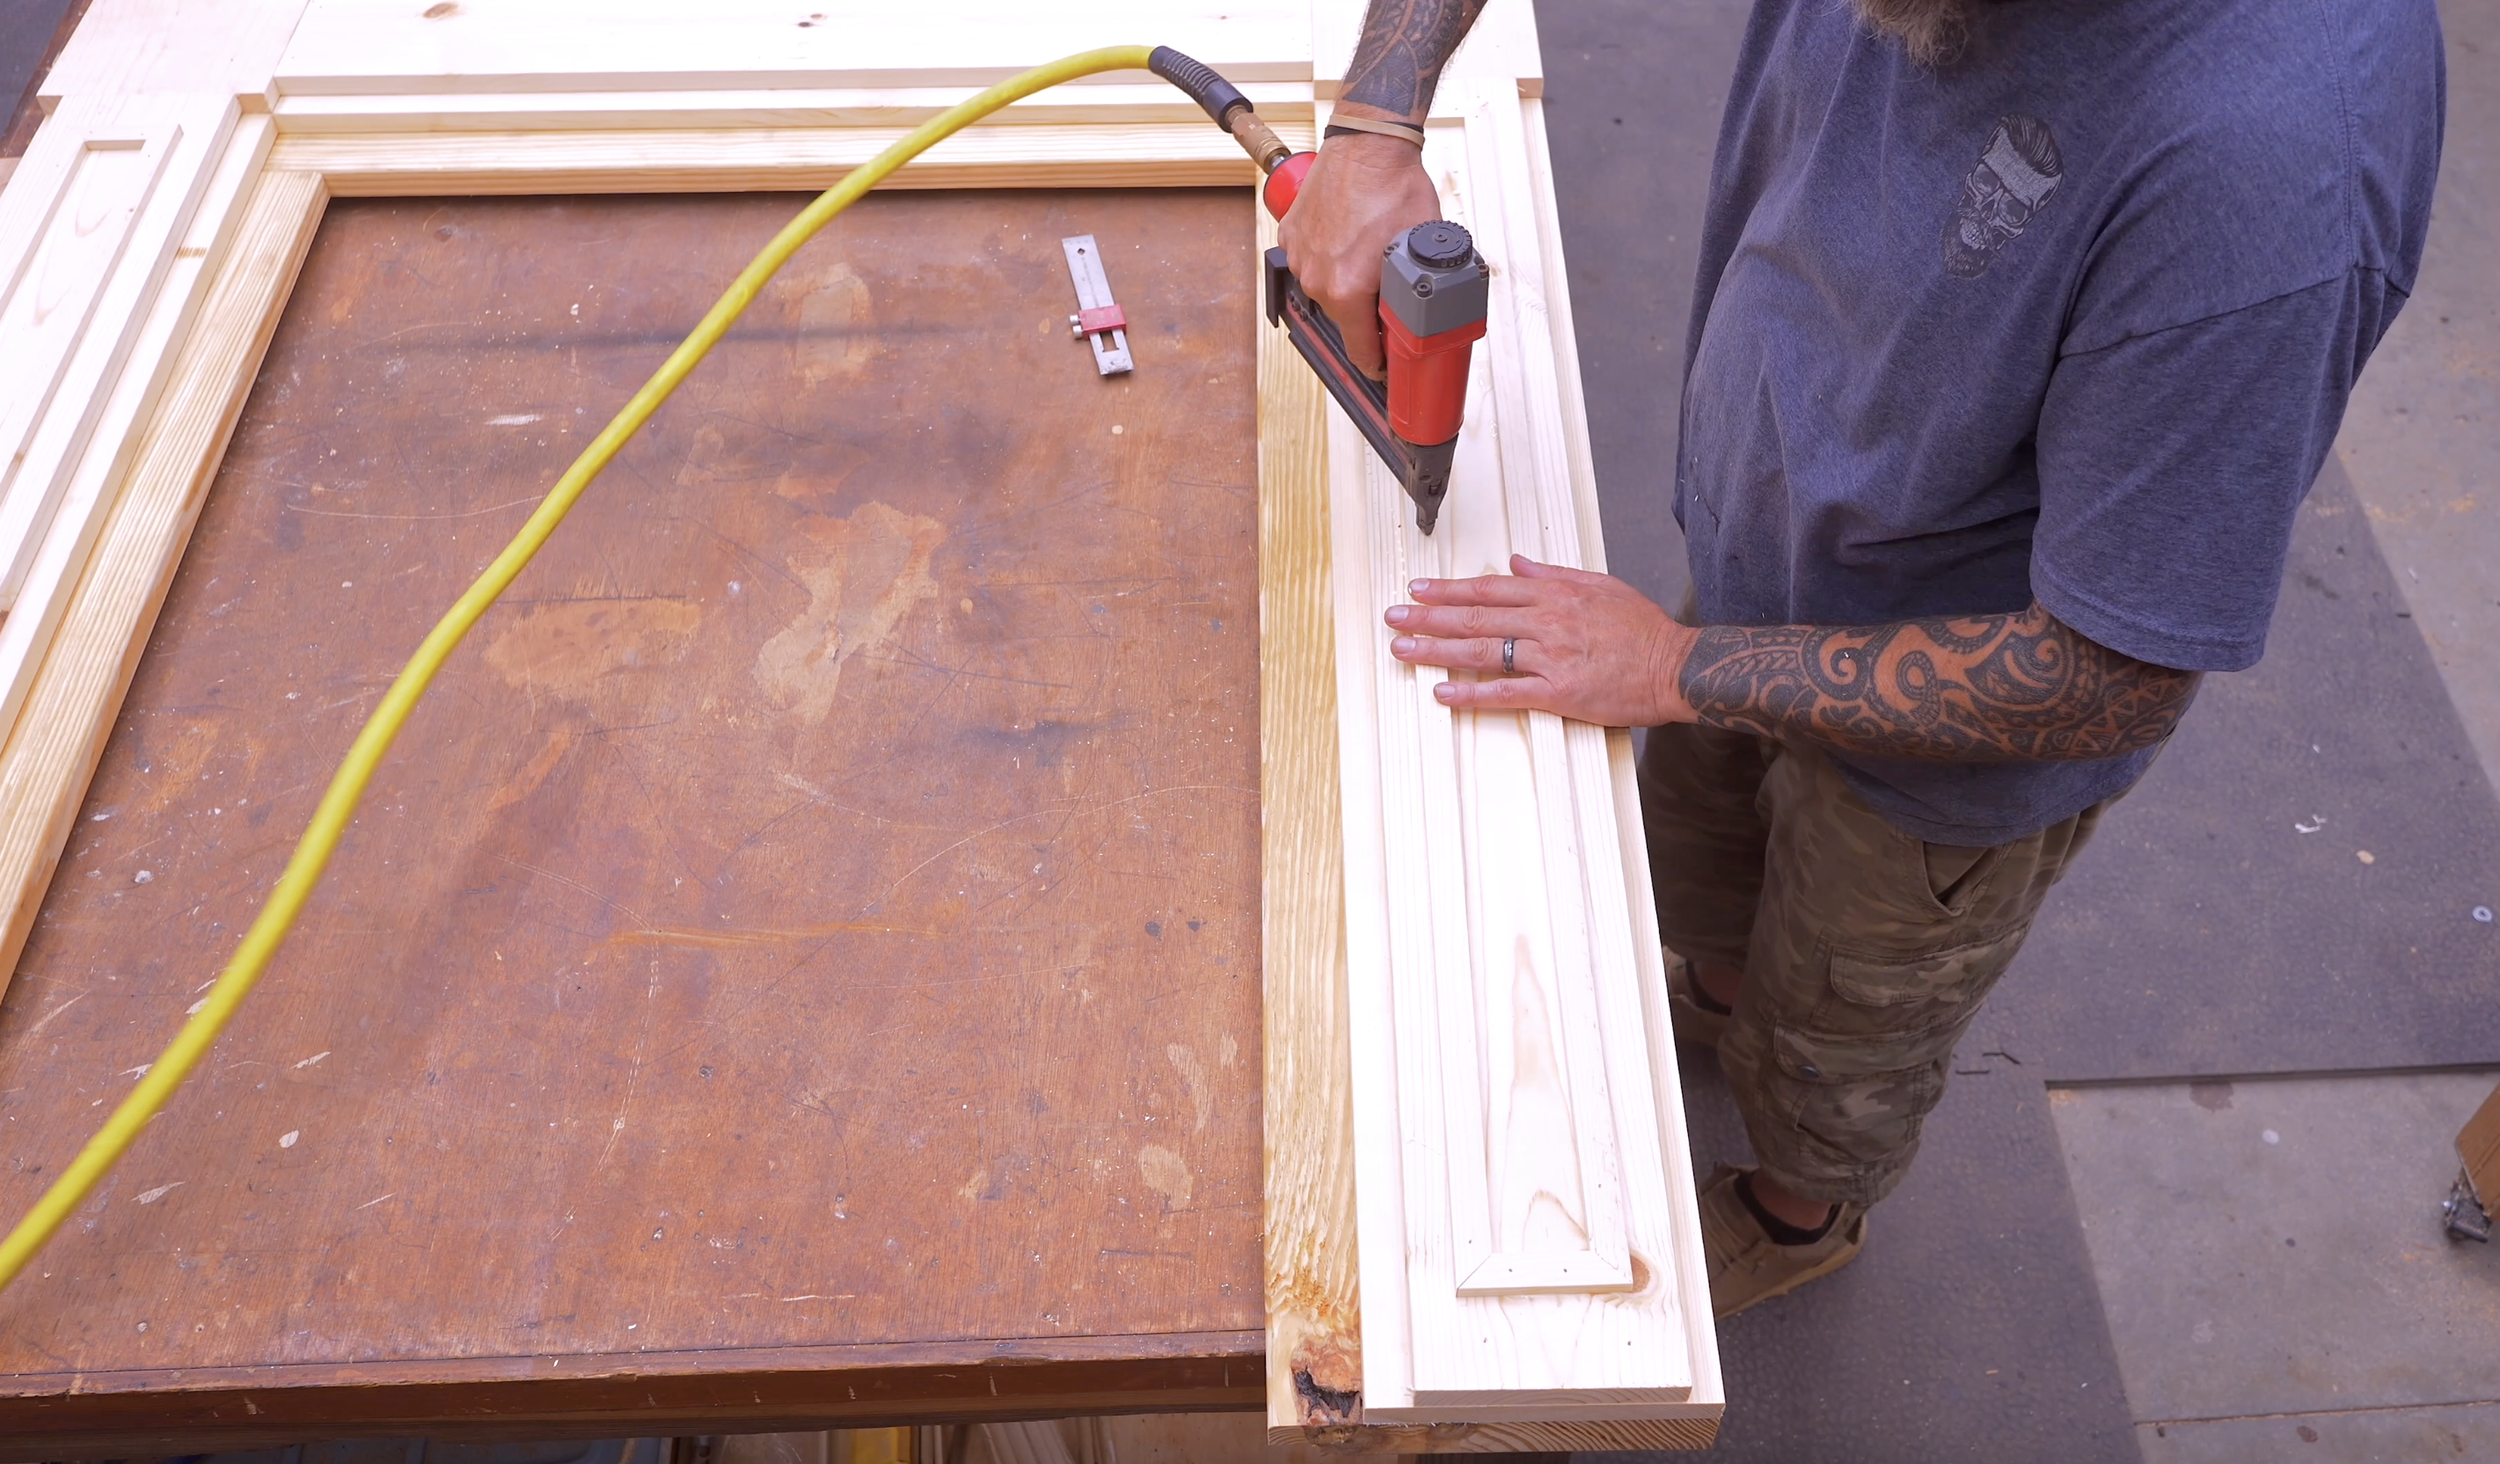
These boards will create the first raised decorative layer across the front of our fireplace frame. Position the two 44-inch pieces vertically over the side sections. Then position the 48-inch piece horizontally across the top. The outside edges of these trim boards should align with the outside edges of the main frame. Attach them using wood glue and brad nails.
Here's something important to remember. We're going to add another layer of trim over these boards, so keep your nails or screws at least 1 inch away from the outside edges. That way, we won't have exposed fasteners interfering with our next layer. Once the first trim is attached, you'll already start seeing the fireplace take shape.
But we're not finished dressing it up yet!
Step 3: Install the Second Decorative Trim Layer
This next layer is what really starts giving our faux fireplace that classic mantel appearance.
Remember, the secret to this build is creating depth by stacking different-sized boards. Instead of everything sitting flat, we're going to have multiple layers that stand out from one another.
Cut the Second-Layer Pieces
We'll start with two square pieces cut from our 1x8 material.
Two 7½ x 7½-inch squares cut from 1x8 lumber
Two 44-inch boards cut from 1x6 lumber
One 33½-inch board cut from 1x6 lumber
The 1x6 boards are approximately 5½ inches wide.
Install the Corner Squares
Begin by placing one 7½-inch square at each upper corner of the fireplace. These pieces will form the foundation for decorative medallion-style details. Position them so that two outside edges are flush with the outside edges of the fireplace frame. Apply wood glue and secure them using a few brad nails.
Attach the Remaining Trim
Next, install your two 44-inch 1x6 boards vertically over the first trim layer. Center each board over the wider trim beneath it. Since the first layer is 7¼ inches wide and the second is 5½ inches wide, this leaves approximately an inch of the wider material visible along the outside edges. This stepped arrangement creates a much more decorative appearance.
Now install the 33½-inch board horizontally across the top, between the corner squares. Again, center it over the wider trim below. Use wood glue and just enough brad nails to keep the pieces in place while the glue dries. Since these fasteners will be visible, try to keep them neat and minimal.
At this point, you'll have a beautiful layered fireplace surround, complete with two raised corner blocks. And we're about to make it look even better!
Step 4: Create and Install the Decorative Molding
Now we're going to add some smaller trim pieces that will make this fireplace look like a much more expensive piece of furniture. And instead of purchasing decorative molding, we're going to make our own using leftover lumber.
Cut the Decorative Strips
Using your table saw, rip strips from your remaining 1x material. We want strips approximately ½ inch by ¾ inch. These will be used to create rectangular decorative frames along the sides and across the top.
Here's the complete decorative trim cut list:
Four 40-inch strips for the side rectangles
Four 3½-inch strips for the side rectangles
Eight 5½-inch strips for the upper corner squares
Two 29½-inch strips for the upper center rectangle
Two 3½-inch strips for the upper center rectangle
Each strip needs 45-degree miters on the appropriate ends so that the pieces meet neatly at the corners. All lengths are measured from outside miter tip to outside miter tip.
For the very short pieces, I recommend making your angled cuts while the material is still long enough to handle safely. Trying to hold a tiny piece close to a saw blade isn't worth the risk.
Install the Side Rectangles
For the first short horizontal piece, measure 2 inches up from the bottom of the side trim and 1 inch in from the outside edge. Position your 3½-inch piece and attach it using wood glue and brad nails.
From there, use that first piece as your guide to install the remaining trim and create a long, narrow rectangle. Your 40-inch pieces form the sides of that decorative rectangle. Repeat the exact process on the opposite side of the fireplace.
Once both sides are finished, you'll have matching raised rectangular details running vertically along the frame.
Create the Decorative Corner Squares
Now let's move up to the top corners.
Using your eight 5½-inch pieces, build a small decorative square inside each of the two larger corner blocks. Position the molding approximately 1 inch from the outside edges. Attach the pieces with wood glue and brad nails, keeping the miters aligned.
These smaller squares give the top corners that decorative medallion-style appearance.
Install the Upper Center Rectangle
For the final decorative molding, we're going to frame out the horizontal section between our two corner blocks.
Use the two 29½-inch pieces and two remaining 3½-inch pieces. Position the rectangle so it begins approximately 3 inches from the decorative corner square, following the same spacing on the opposite side. Attach the short end pieces first, then use them as your guide for positioning the longer pieces.
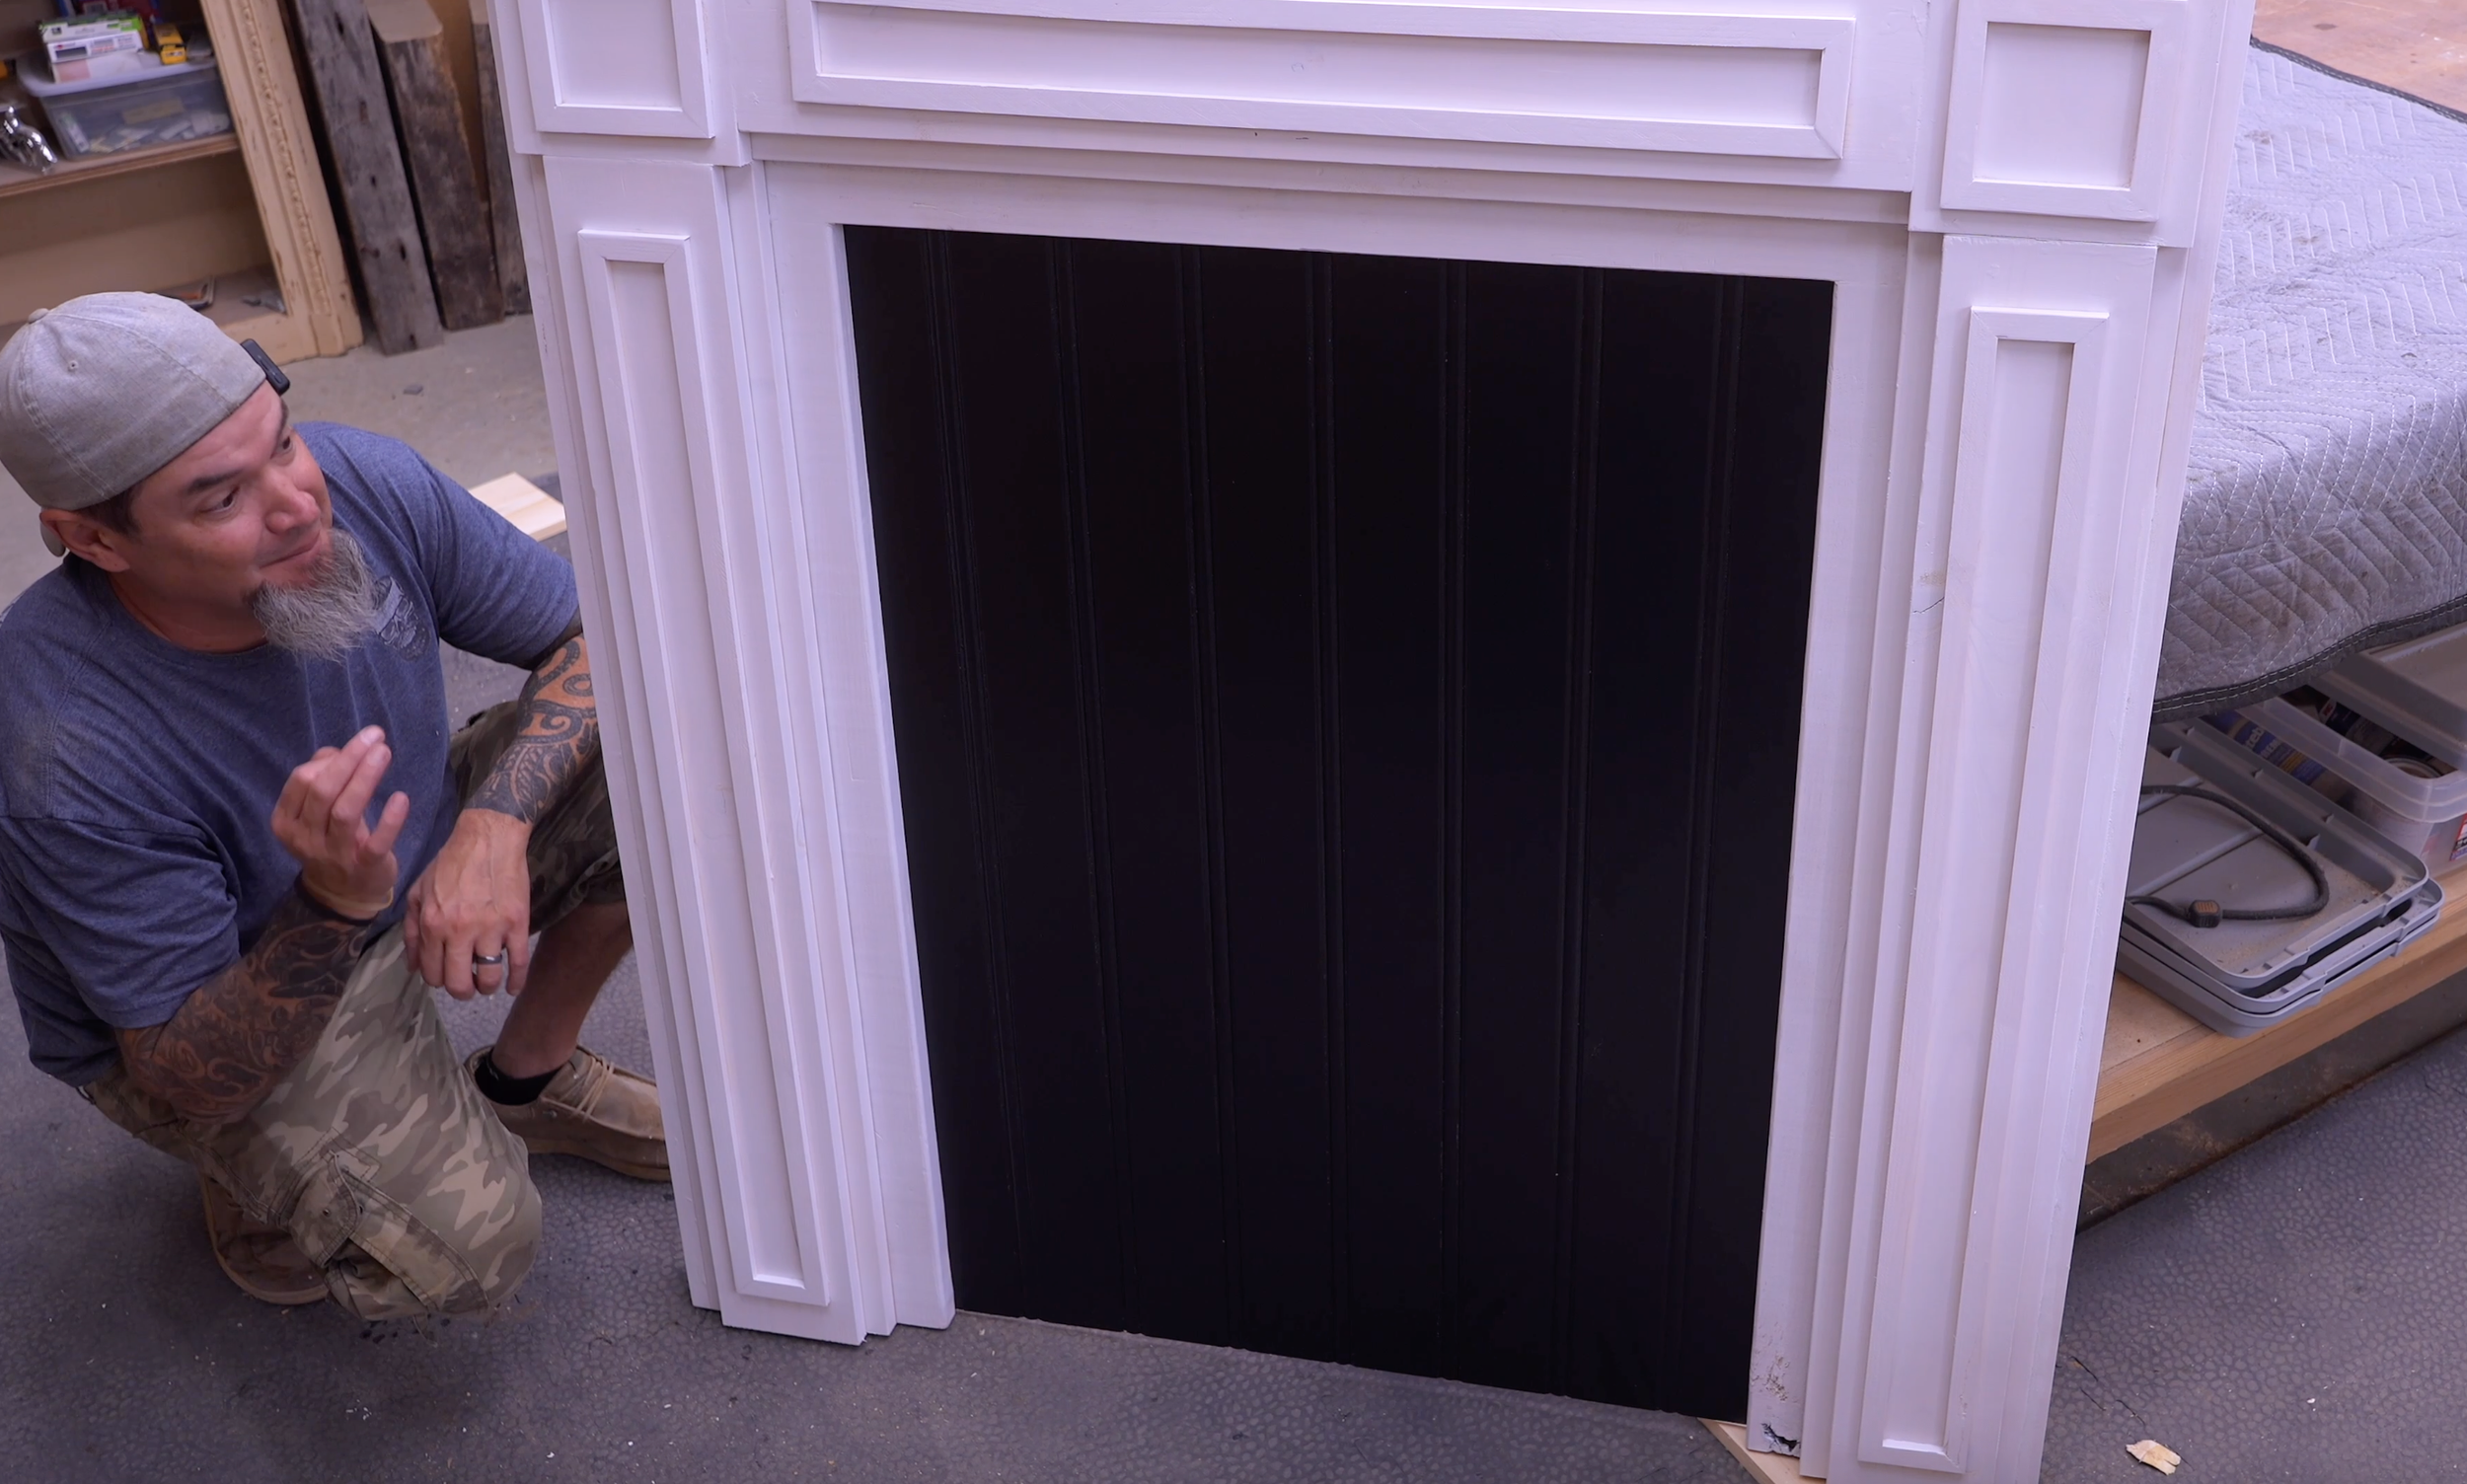
Once you've finished this step, take a look at what we've created. We've taken ordinary lumber and turned it into something that looks like a beautiful traditional fireplace surround!
Step 5: Add the Side Finishing Strips and Paint the Fireplace
We're getting pretty close to finishing the main structure. But before we paint, I want to add a couple more pieces that will clean up the outside edges and hide some of our joints.
Cut the Outside Trim
For these finishing pieces, cut:
Two strips measuring 2¼ inches wide by 51¼ inches long
These strips will cover the exposed side joints and give the fireplace a cleaner, more finished appearance. Position the strips along the outer side edges of the surround. Check their alignment, then attach them using wood glue and brad nails.
Prepare the Fireplace for Finishing
With all our trim installed, it's time to get everything looking nice and smooth.
Inspect the project for exposed nail holes, small gaps, and rough edges. Apply wood filler where necessary. Once it dries, sand the surface until everything feels smooth and the joints blend together. Be careful not to round over the decorative edges too much. We want to preserve the definition between all those layers.
Choose Your Paint or Stain
You can finish this fireplace however you'd like. A rustic stain would look great, especially if you're going for a more traditional or farmhouse appearance. You could also paint it black, gray, or just about any color that matches your home.
For my build, I decided to go with white paint. I think white really brings out all the decorative details, and it's going to look great in the area where I plan to display it.
Apply your paint using the appropriate primer and finish for your lumber. Allow everything to dry completely before moving on. And now we're ready to install the backing that will give this fireplace its illusion of depth.
Step 6: Install the Recessed Fireplace Backing
Remember those grooves we cut into our original frame pieces? Well, now we're finally going to put them to use!
For my backing, I'm using some leftover beadboard paneling that I already had in the shop. You can use several different types of material for this part. Fence pickets, pallet wood, beadboard, or another suitable wood panel could all work. The important thing is that the backing fits into the recessed channels we created earlier.
Prepare the Backing
The space we're covering is approximately:
31½ inches high by 43 inches wide.
Check the actual opening and rabbet dimensions before cutting, since your material thickness and final fit may vary. I'm using 3/8-inch beadboard for mine.
One thing I really like about beadboard is that it already has decorative grooves running through it. If you're using ordinary wood boards, you could create a similar effect by cutting shallow decorative grooves with a table saw using an appropriate, safe cutting setup.
But here's where things get interesting. I'm painting my backing black. Why? Because I want to create the illusion of a dark fireplace opening. Instead of seeing a flat wooden panel, I want your eye to perceive depth, almost like you're looking into a recessed fireplace.
You could absolutely leave the beadboard white if you prefer that look. But for my design, I think the black backing is going to make the entire project stand out.
Attach the Backing
Once the backing is painted and dry, carefully slide it into the recessed grooves along the inside of the main frame. Make sure it sits properly in the channel and doesn't extend past the rear surface of the fireplace. Apply wood glue where appropriate and secure the backing using brad nails.
Now step back and look at it. That dark backing completely changes the appearance of the project! We've taken a simple wooden surround and given it the illusion of a fireplace opening without adding an actual firebox.
All that's left is the mantel!
Step 7: Build and Install the Wooden Mantel Top
Now we're going to finish this project with one of my favorite details.
The mantel top.
And here's where you can get a little creative. You can use thicker lumber for a heavier appearance, thinner material for a cleaner look, or even a contrasting wood species.
Originally, I was planning to paint everything white. But after seeing how the fireplace was coming together, I decided to leave the mantel top natural wood. I think that contrast between the white surround and the wooden mantel is going to look fantastic.
Cut the Mantel Board
For the mantel top, you'll need one board measuring:
5 inches wide by 51½ inches long
You can use thicker material if you'd like a more substantial-looking mantel. For my build, I'm going with ¾-inch material.
Prepare the Mounting Holes
Since I might want to hang Christmas stockings from this fireplace, I decided to secure the top with screws rather than relying only on brad nails.
Start by pre-drilling and counterboring three screw holes in the mantel. Each hole should be positioned approximately 1 inch from the back edge.
Place one hole in the center. Position the other two holes approximately 6 inches in from either end. Counterboring the holes allows the screw heads to sit below the wood surface. You can cover them with wooden plugs or filler for a clean appearance.
Attach the Mantel
Position the mantel on top of your fireplace structure. The back edge should be flush with the rear of the frame. Make sure the mantel overhangs approximately 1 inch on each side.
Apply wood glue and secure the top using properly sized wood screws through your pre-drilled holes. Be sure to choose screws that provide good holding strength without coming through the wood.
Once everything is attached, sand the exposed edges and apply your preferred clear finish to the natural wood. Allow the finish to cure before decorating. And just like that, we've built an awesome DIY faux fireplace!
Before displaying it, secure the surround to a suitable wall or supporting structure with appropriate anti-tip hardware. Don't rely on the narrow footprint of a decorative surround to keep it upright, especially if you're adding items to the mantel.
Also, the mantel should only support appropriately lightweight decorations, and hanging stockings should not be treated as a weight-bearing feature.
Ready to Build?
I really couldn't be happier with how this project turned out. By using several layers of trim, creating raised corner details, installing a recessed backing, and topping everything off with a natural wood mantel, we ended up with something that looks far more complicated than it actually is.
And that's one of the things I love most about woodworking. You don't always need expensive materials or fancy techniques to create something that looks amazing. Sometimes, all it takes is a little creativity and knowing how to put a few simple pieces together.
Whether you're decorating for Christmas, creating a farmhouse-style focal point, or looking for a new woodworking project to build and sell, I think this DIY faux fireplace is definitely worth considering. So, what are you waiting for?
👉 Get up, get out, and get your build on.
Whether you’re new to woodworking or a seasoned pro, this project offers the perfect mix of functionality and creativity. Below I have the YouTube video linked for a step-by-step video tutorial for you to follow along with. If you’re a more “plans in the hand” person, click “Get Plan” down below for downloadable instructions. And if you’re ready to dive deeper into woodworking, check out my new course, “Woodworking Kickstart” (which is also linked below). It’s packed with step-by-step lessons to help you build confidence and skills, whether you’re a total beginner or an experienced DIYer. You’ll be building with confidence in no time.
Remember, creativity doesn’t have to be expensive; all you need is a little inspiration and a willingness to try.
Get Easy Step-By-Step Directions to build this by clicking the button below
⭐ 10,044 5 Star Reviews
📚 113 Plans to Choose From
🧩 Lego-Like Assembly Steps
📏 Exact Measurements
📋 Detailed cut and part list
🔍 X-Ray Views
🚀 Instant Delivery
