
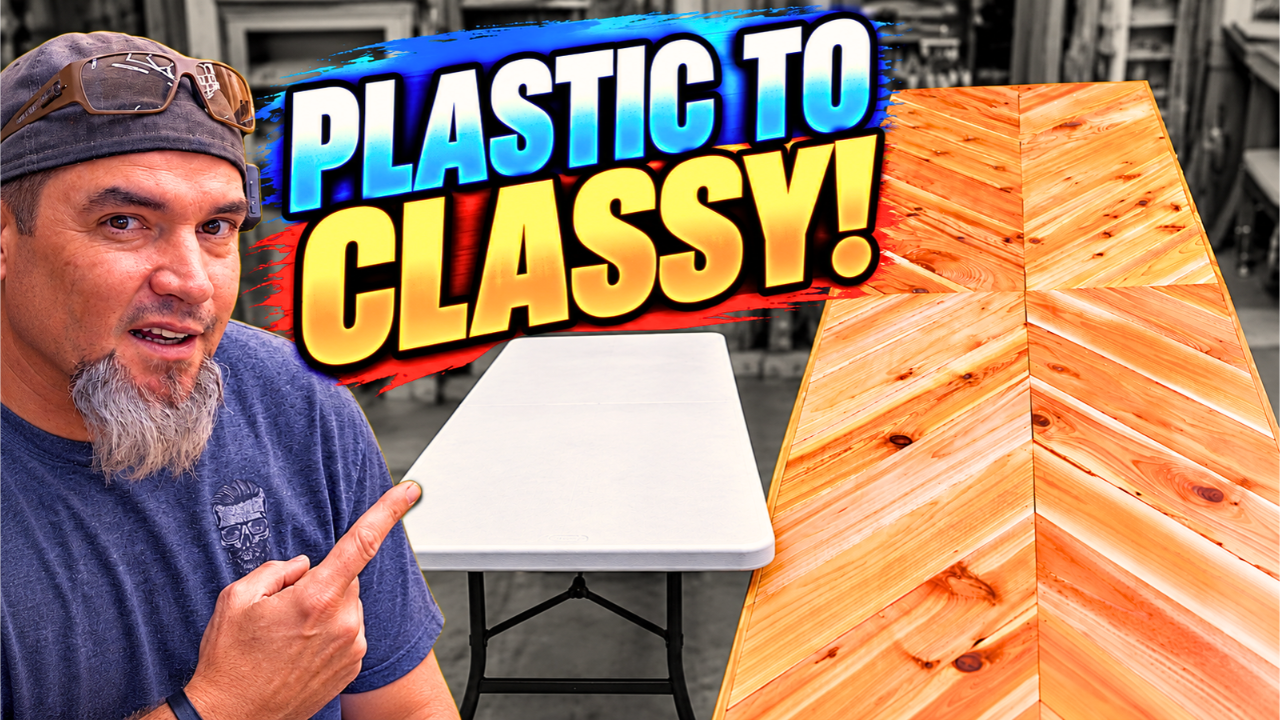
Let's face it. We've all used those plastic folding tables. They're extremely handy for birthday parties, family get-togethers, Thanksgiving dinners, craft fairs, and just about any occasion where you need a little extra table space. But there's one big problem.
They're pretty ugly!
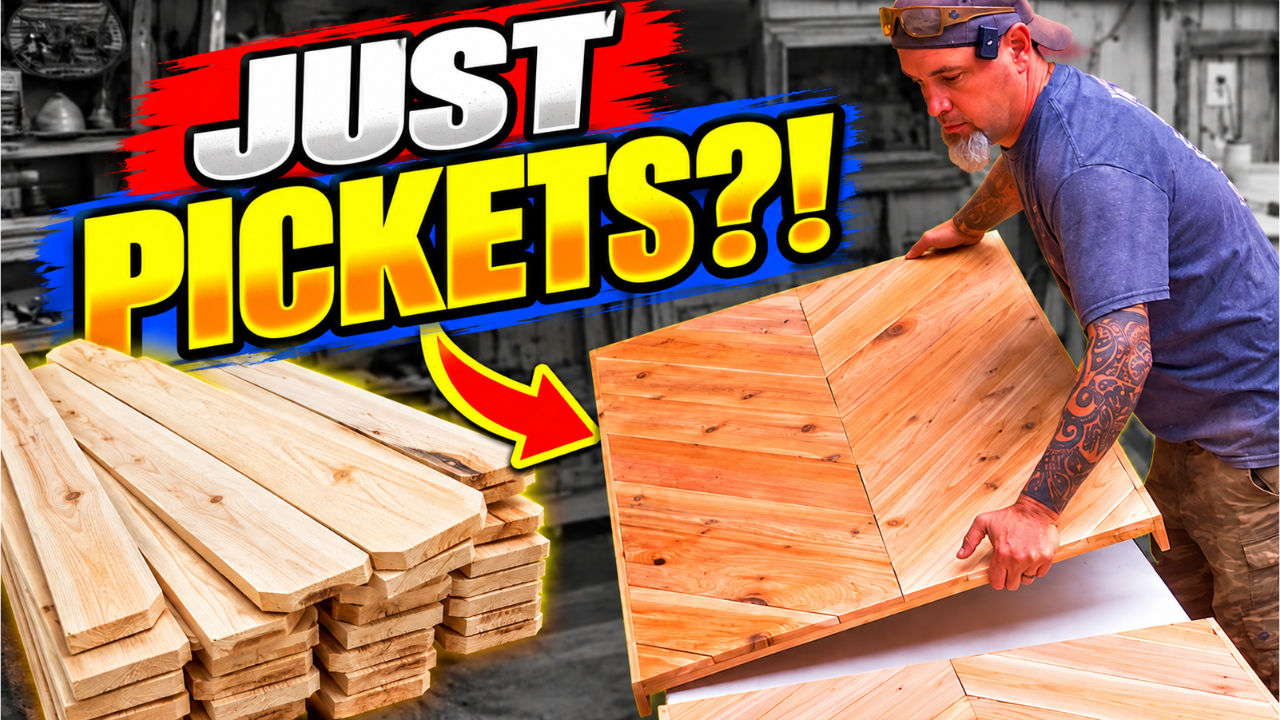
Sure, they get the job done, but those plain plastic tops aren't exactly something you want to show off. Well, what if I told you that you could completely transform the look of one of those tables using nothing more than some inexpensive fence pickets? That's exactly what we're going to do today!
I'm going to show you how to build a removable DIY wooden folding table cover that fits right over your existing plastic table. Not only does it look awesome, but it's lightweight, easy to remove, and built in two separate sections to make storage a whole lot easier.
Materials
Cedar Fence Pickets
Wood Glue
Pocket-Hole Screws
Brad Nails
Exterior Urethane
Sandpaper
Latches & Carrying Handle (Optional)
Tools
Miter Saw
Table Saw
Circular Saw
Pocket-Hole Jig
Brad Nailer
Drill/Driver
Palm Sander
Clamps
A Quick Note About Measurements
I'm building this particular cover for a standard-size folding table, with a finished wooden top approximately 8 feet long.
Since folding tables can vary slightly in size, I recommend measuring your actual table before cutting your materials.
Step 1: Cut the Lumber for the Two Tabletop Frames
We're going to start by building the frames that will hold all our tabletop boards together. Now, unlike a traditional table frame, these pieces aren't going to stand up on edge. Instead, they'll lay flat underneath our wooden tabletop.
Remember, our plastic folding table is already doing the heavy lifting. These frames are simply going to connect all our wooden pieces and keep everything together.
Cutting the Frame Boards
We're going to use our cedar fence pickets and rip them down into strips that are 2½ inches wide. But before we start ripping, I recommend cutting the boards to length. Fence pickets are notorious for having a little bow or curve in them. By cutting them into shorter lengths first, we can help minimize that problem and make the boards easier to work with.
Start by cutting:
Two boards measuring 48 inches long
One board measuring 43 inches long
Two boards measuring 25 inches long
Once you've made those cuts, head over to your table saw and rip the boards into 2½-inch-wide strips. You'll end up with:
Four 48-inch-long frame rails
Two 43-inch-long center supports
Four 25-inch-long short frame rails
The idea is to build two matching sections that will eventually sit side by side to create our finished tabletop. And once those pieces are cut, we're ready to start assembling!
Step 2: Assemble the Two Wooden Frames
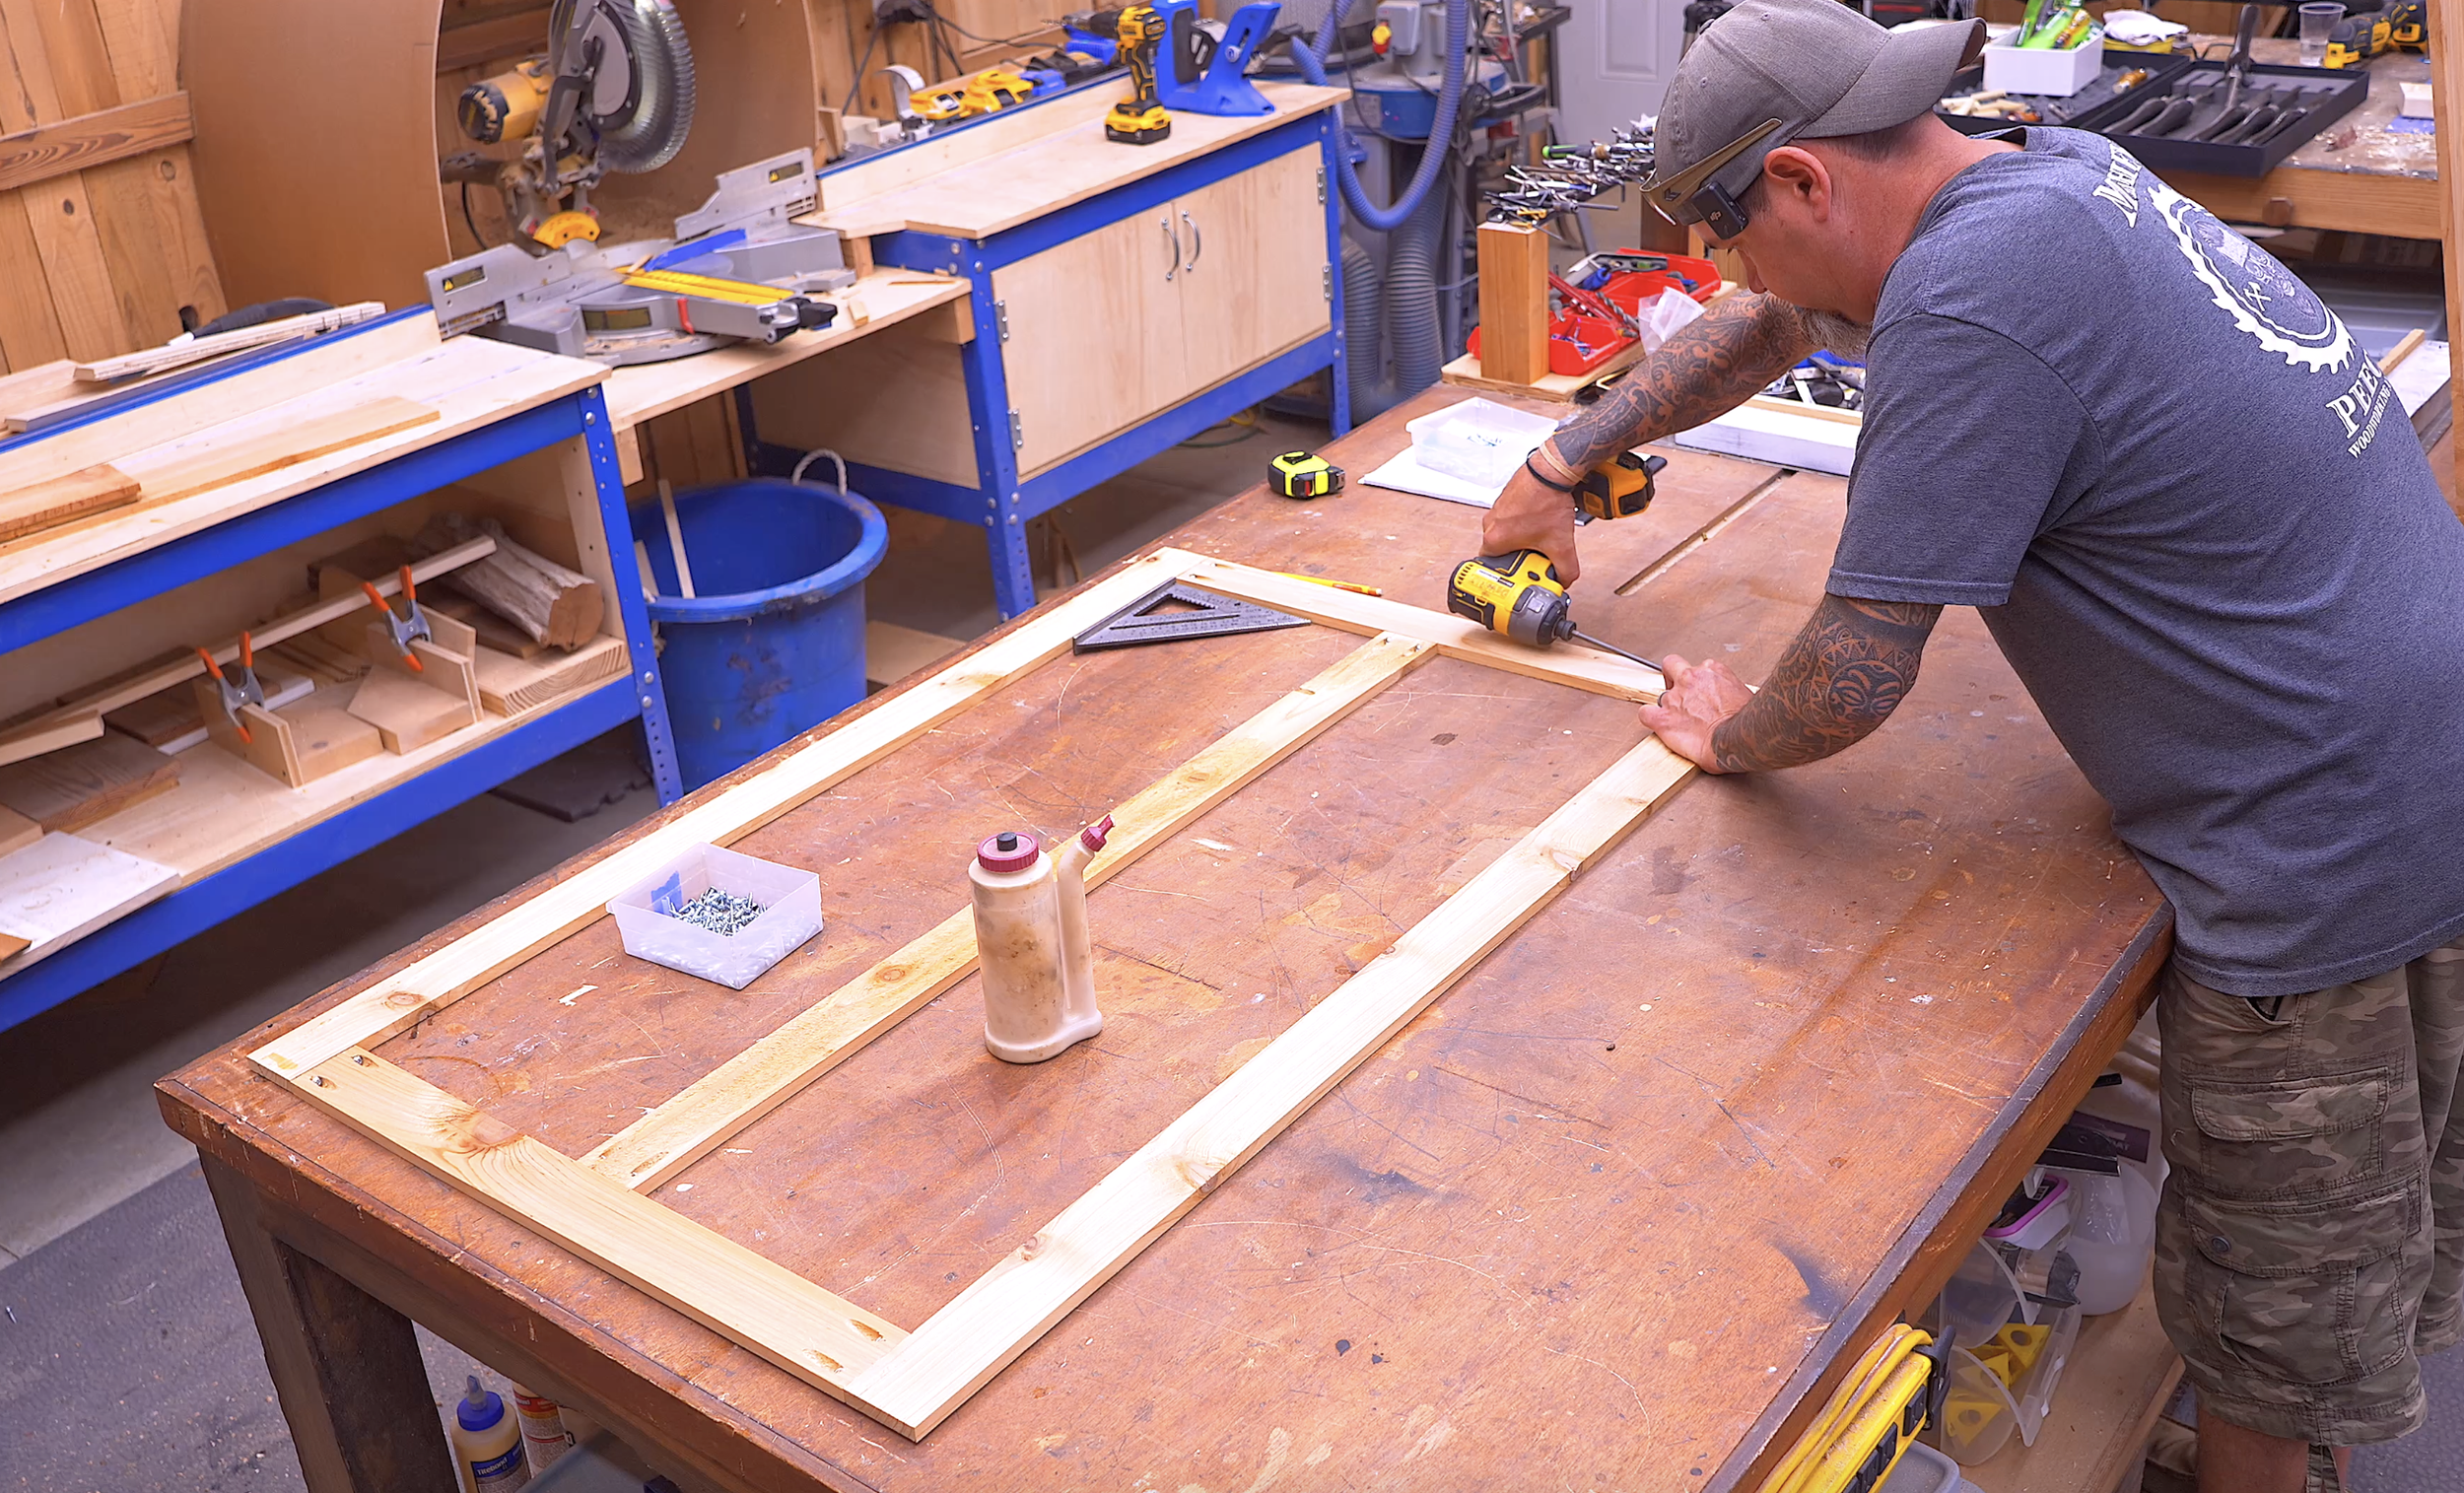
Now that we have all our frame pieces cut, we're going to put everything together using pocket-hole joinery. If you've never used a pocket-hole jig before, don't let that intimidate you. It's a great way to connect boards without having to get into complicated woodworking joints.
Drilling the Pocket Holes
Start by drilling two pocket holes into both ends of each of your four 25-inch boards. You'll also drill two pocket holes into both ends of your two 43-inch center supports.
These holes will allow us to connect the shorter boards to our longer outside rails. Make sure your pocket-hole jig and screw length are adjusted for the actual thickness of your fence pickets.
Assembling Each Frame
For each frame, you'll use:
Two 48-inch outside rails
Two 25-inch end pieces
One 43-inch center support
Lay the two 48-inch boards parallel to one another. Position the two 25-inch boards between them, one at each end, creating a rectangular frame. Next, place the 43-inch board between the outside rails to provide support through the center.
Apply wood glue at each joint and secure the boards using your pocket-hole screws. Keep everything flat and square while tightening the screws. Once the first frame is complete, repeat the exact same process to build your second frame.
You'll now have two identical rectangular frames. And that's really all there is to the underlying structure! The next part is where we're going to make this project look pretty amazing.
Step 3: Cut the Chevron-Style Wooden Tabletop Pieces
Now, there's nothing wrong with running boards straight across a tabletop. That's actually a really simple way to build one of these covers. But I wanted to do something a little different.
Instead of a traditional straight-board layout, we're going to create a decorative pattern using angled boards. Some people call this a chevron pattern. Others might call it an arrow design. Whatever you want to call it, I think it looks awesome!
Cutting the Angled Tabletop Boards
For this design, we're going to need 30 pieces of fence picket material.
Here's our cut list:
30 pieces measuring 26½ inches long
Each piece ripped to 5 inches wide
Both ends cut at 45-degree angles
As with the frame boards, we're going to cut these pieces to length before ripping them to their final width. Start by cutting the 45-degree angles on each end using your miter saw. Once you've cut all 30 pieces, move over to your table saw. Rip each piece down to 5 inches wide.
I like to remove a little material from both edges of the pickets. This helps clean up the factory edges and gives us straighter, more consistent boards.
Check Your Boards Before Assembly
Before attaching anything, take a moment to look over your boards. Cedar has some beautiful grain patterns, and some pieces are going to look better than others.
Decide which side you want facing upward and arrange the boards so the grain patterns complement one another. Another thing to consider is your finish. If you're planning to paint or stain alternating boards different colors, now would be a good time to apply those colors before assembly.
For my project, I plan on leaving the natural wood appearance. I really like the way cedar looks once you apply a protective clear finish. With our tabletop pieces cut and arranged, we're ready to start putting our decorative cover together.
Step 4: Attach the Chevron Boards to the Frames
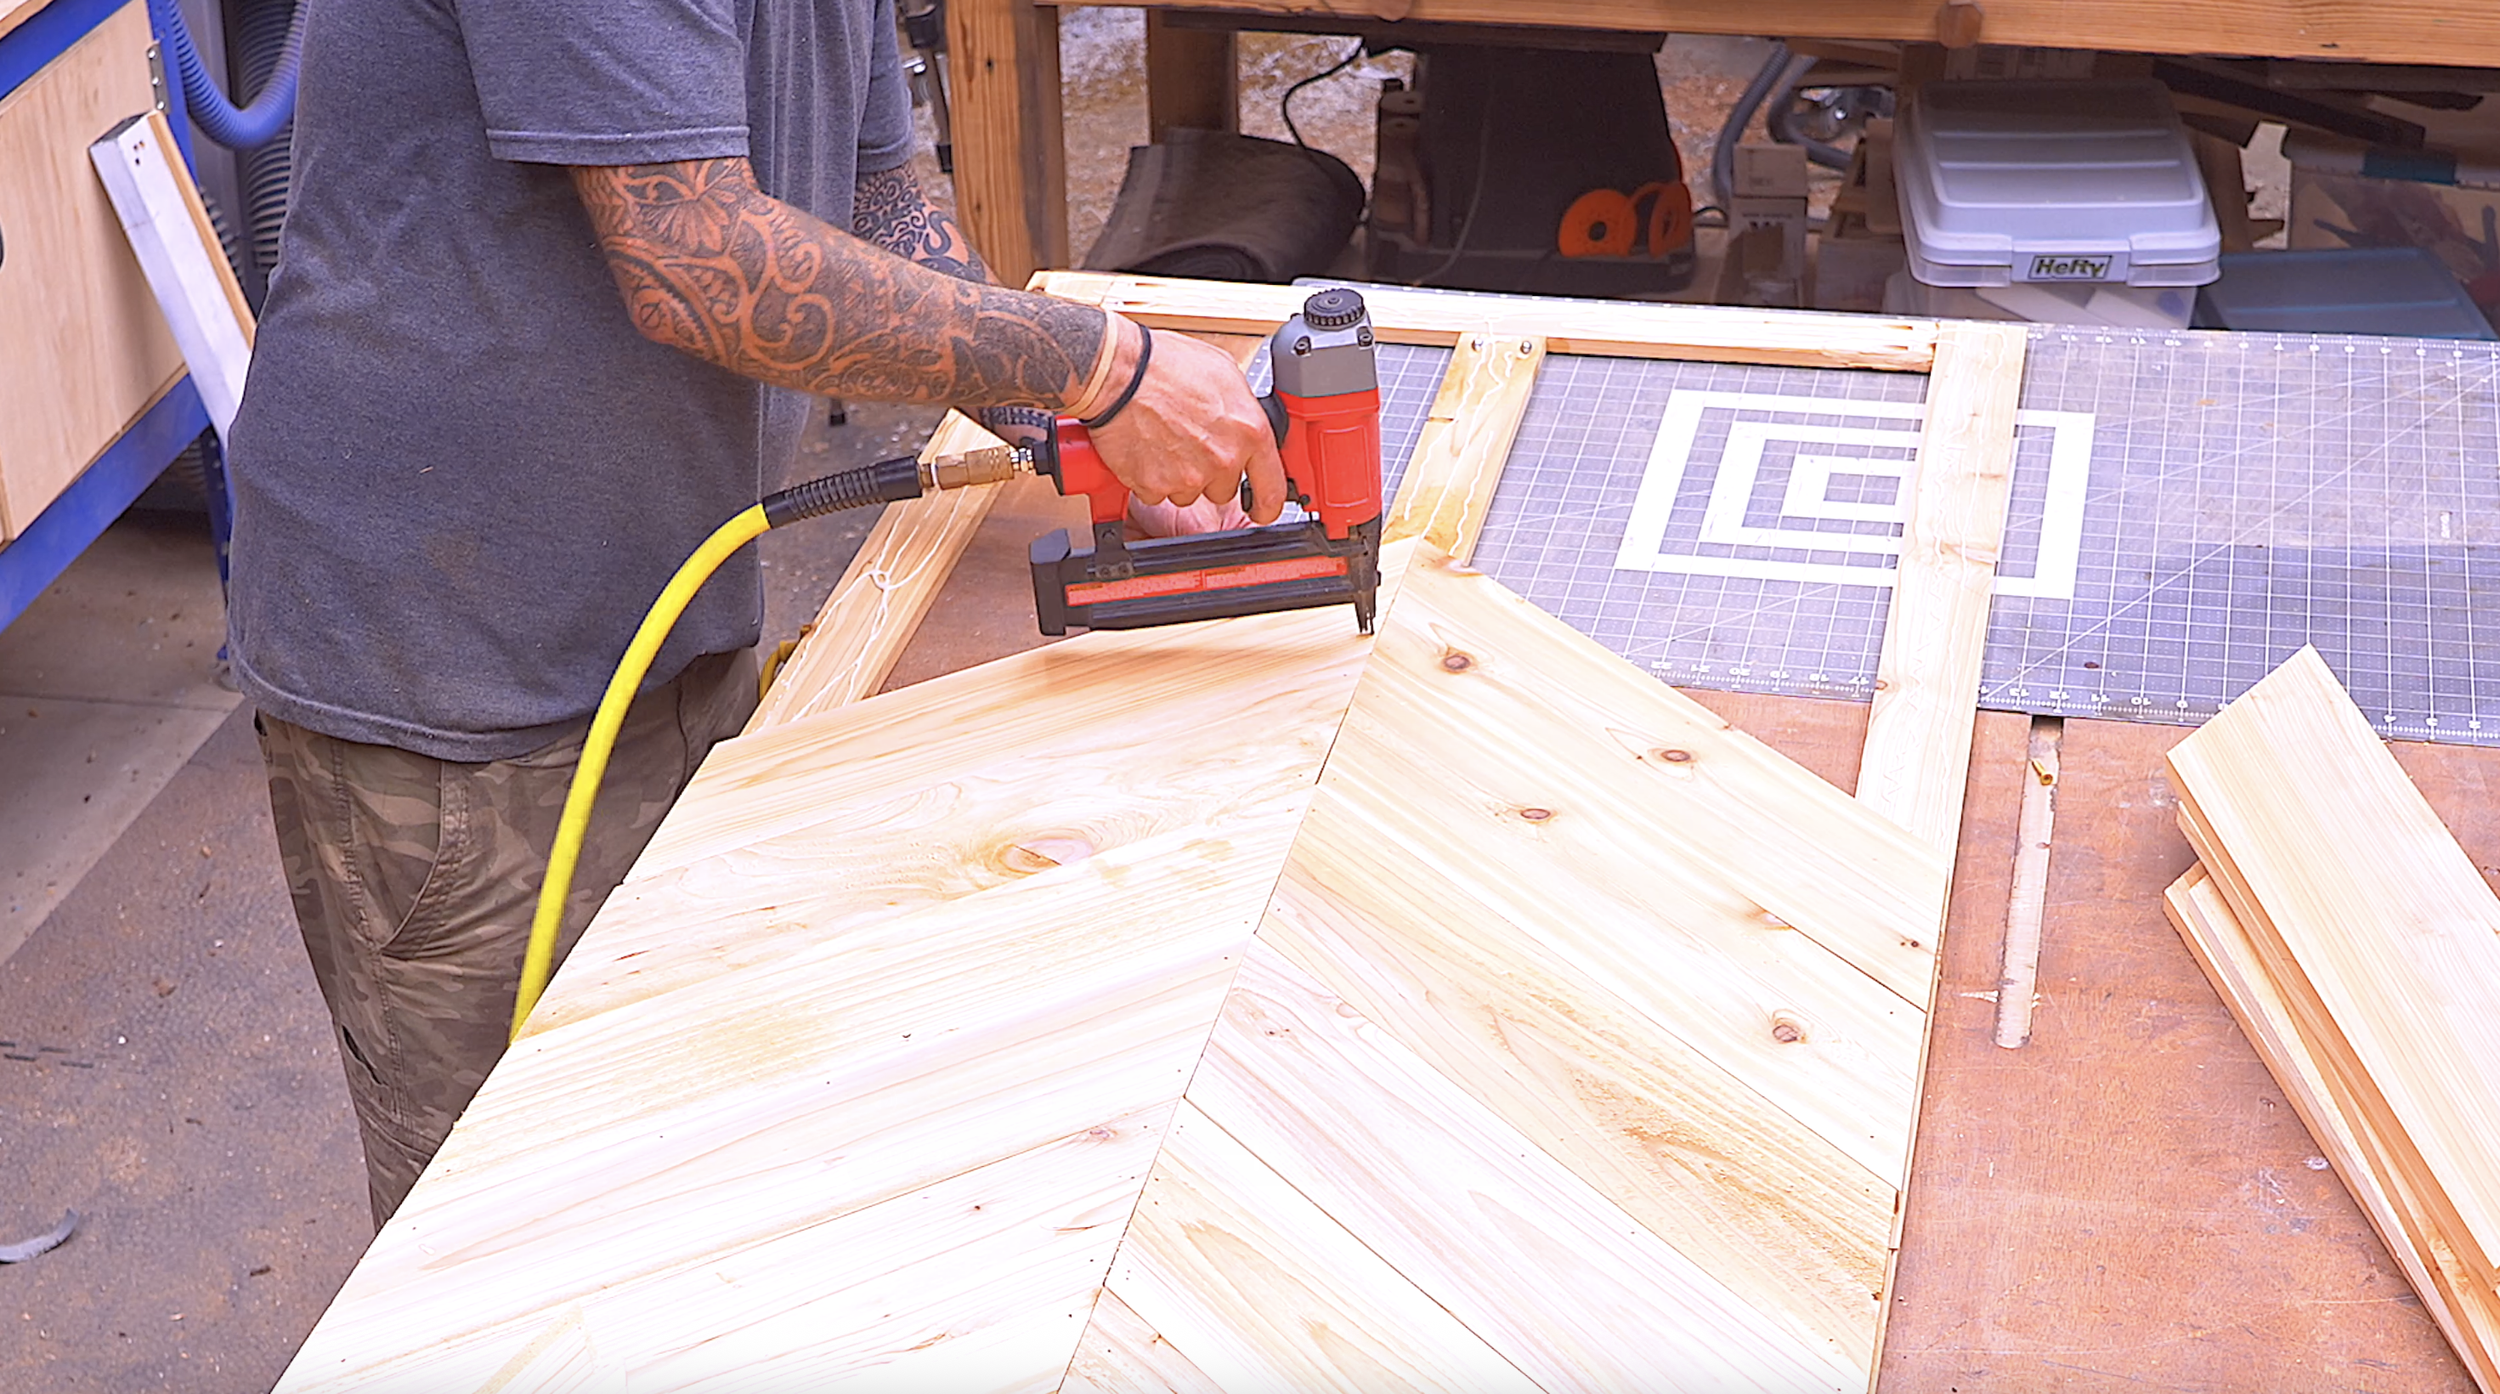
This is probably my favorite part of the entire project because we're finally going to see our design come together. Start by laying both of your frames flat on your work surface, end to end, with their ends touching.
We're temporarily treating these two frames as one long tabletop. Why? Because I want our chevron pattern to flow continuously from one end of the table to the other. We'll separate the two sections after all the tabletop boards are installed.
Starting the Chevron Pattern
Begin at one end of your frames. Take your first two angled boards and position them so their angled edges meet in the center, creating the beginning of your chevron pattern. The outside ends should reach the two outside corners of your frame.
Spend a little extra time getting these first two boards positioned correctly. They're going to establish the alignment for the rest of the tabletop. Once you're happy with their placement, apply wood glue where the boards contact the frame and secure them using brad nails.
Continue Installing the Boards
With the first two boards attached, use them as your guide for installing the remaining pieces. Work your way down the length of the tabletop, fitting the angled boards together to maintain a consistent pattern. Apply glue and secure each piece to the framing underneath with brad nails. Remember, we're attaching these pieces to the frame, not building a heavy, self-supporting tabletop.
As you get toward the opposite end, don't worry if some of the boards extend past the frame. We're going to trim those flush once everything is attached. You may also find that you need small pieces to fill in the outer corners of the design. For those areas, simply use cutoff pieces or leftover scraps and cut them to fit.
Once all the boards are installed, you should have one long chevron-patterned wooden surface covering both of your frames. And I have to say, this is where things start getting exciting!
Step 5: Trim the Tabletop and Separate the Two Panels
Now that we've attached all our boards, we need to clean up the edges and turn our long tabletop into two separate sections. The best way I've found to do this is by cutting from the underside. That allows us to see exactly where our frames are positioned and gives us a clear guide for our cuts.
Preparing to Cut
Carefully turn the assembly over and place it on a properly supported work surface. I'm using scrap rigid foam insulation underneath mine.
If you've never used foam board to support a project while cutting with a circular saw, it's a really handy trick. It provides a stable surface underneath your material and allows you to make cuts without damaging your workbench. Just make sure your cutting depth is properly adjusted and the workpiece is secure.
Trim the Ends
Using your circular saw and a straightedge guide, trim the excess tabletop material at both ends. The goal is to leave the decorative boards flush with the frame beneath them.
Separate the Two Panels
Next, locate the joint where your two frames meet in the middle. Use that gap as your guide and carefully cut through the tabletop boards to separate the assembly into two sections.
Once the cut is complete, you'll have two separate wooden tabletop panels. And here's something really cool about this design. You can lay the panels side by side in their original orientation, or you can turn one of them around. Doing that changes the appearance of the chevron pattern!
For my build, I actually liked the design better after turning one panel around. It's a simple change, but it gives the tabletop a completely different look. Once you've decided on the arrangement you like best, give both panels a quick sanding. Now we're ready to add the finishing trim.
Step 6: Add the Decorative Edge Trim
Right now, our tabletop is looking pretty good. But I want to add one more detail that's really going to dress this thing up. We're going to install trim around the outside edges. This will help hide the exposed edges of the tabletop and create a more finished appearance.
Cutting the Trim
For this part, we're going to use the same cedar fence picket material. Start by ripping five strips that are 2½ inches wide. Next, head over to your miter saw. Cut four long side-trim pieces, each approximately 48½ inches long, with a 45-degree miter on the appropriate end. Then cut two end-trim pieces measuring 31 inches long, with 45-degree miters on both ends.
Here's the trim cut list:
Four long side-trim pieces measuring approximately 48½ inches
Two end-trim pieces measuring 31 inches
All trim ripped to 2½ inches wide
Side trim receives a 45-degree miter on one end
End trim receives 45-degree miters on both ends
Because fence picket thicknesses and assembled panel dimensions can vary, check these measurements against your actual panels before making the final cuts.
Attaching the Trim
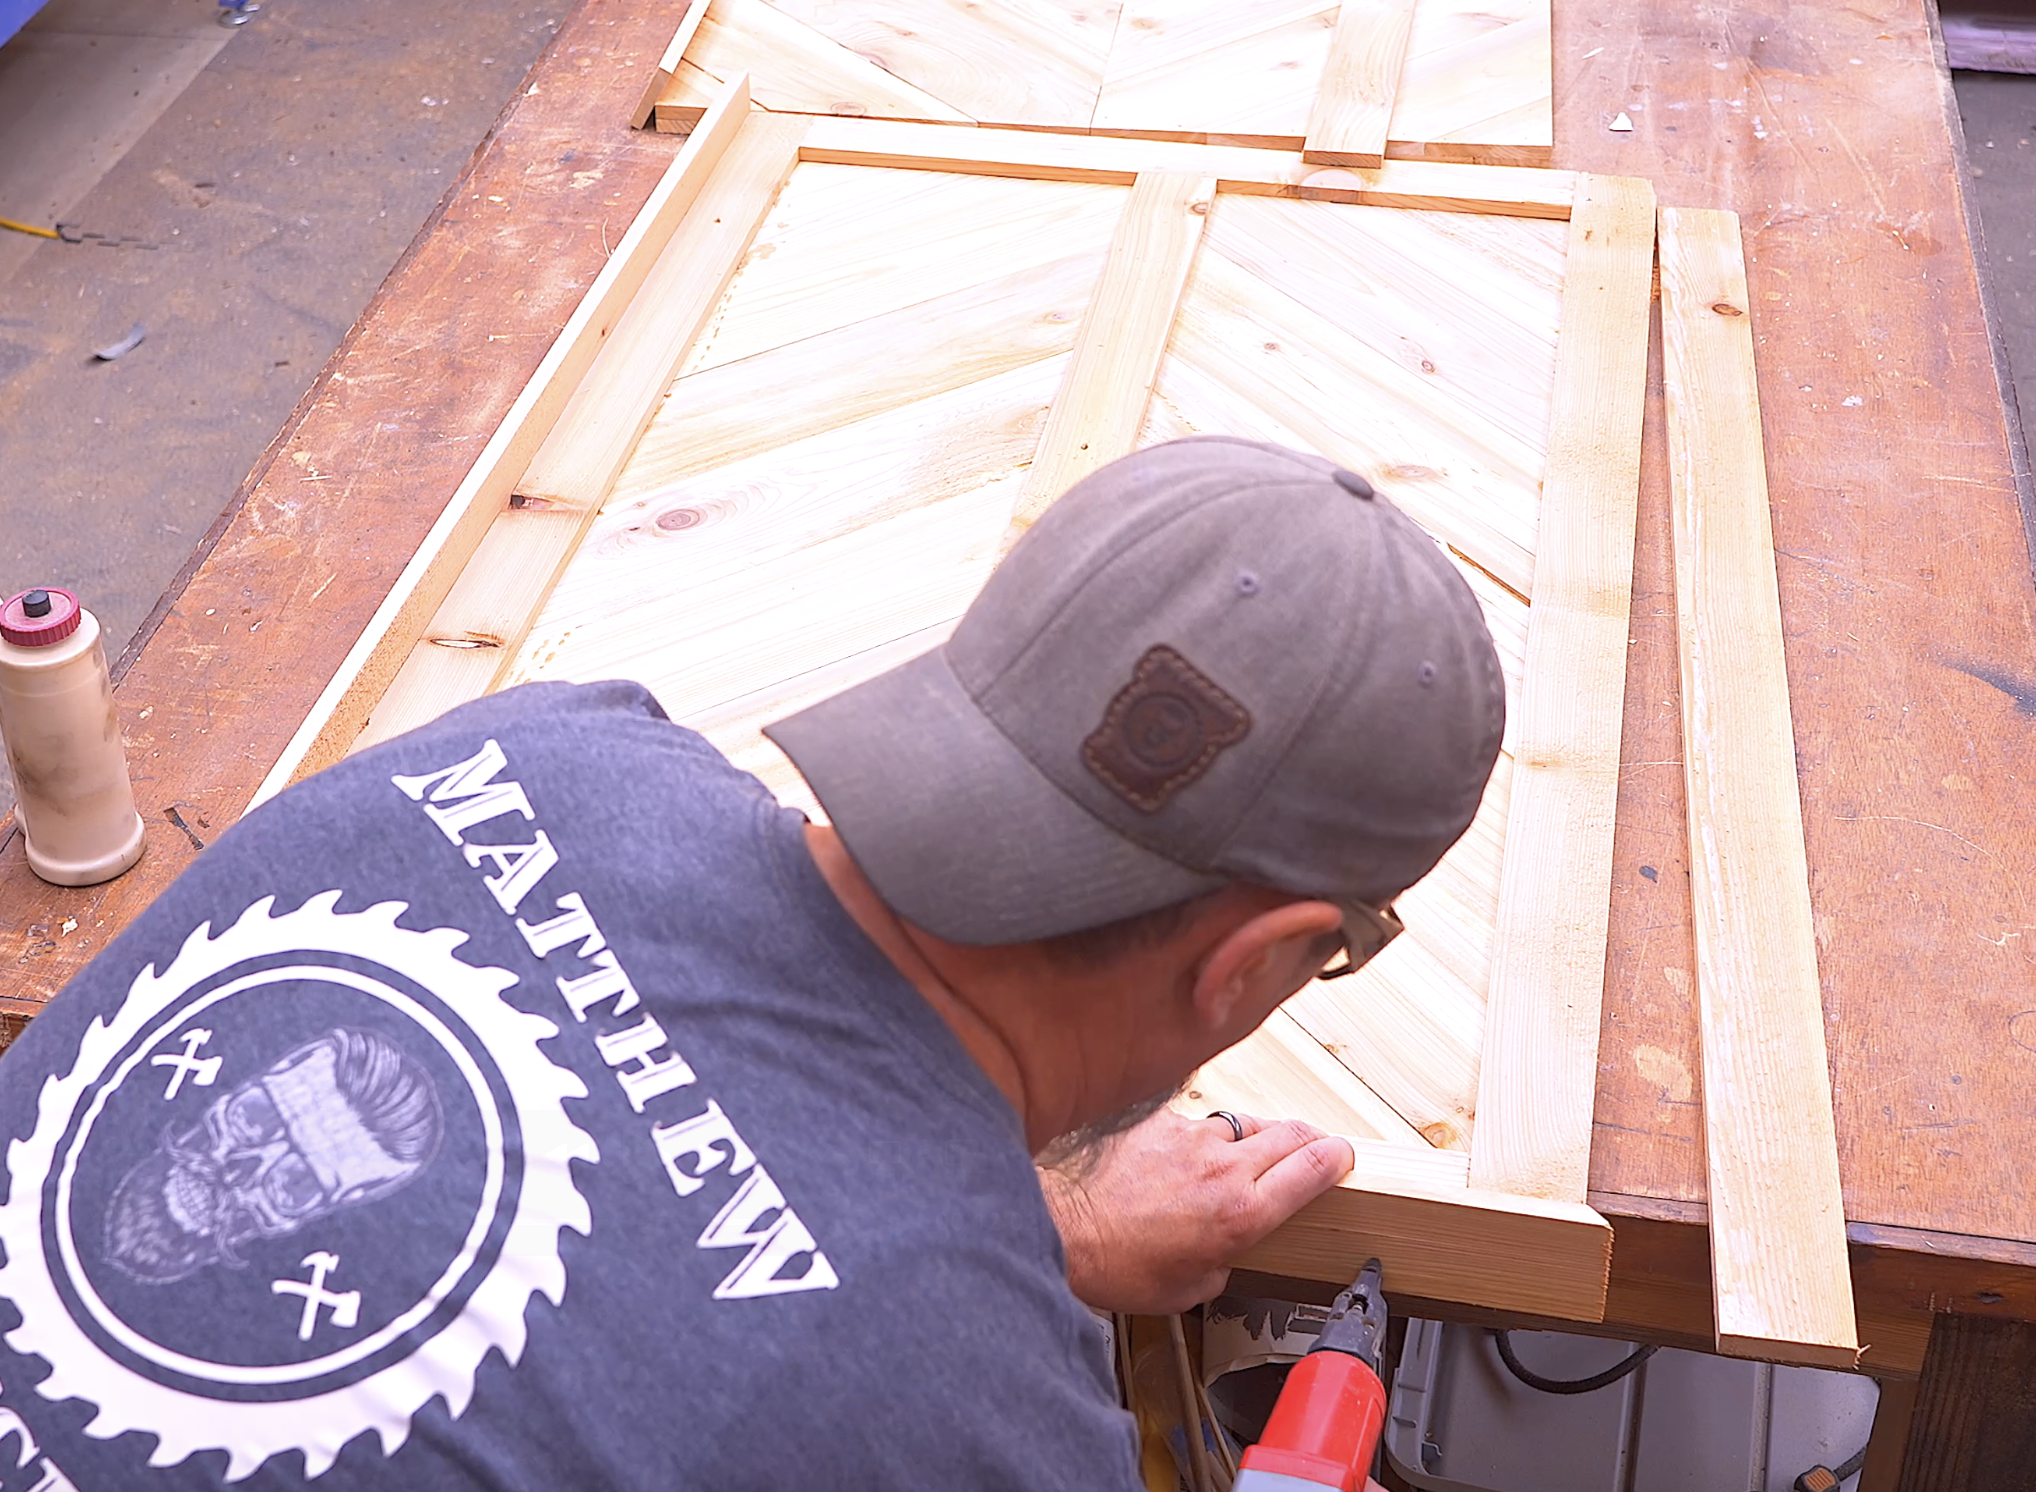
You can attach this trim with the wooden panels resting on your plastic table or by flipping them over on your workbench, either way works. Position the trim around the appropriate outside edges of each panel. Apply wood glue and secure the trim using brad nails.
Take your time aligning the edges and corners so everything looks clean. The trim should extend down around the edge of the original plastic tabletop when the cover is installed. That helps hide the plastic beneath and makes the finished project look much more like a real wooden table.
Once all the trim is attached, give the entire tabletop another light sanding. Pay attention to sharp corners, rough edges, and any spots where the boards may not line up perfectly. At this point, we've got our two decorative tabletop sections built!
All that's left is adding a protective finish and putting them to use.
Step 7: Apply a Protective Finish and Install the Table Cover
Applying the finish
For my project, I'm using an exterior-type urethane. Even though this is primarily a decorative tabletop cover, we still want to protect the wood from spills, food, moisture, and everyday use.
Start by making sure the entire surface is clean and free of sanding dust. Apply your finish according to the manufacturer's instructions, paying attention to drying times and any recommended sanding between coats.
Apply the finish evenly across the tabletop, including the exposed trim and edges. Let everything dry and cure completely before putting the cover into service. If you'll be serving food on the table, use plates, trays, and appropriate food-contact surfaces rather than assuming an exterior wood finish is suitable for direct food contact.
Installing the Wooden Table Cover
Once the finish has cured, it's time to see how everything looks!
Set up your plastic folding table on a flat surface and make sure it's properly locked into position. Take your first wooden tabletop panel and carefully position it over one end of the table. The decorative edge trim should slip down around the outside edge of the plastic top. Slide the panel into place.
Now repeat the same process with your second panel, making sure the two sections meet neatly in the center. And just like that, we've completely transformed the appearance of our plastic folding table!
One thing I really like about these cedar panels is how lightweight they are compared to a traditional wooden tabletop. They're much easier to handle, and when you're finished using the table, you can remove both pieces and store them away.
Before using the cover, make sure both sections fit securely and cannot slide unexpectedly. If you're planning to use the table around children, in busy areas, or where people may lean on its edges, consider a suitable way to secure the removable panels to the underlying table.
An Easy Upgrade for Storage and Transportation
There's one more little addition I'm considering for my own table cover. Since we've built this in two separate sections, why not make them easier to carry and store? I've been looking at adding a couple of inexpensive latches to the panels.
The idea is to stack the two sections together and use the latches to keep them connected during storage. Then, by adding a simple screw-on handle along the side, you could make the whole thing much easier to transport. This would be especially handy if you use folding tables for craft fairs, family gatherings, or events where you're constantly setting things up and taking them back down
Ready to Build?
I couldn't be happier with how this project turned out.
We took an ordinary plastic folding table, added some inexpensive cedar fence pickets, created a custom chevron-patterned tabletop, and completely transformed the way it looks. And we did all that without building an entirely new table!
The two-piece design makes the cover removable, the cedar helps keep the weight manageable, and the decorative edge trim gives everything that finished furniture appearance. It's one of those woodworking projects that reminds me why I enjoy building things so much.
Sometimes, you don't have to start with something complicated to end up with something impressive. And if this project seems like one you can tackle, you know what that means…
👉 Get up, get out, and get your build on.
Whether you’re new to woodworking or a seasoned pro, this project offers the perfect mix of functionality and creativity. Below I have the YouTube video linked for a step-by-step video tutorial for you to follow along with. If you’re a more “plans in the hand” person, click “Get Plan” down below for downloadable instructions. And if you’re ready to dive deeper into woodworking, check out my new course, “Woodworking Kickstart” (which is also linked below). It’s packed with step-by-step lessons to help you build confidence and skills, whether you’re a total beginner or an experienced DIYer. You’ll be building with confidence in no time.
Remember, creativity doesn’t have to be expensive; all you need is a little inspiration and a willingness to try.
Get Easy Step-By-Step Directions to build this by clicking the button below
⭐ 10,044 5 Star Reviews
📚 113 Plans to Choose From
🧩 Lego-Like Assembly Steps
📏 Exact Measurements
📋 Detailed cut and part list
🔍 X-Ray Views
🚀 Instant Delivery
