
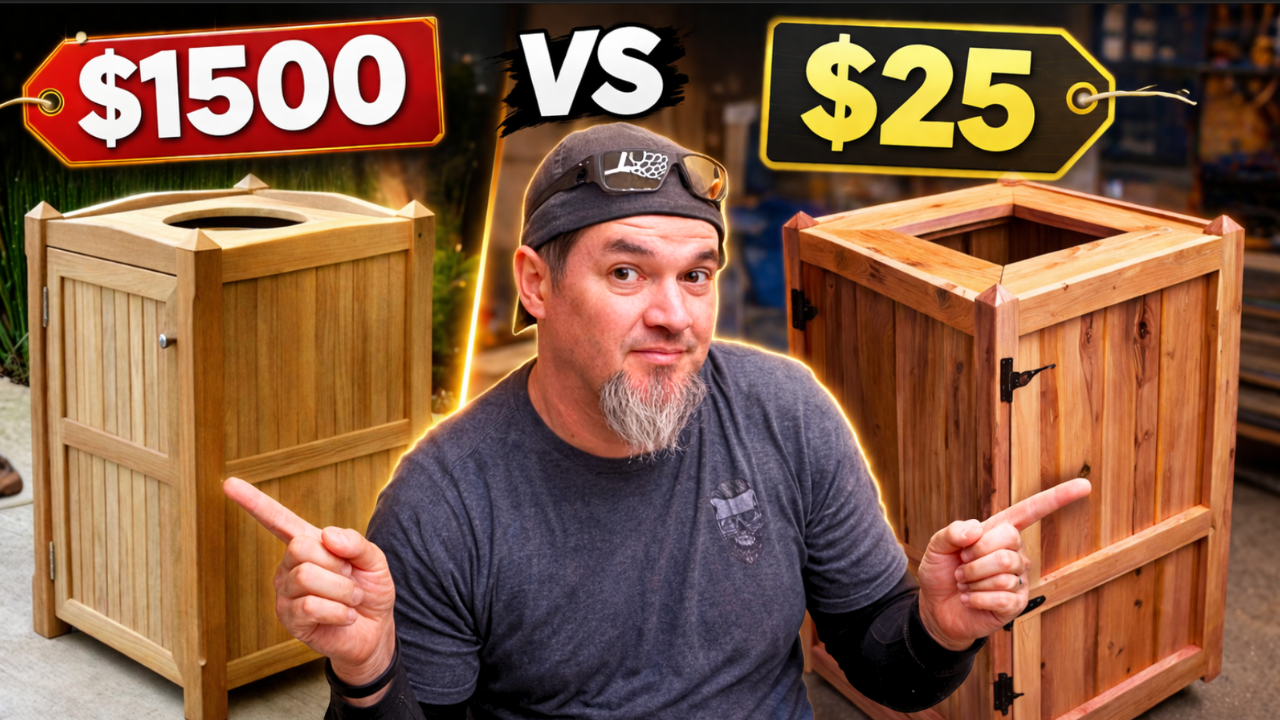
Big Box Stores Are Wanting $1000+ For This DIY Outdoor Trash Can Cover!
Let’s be honest—nothing kills the look of a clean patio or back porch faster than a trash can sitting out in the open.
That’s exactly what led to this build.
After seeing wooden trash bin covers selling anywhere from $700 to $1,500, it raises a pretty obvious question:
Why not just build one yourself?
In this guide, we’re breaking down exactly how to build a durable, great-looking wooden trash can enclosure using simple materials like 1x6 boards and basic tools. Whether you want to clean up your outdoor space or build something that could actually sell, this is one of those projects that checks both boxes.
Materials & Tools
One of the best parts about this project is that you don’t need expensive lumber.
Lumber
1×6 Boards (for panels)
2×4 Boards (for legs)
Hardware
Pocket hole screws
1 ¼" screws
Exterior screws
Wood glue
Hinges (strap hinges recommended)
Tools
Table saw
Miter saw
Drill/driver
Pocket hole jig
Clamps
Time To Bring Your Trash Can Cover To Life
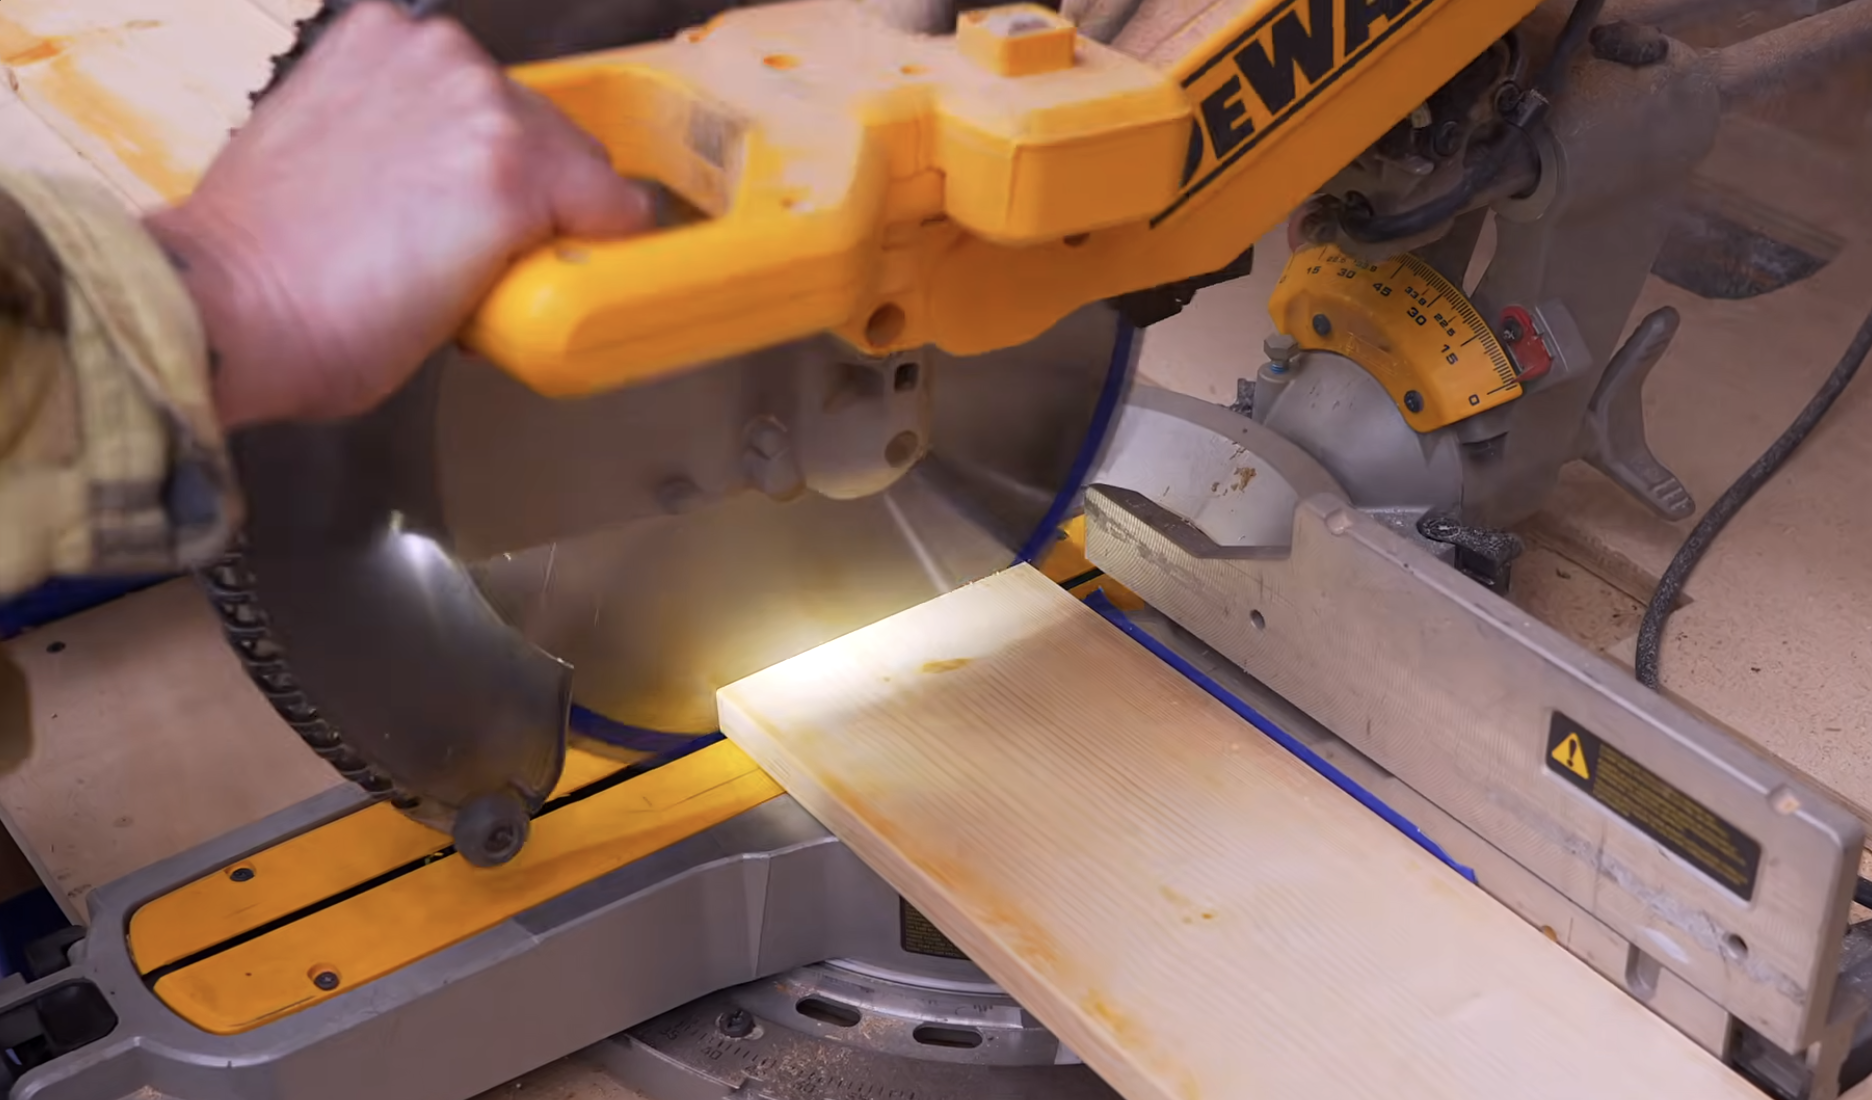
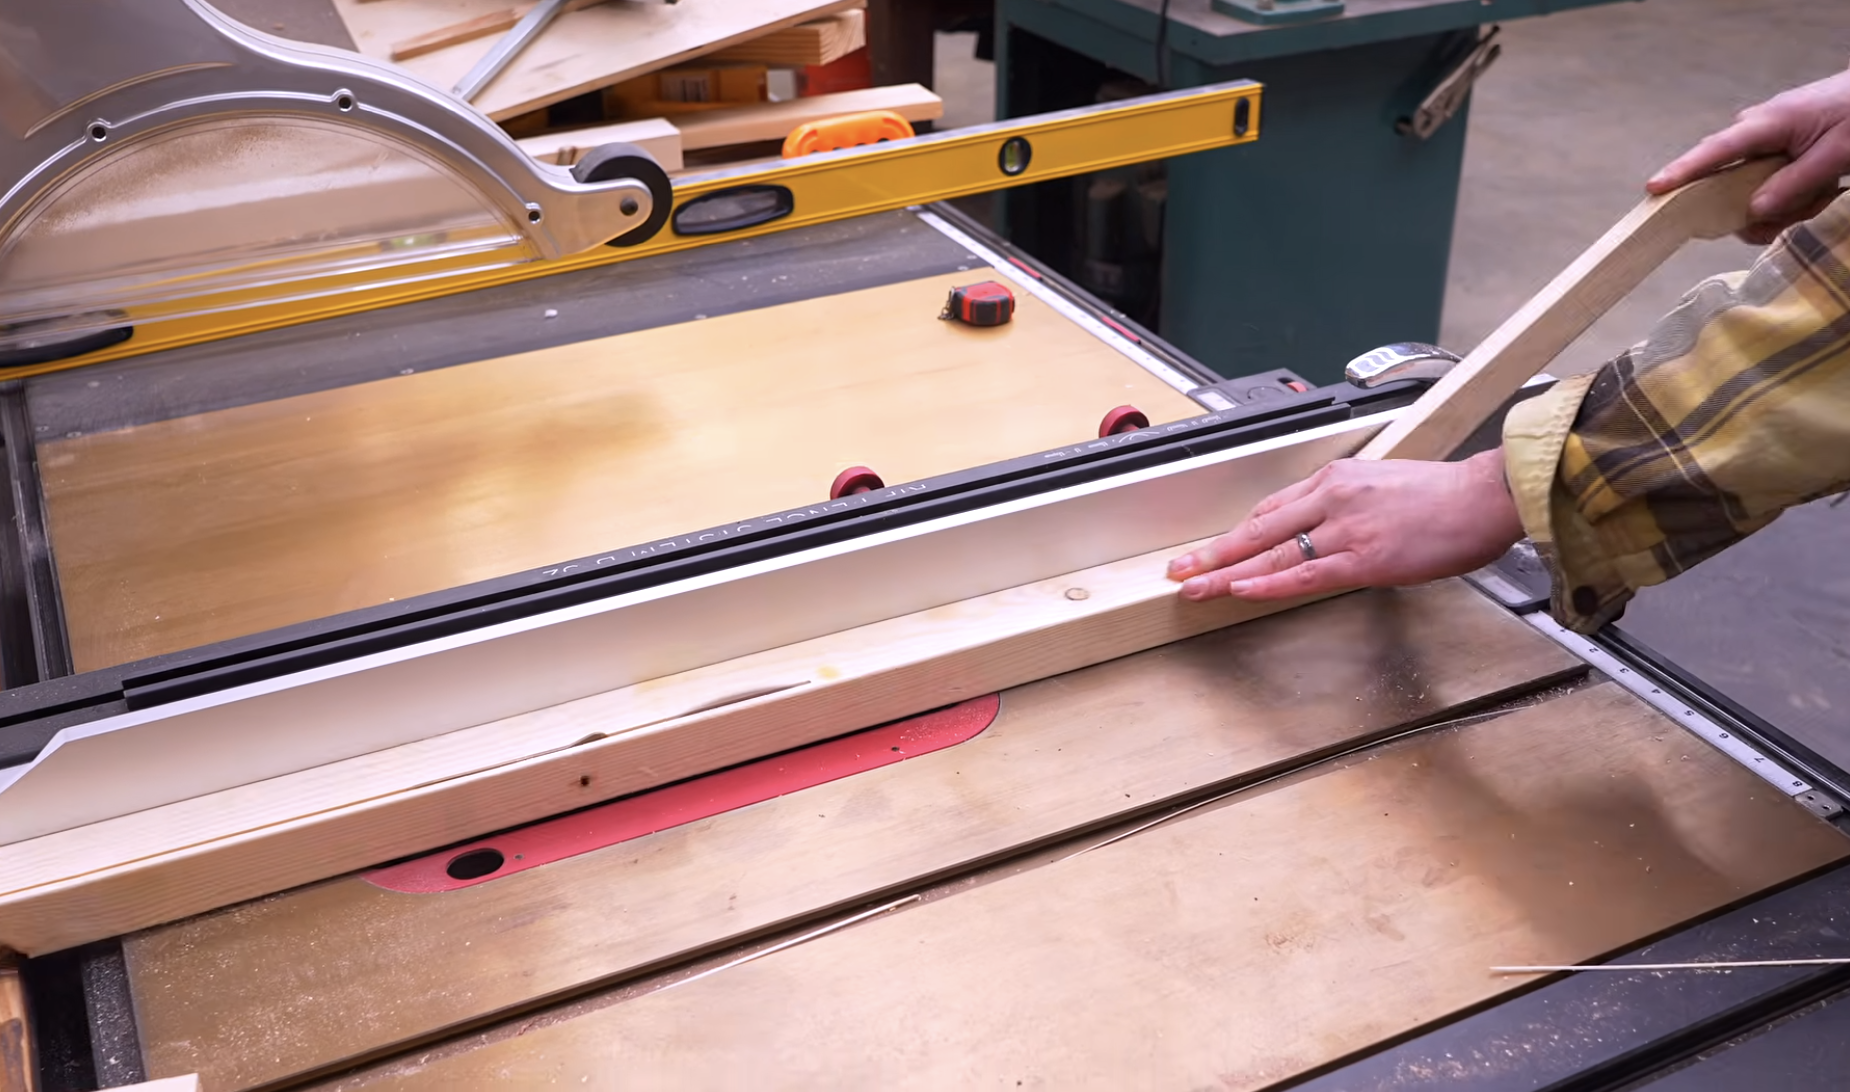
Step 1: Cut Panel Boards
Each panel is made from multiple boards joined together.
Cut:
Panel boards:
17 ½" long
Rip to 5" wide
Each side uses:
8 boards (for 2 smaller panels per side)
💡 Cut boards to length before ripping to remove bowing and get cleaner pieces.
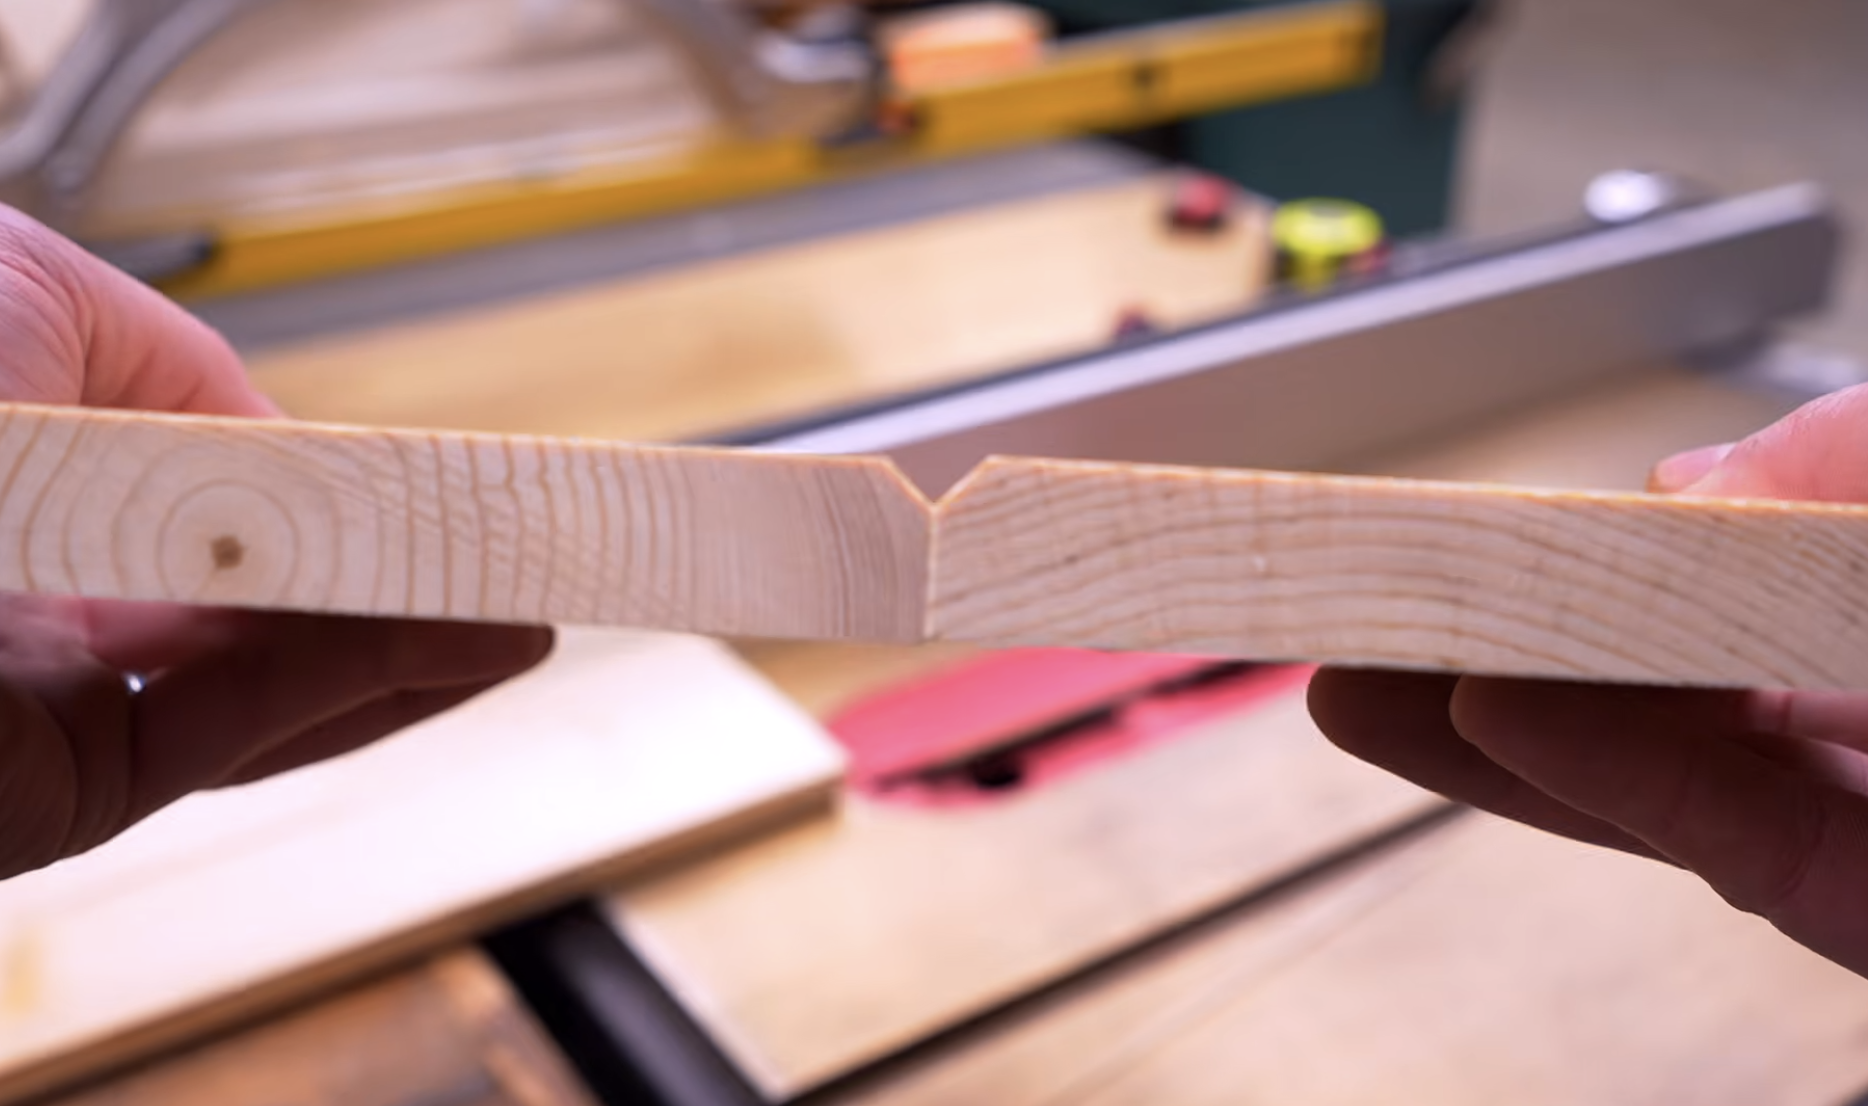
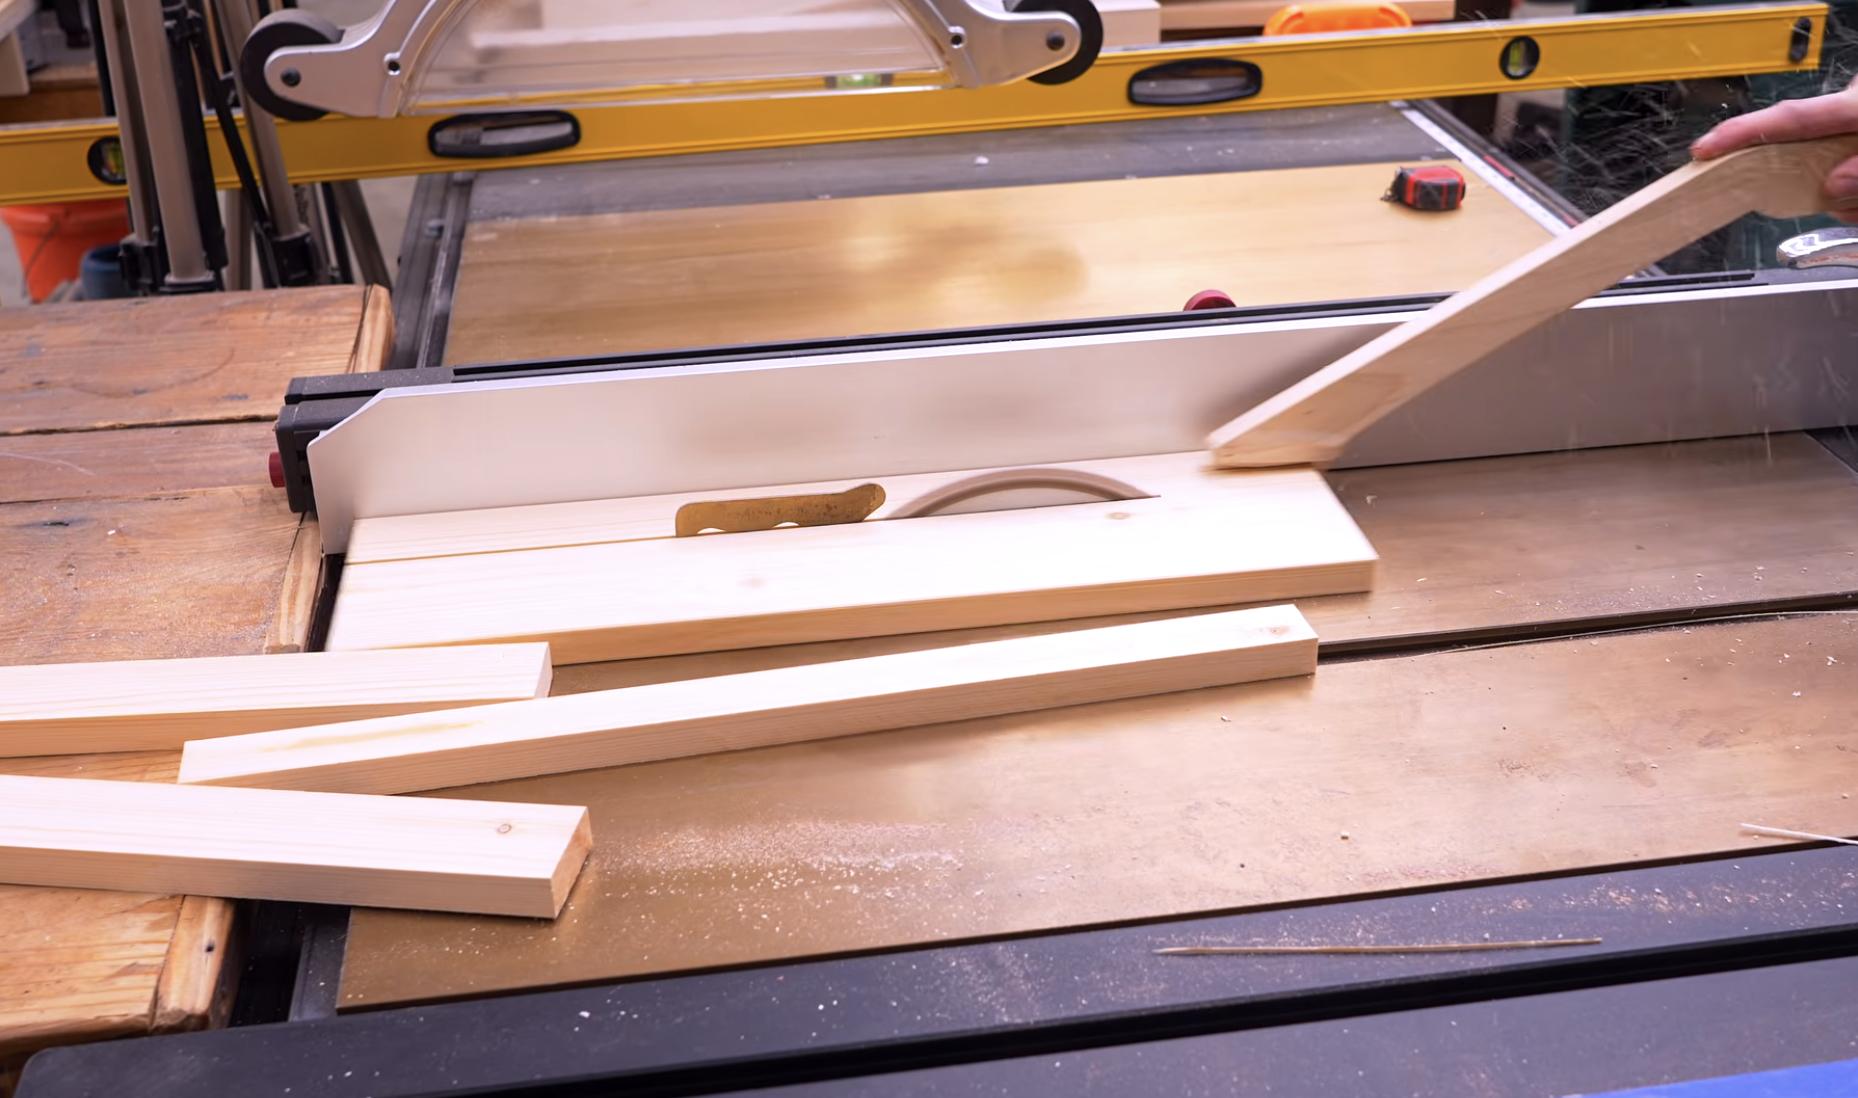
Step 2: Add Decorative V-Groove (Optional but Recommended)
This is a small detail that makes a BIG difference.
How:
Tilt blade to 45°
Set fence to 4 ¾"
Run both edges of each board
When assembled, this creates a clean V-groove seam between boards.
👉 This is one of those “cheap upgrades” that makes your build look high-end.
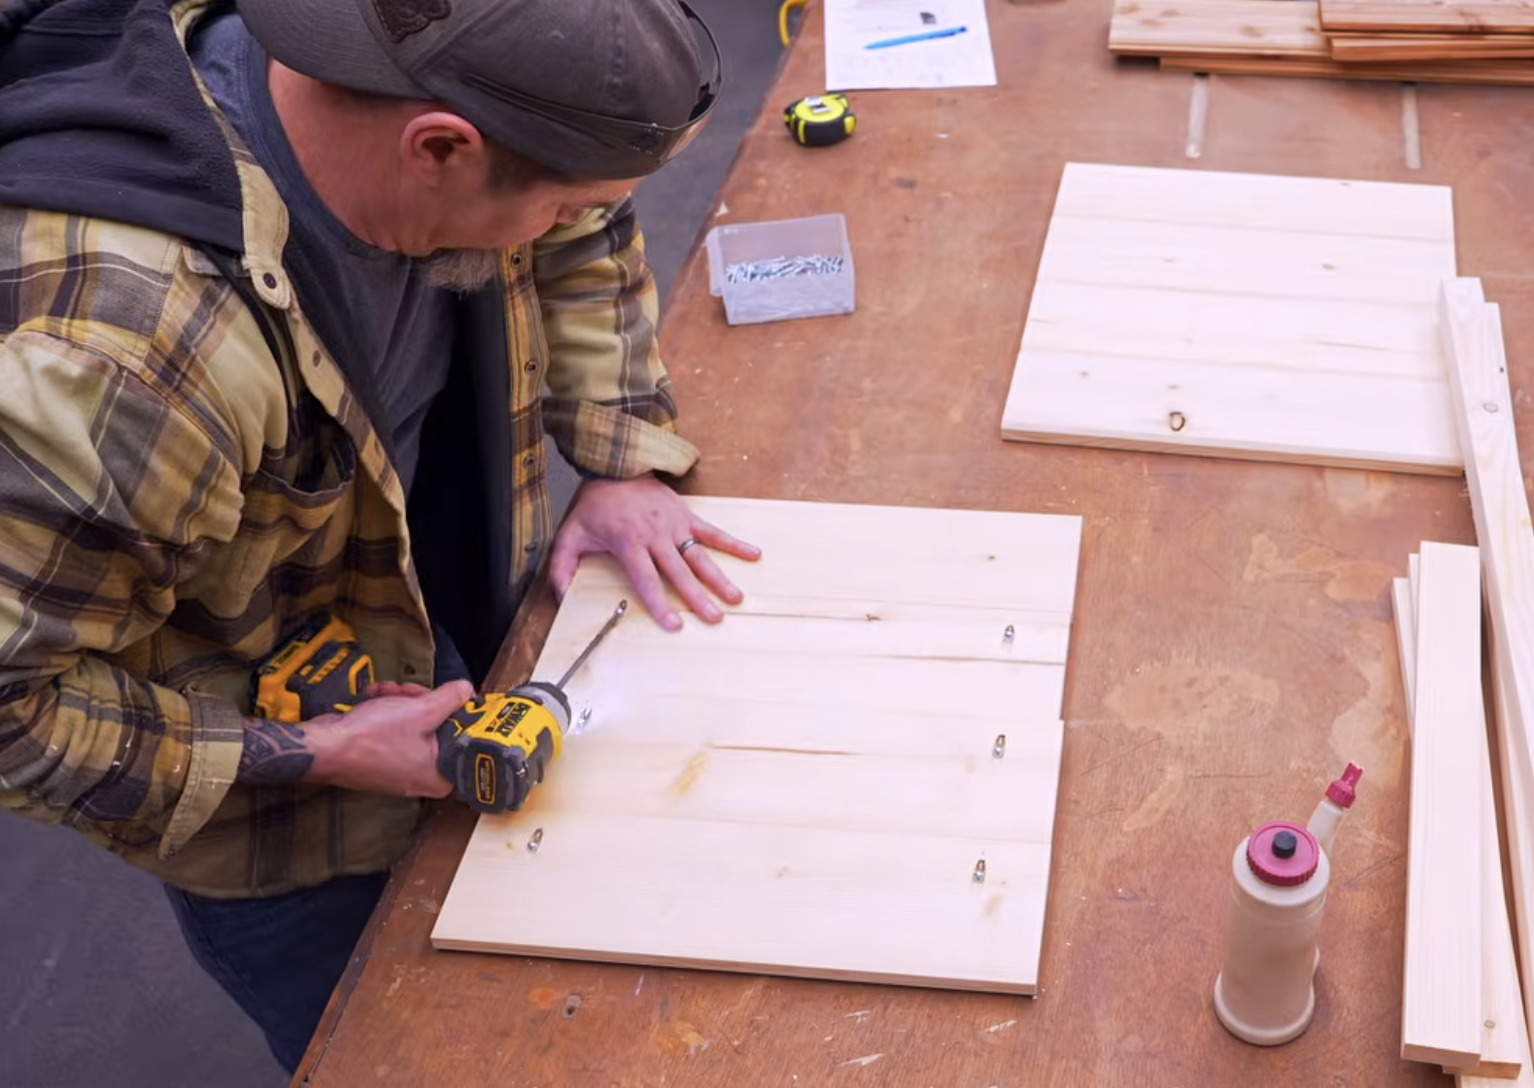
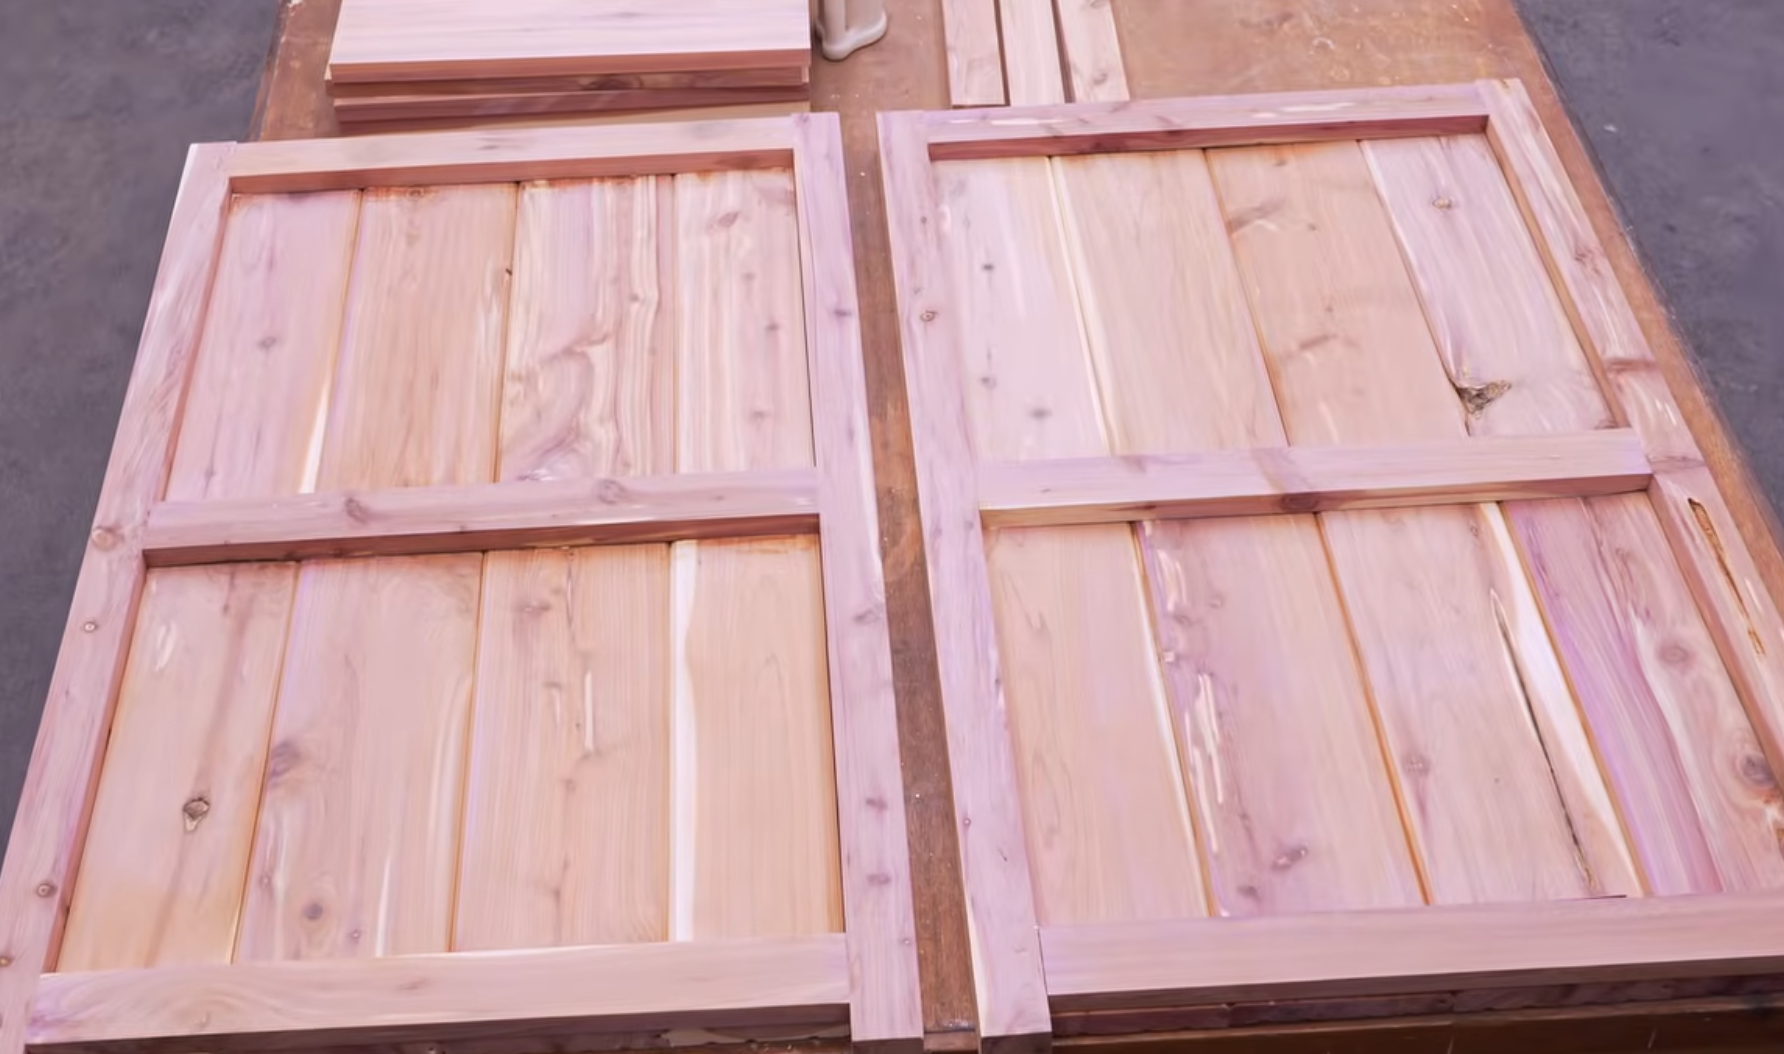
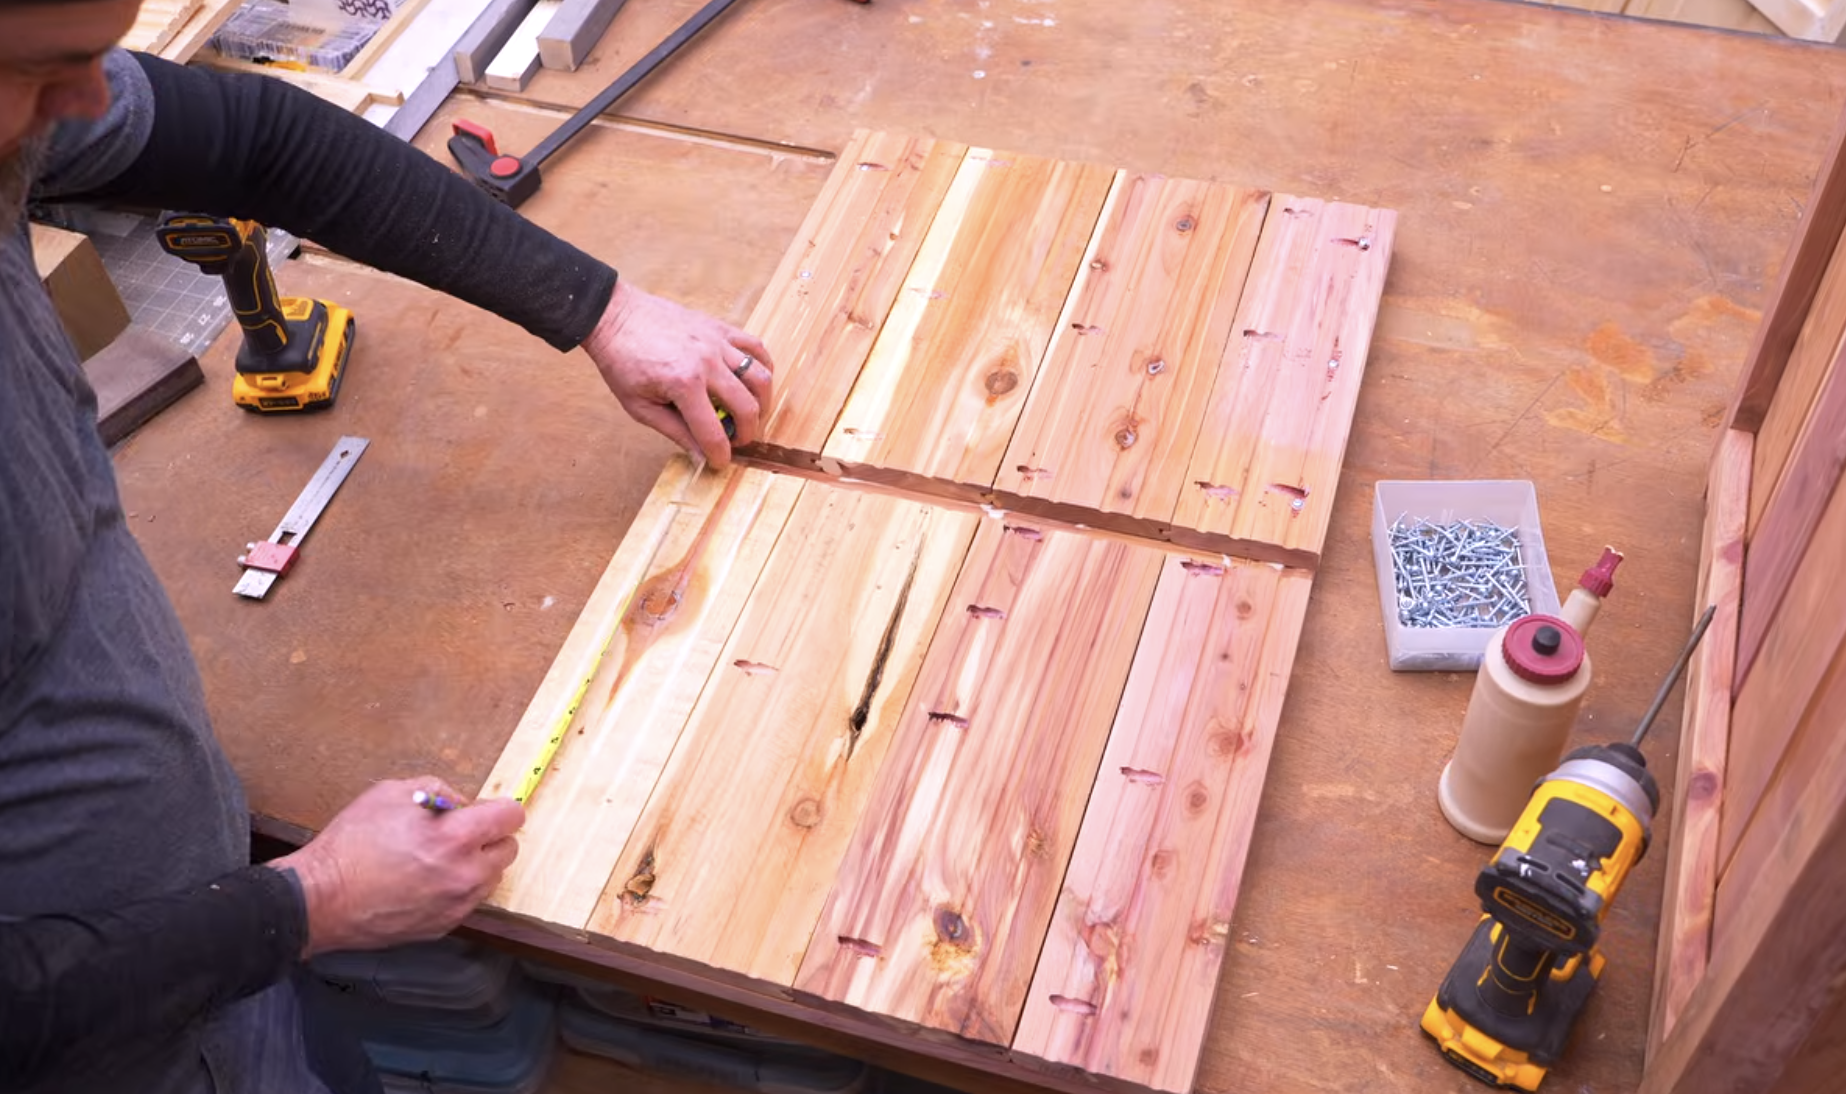
Step 3: Build Panel Sections
Each side panel is made from two smaller panels.
To assemble:
Drill pocket holes in 6 boards per panel
Lay boards flat
Add wood glue between edges
Drive pocket screws to join
Repeat to create:
2 panels per side
4 sides total
Step 4: Cut and Prep Legs
Cut:
4 legs
Size: 1 ½" x 1 ½" x 38"
(Just rip 2x4s down to size)
Optional upgrade:
Add a decorative point to the top:
Mark 1" down on all sides
Cut 45° angles around top
Creates a pyramid-style cap
👉 Small detail, big visual upgrade.
Step 5: Cut Horizontal Rails
Cut:
9 rails
Size: 2" wide x 20" long
These connect your panels and form the structure.

Step 6: Assemble Side Frames
Layout:
Each frame uses:
2 legs
3 rails
Rail placement:
3"
19 ½"
36 ¾" from bottom
Assembly:
Use pocket hole screws + glue
Clamp for square alignment
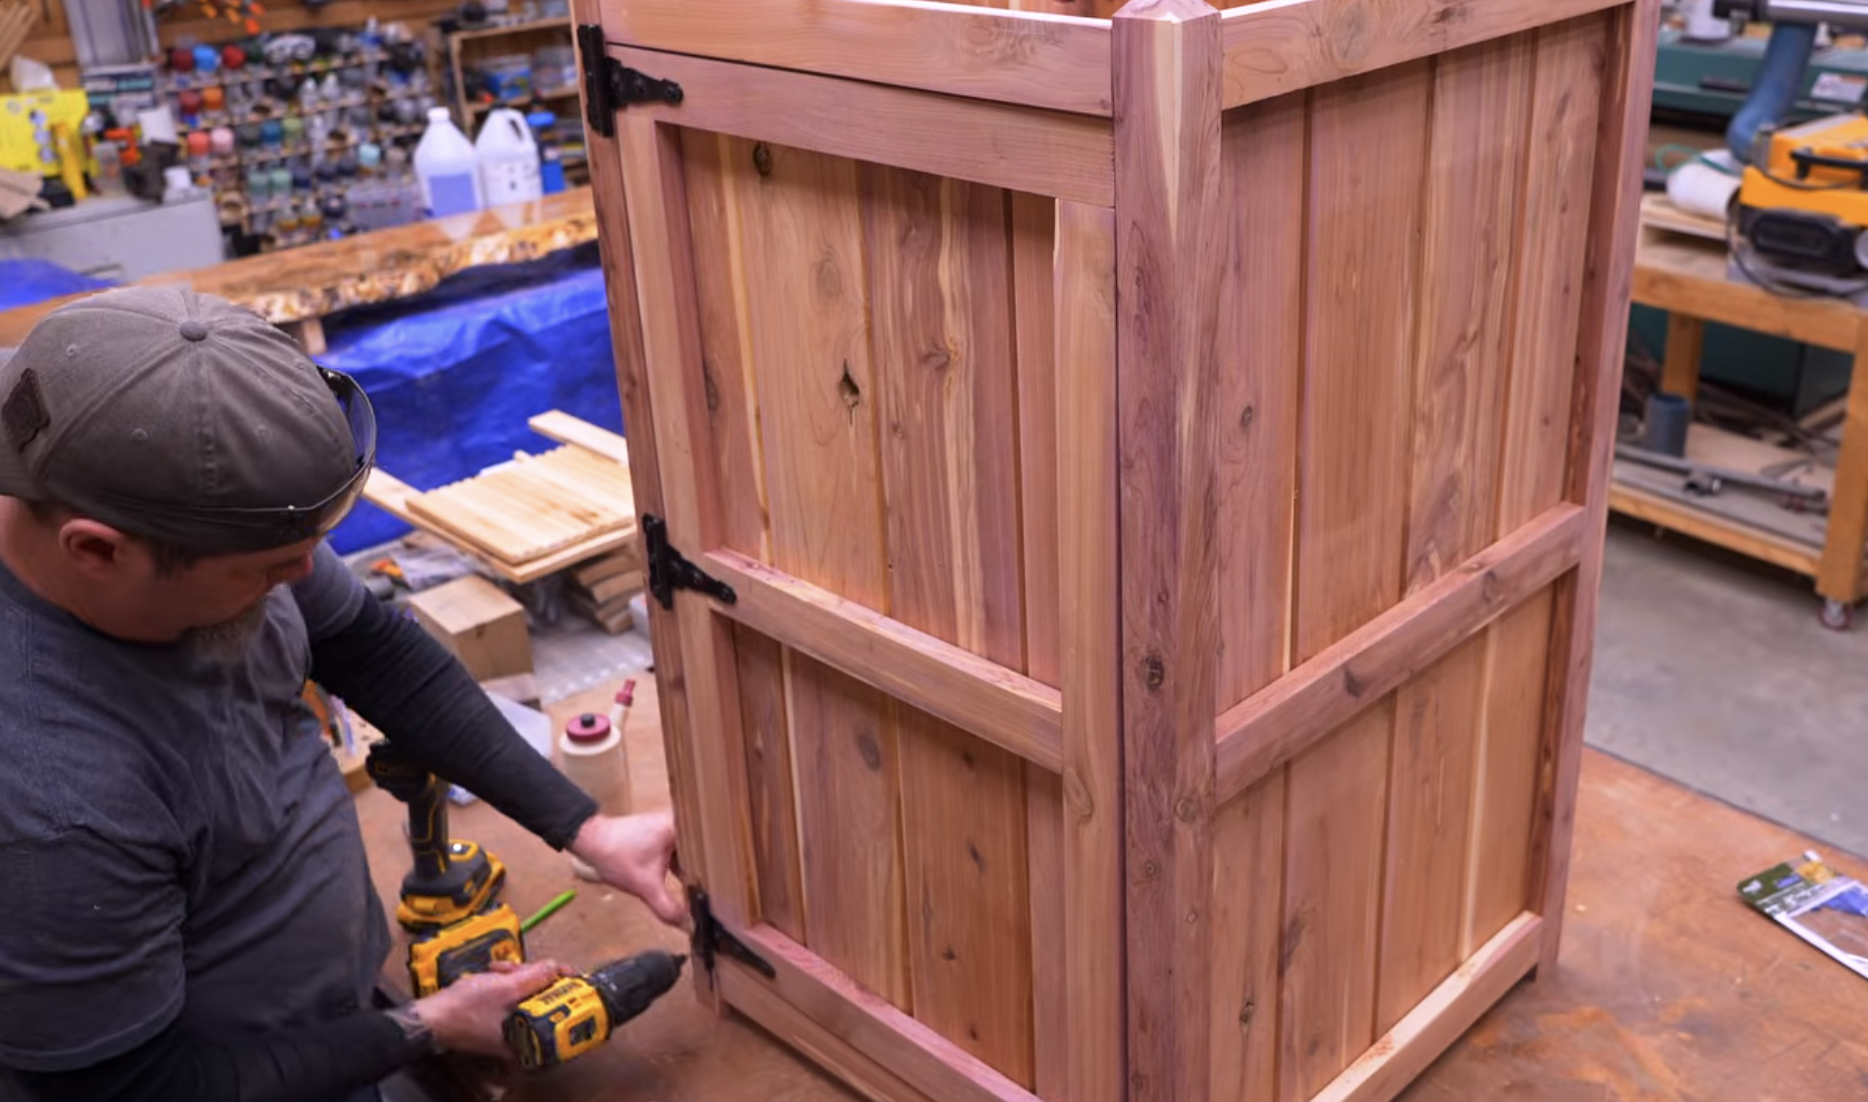
Step 7: Attach Panels to Frames
Position panels inside frame
Drill pocket holes into panel edges
Attach to legs with:
Pocket screws
Wood glue
Add a few screws top/bottom for extra strength.

Step 8: Build the Main Box
Connect side assemblies using rails
Attach back panels
Repeat panel install process
At this stage, you’ll have:
👉 3 solid sides complete
Step 9: Build the Door Panel
Frame pieces:
Sides: 27 ¾"
Top/bottom: 19 ¾"
Center brace: 15 ¾"
Assembly:
Build rectangular frame with center support
Trim panel inserts to:
16 ⅜" x 19 ¾"
Attach panels to back of frame
Step 10: Install Door
Add:
Stop block inside frame
Positioned 16" from bottom
Hinges:
Use strap hinges (T-hinges) for best look
Align with horizontal rails
Use spacers (washers) for even gaps
Optional:
Add handle or latch
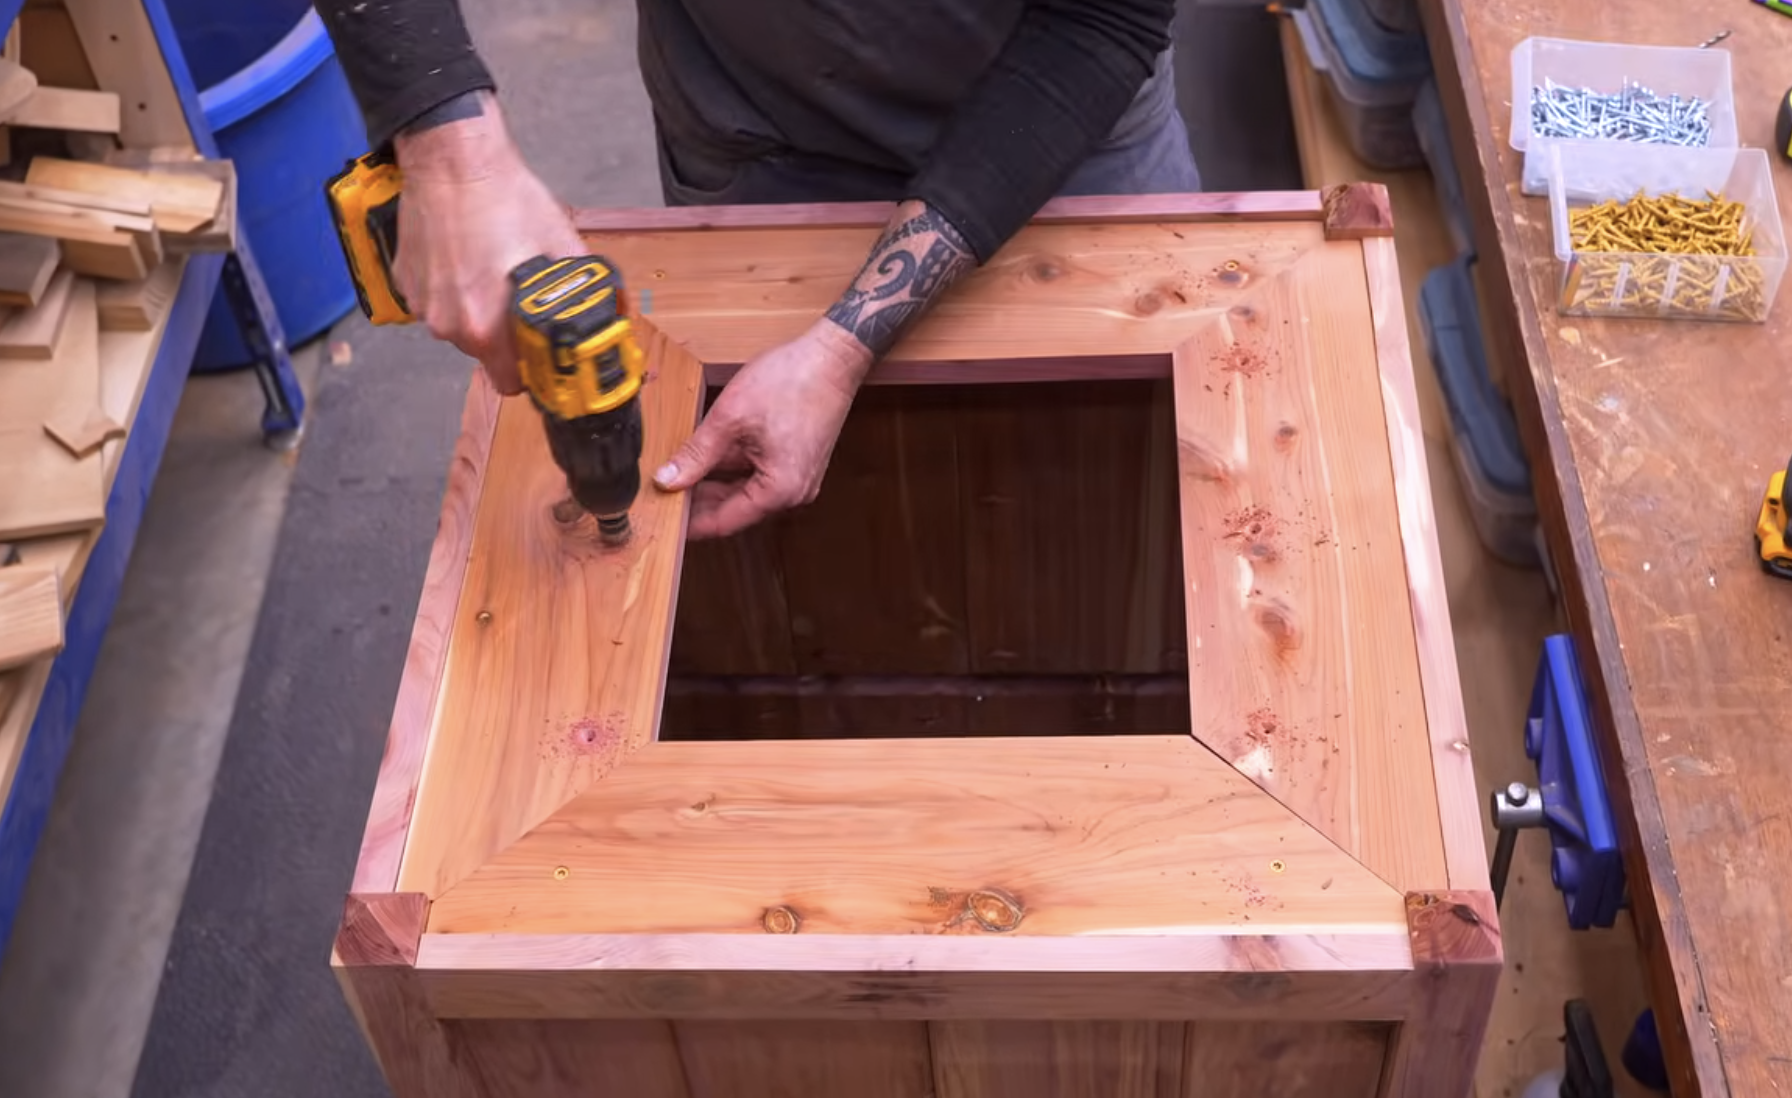
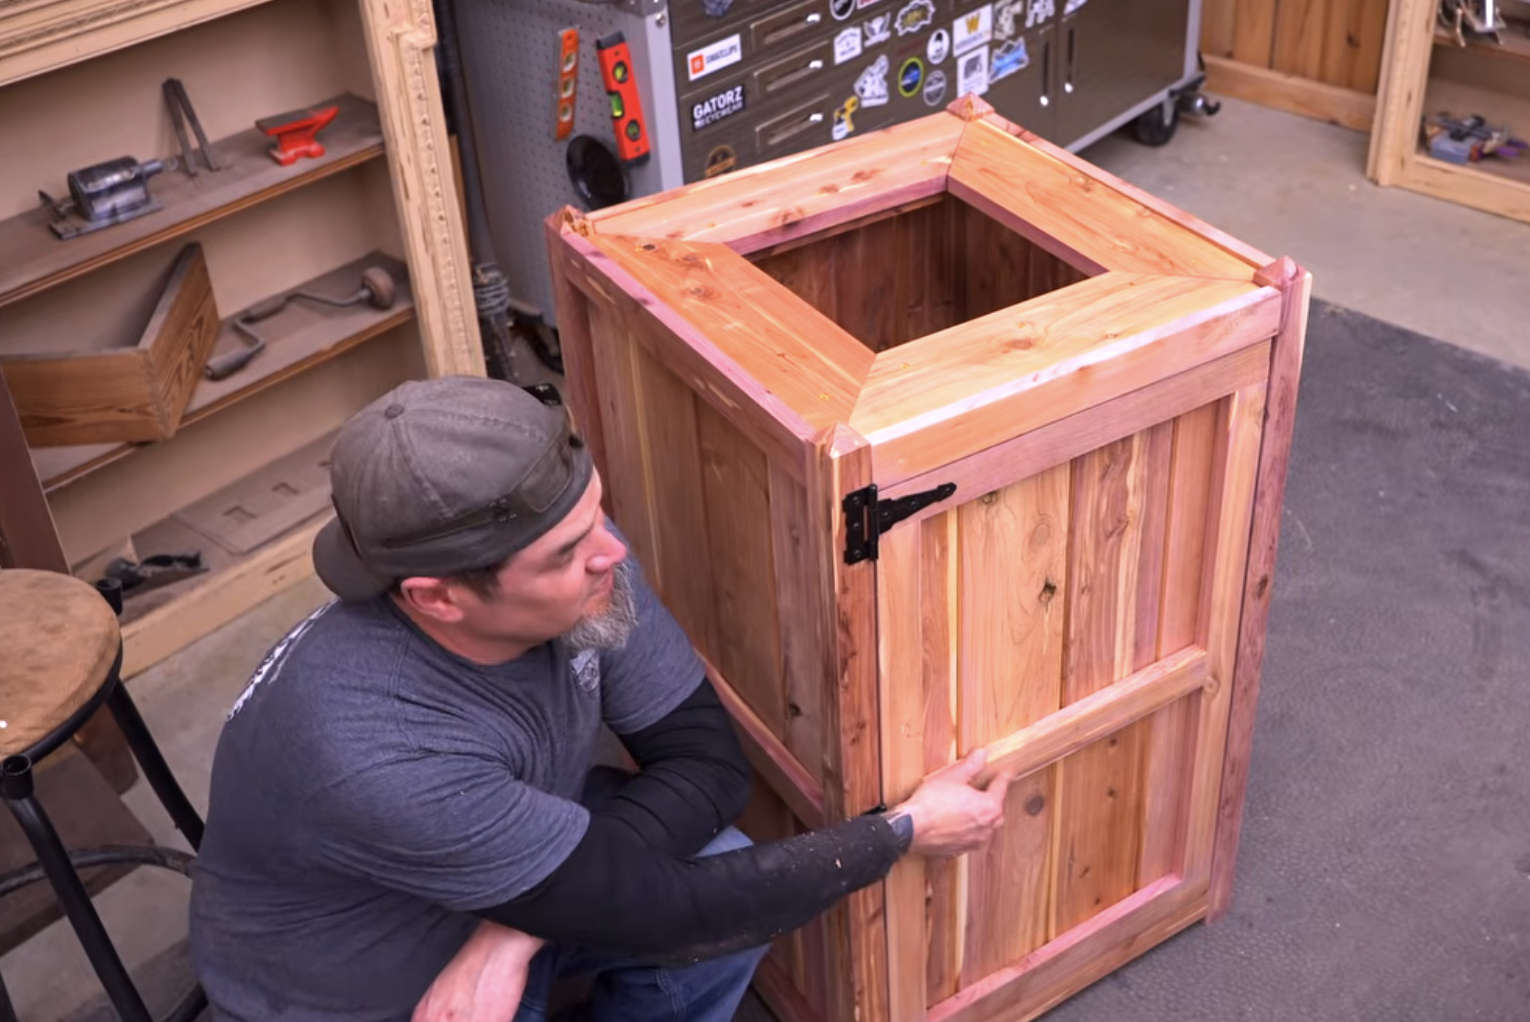
Step 11: Build and Install Top
Cut:
4 boards: 21 ½" x 5"
2 support rails: 2" x 20"
Steps:
Install support rails inside box
1 ½" inset from edges
¾" below top edge
Cut 45° angles on top boards
Trim tips square (¼") for tight fit
Attach with exterior screws
This creates a clean overhanging lid.
Finishing Options
This build looks great in a variety of styles:
High-end look:
Cedar + clear coat
Budget option:
Pine + stain
Modern:
Black paint + natural wood accents
Ready To Build?
This is one of those builds that really makes you think:
“Why are these selling for so much?”
And once you build one, you’ll understand—it’s not complicated, but it looks like something you’d buy from a high-end outdoor store.
If you’re looking for a project that:
Improves your space
Teaches useful techniques
Has real selling potential
This is a solid one to build next.
And if you’re ready…
You already know the next step.
👉 Get up, get out, and get your build on.
Whether you’re new to woodworking or a seasoned pro, this project offers the perfect mix of functionality and creativity. Below I have the YouTube video linked for a step-by-step video tutorial for you to follow along with. If you’re a more “plans in the hand” person, click “Get Plan” down below for downloadable instructions. And if you’re ready to dive deeper into woodworking, check out my new course, “Woodworking Kickstart” (which is also linked below). It’s packed with step-by-step lessons to help you build confidence and skills, whether you’re a total beginner or an experienced DIYer. You’ll be building with confidence in no time.
Remember, creativity doesn’t have to be expensive; all you need is a little inspiration and a willingness to try.
Get Easy Step-By-Step Directions to build this by clicking the button below
⭐ 10,044 5 Star Reviews
📚 113 Plans to Choose From
🧩 Lego-Like Assembly Steps
📏 Exact Measurements
📋 Detailed cut and part list
🔍 X-Ray Views
🚀 Instant Delivery
