
DIY Rustic Wooden Bench (Made from a $10 2x12!)

Functional & Iconic
I’m really pumped about today’s build because this is one I’ve wanted to share for a long time. It checks all the boxes: cheap, easy, and something you can actually sell for a profit. I kept seeing rustic benches like this going for $500 or more, and I thought—why not figure out a way to build one with simple tools and inexpensive lumber?
So that’s exactly what I did. We’re going to make a rustic wooden bench using nothing more than a $10 2x12, a jigsaw, and some basic shop tools. The cool part? We’re even going to cut those fancy angled mortises for the legs—without needing a drill press or an expensive jig.
This is one of those builds that you can knock out in an afternoon, and it’s going to look like a high-end piece of furniture.
Materials & Tools
1 Construction-Grade 2x12 (10–12 feet long)
Jigsaw with Adjustable Angle Plate
Miter Saw
Drill
Screws
Mallet or Hammer
Wood Glue
Sander
Scrap Hardwood for Wedges
Dowels (Optional)
Time To Bring Your Rustic Bench To Life

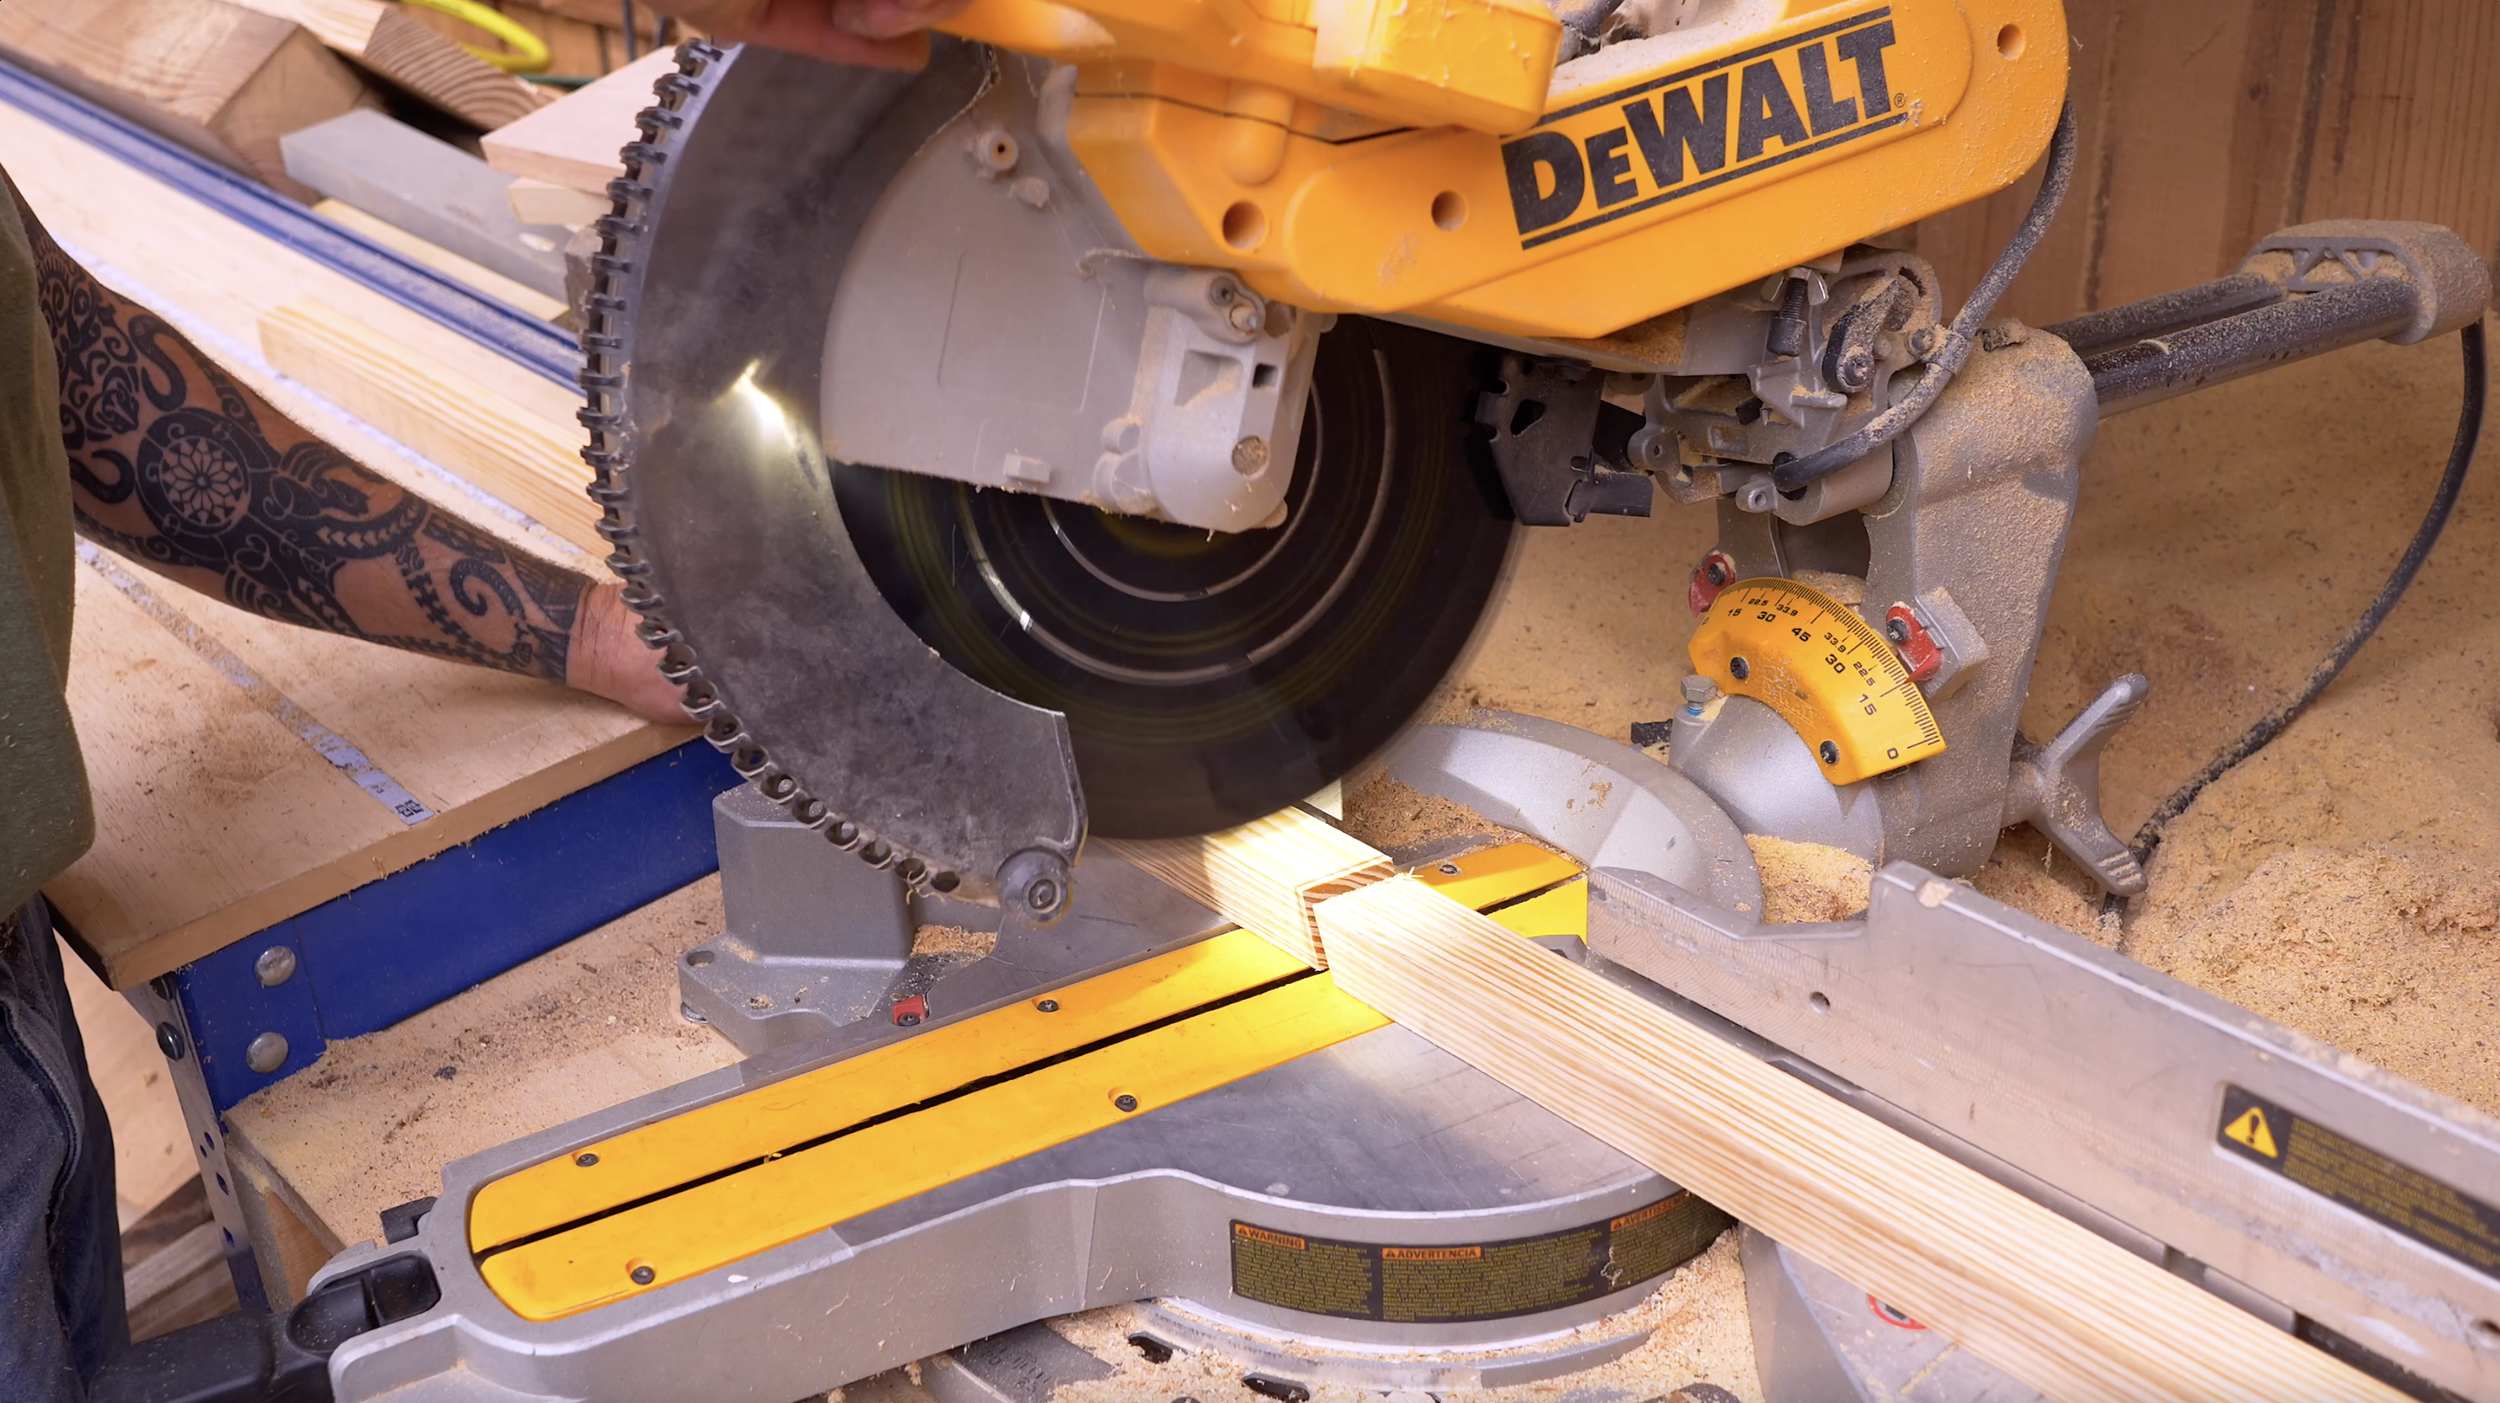
Step 1: Cut the Bench Top
Start by cutting your 2x12 to 60 inches. That’ll be the bench top. The leftover piece of the board will be used to cut legs and supports later.

Step 2: Rip the Legs
From the leftover board, cut four strips for your legs. Each strip should be 1 ¼" by 1 ½". Don’t worry about the final leg length just yet—we’ll trim them later once everything is fitted.
Step 3: Cut the Leg Angles
Here’s where you can make it as simple or fancy as you want:
Simple option: On a regular miter saw, cut each leg with a 15° angle.
Fancy option: If you’ve got a compound miter saw, cut both a 15° bevel and a 15° miter. This gives your bench that “kicked-out” look.
Label your legs Left and Right so you don’t get mixed up later.
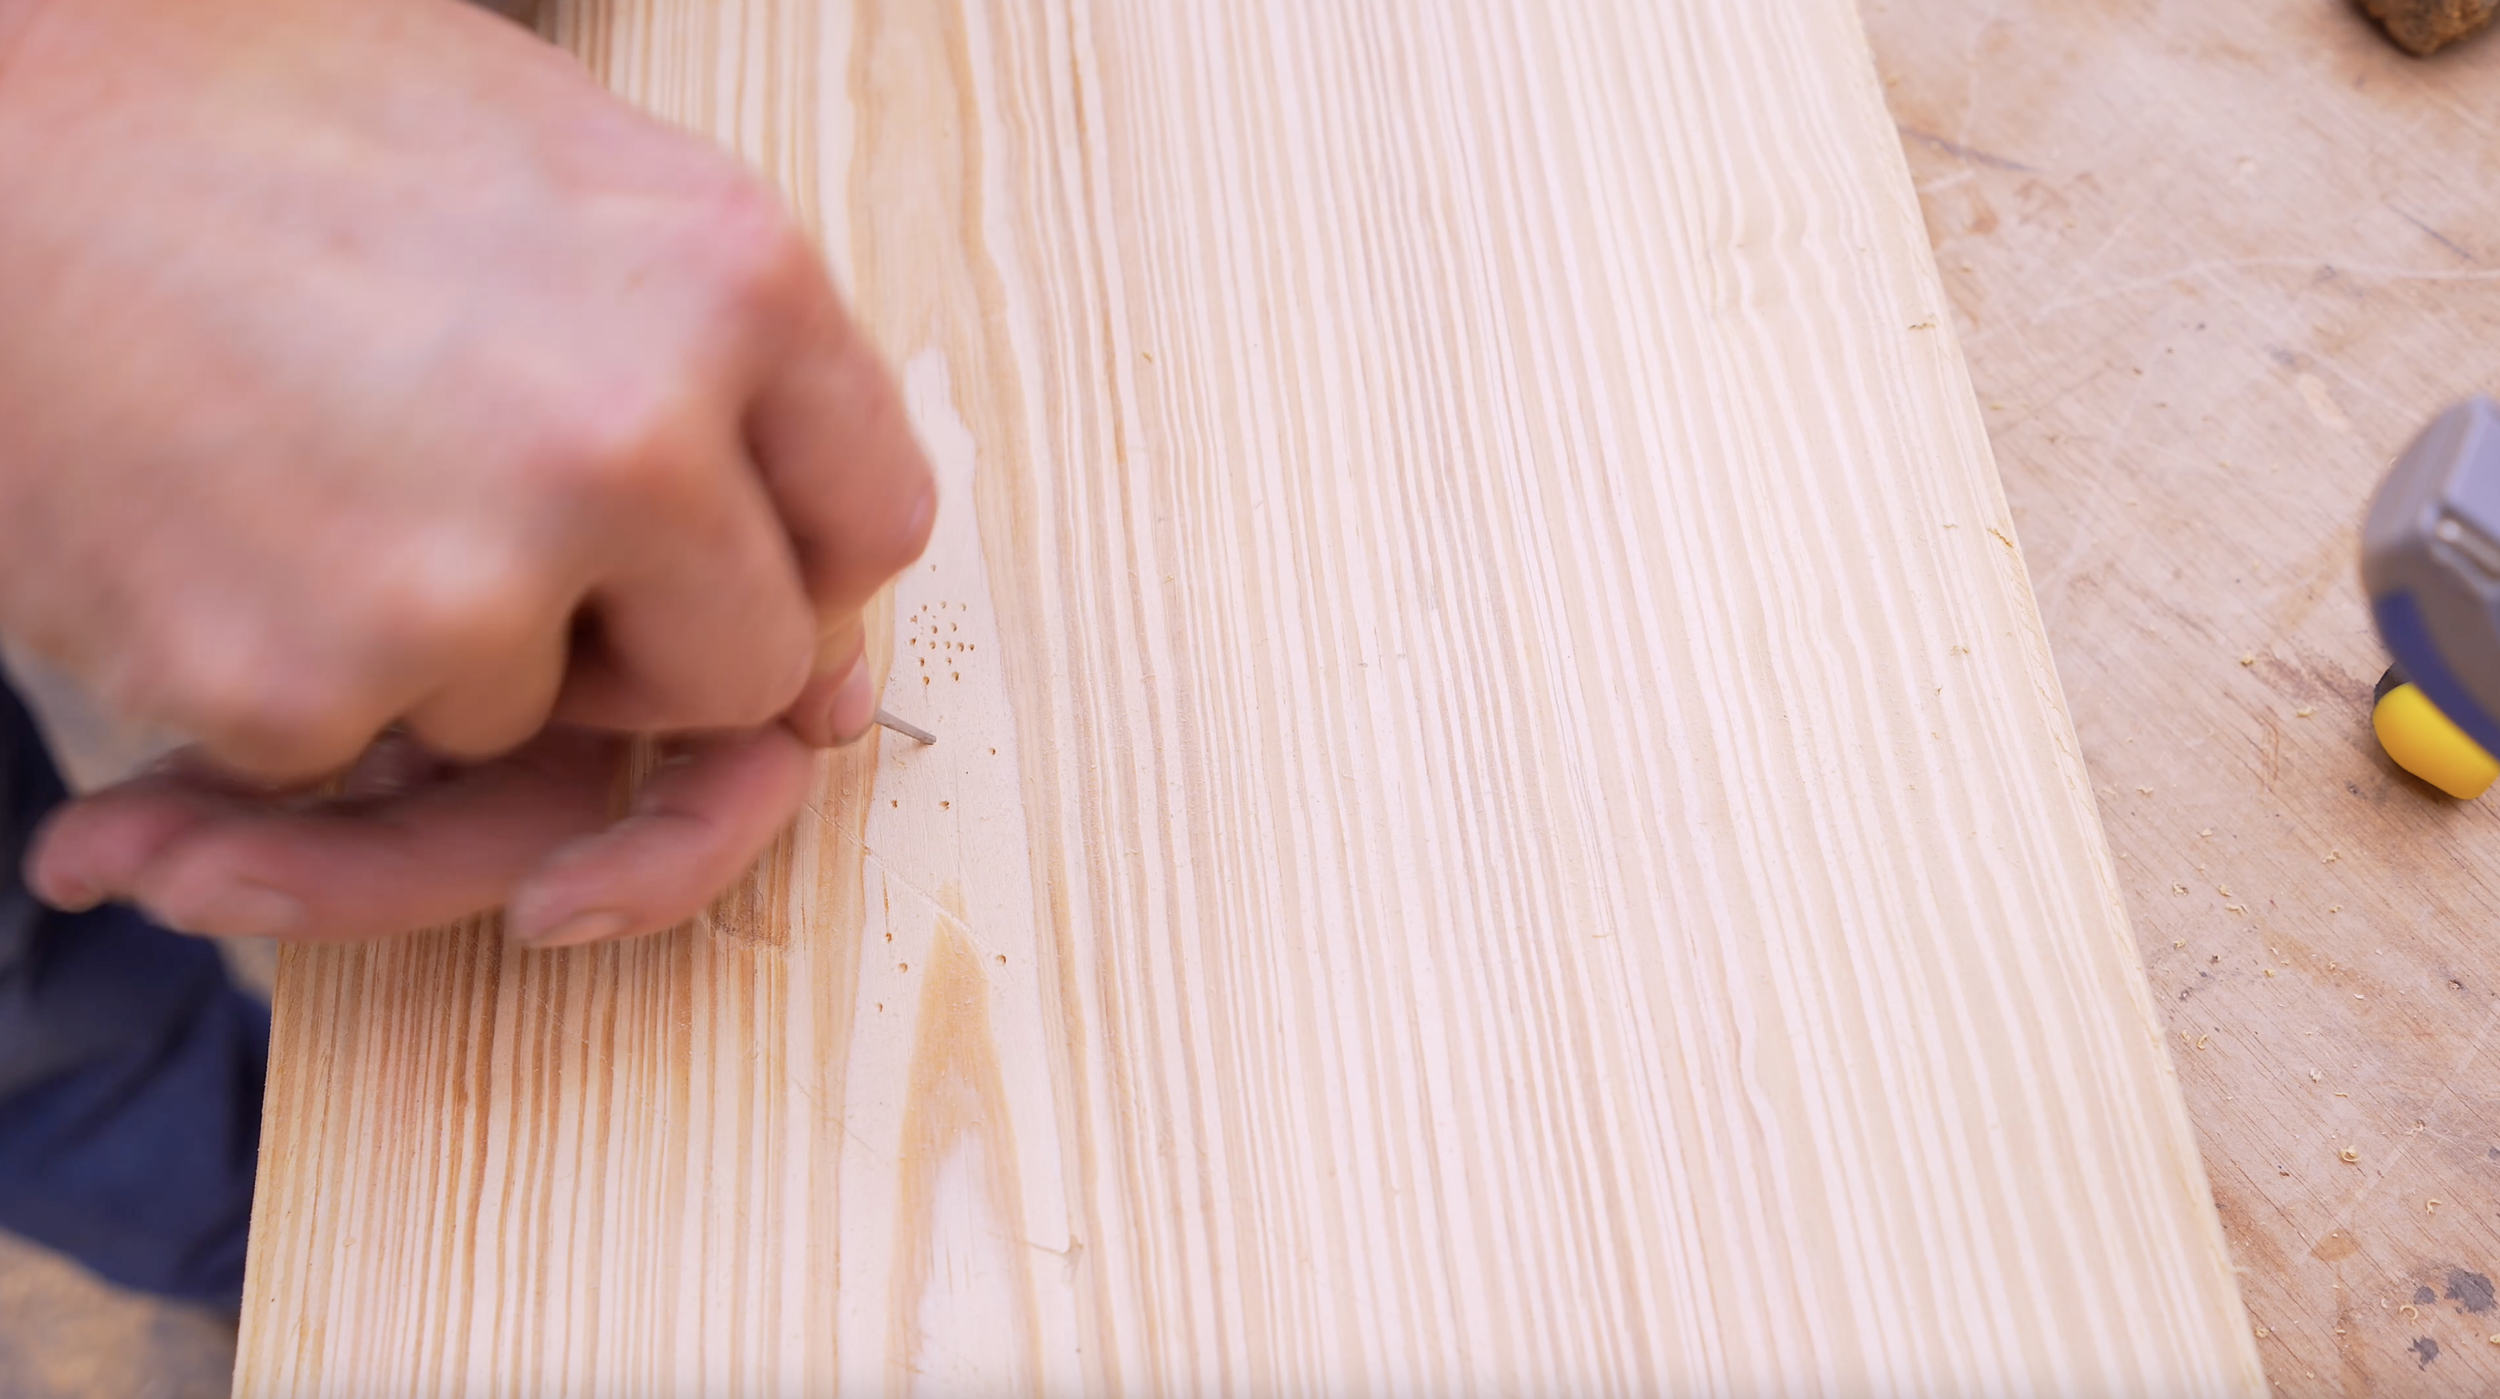
Step 4: Pick Your Bench Top Side
Flip your board over and decide which side will face up. If you like the rustic look, pick the side with knots, cracks, or saw marks. Sand it smooth, then distress it if you want more character (hit it with a hammer, wire brush the grain, even poke a few “worm holes”).
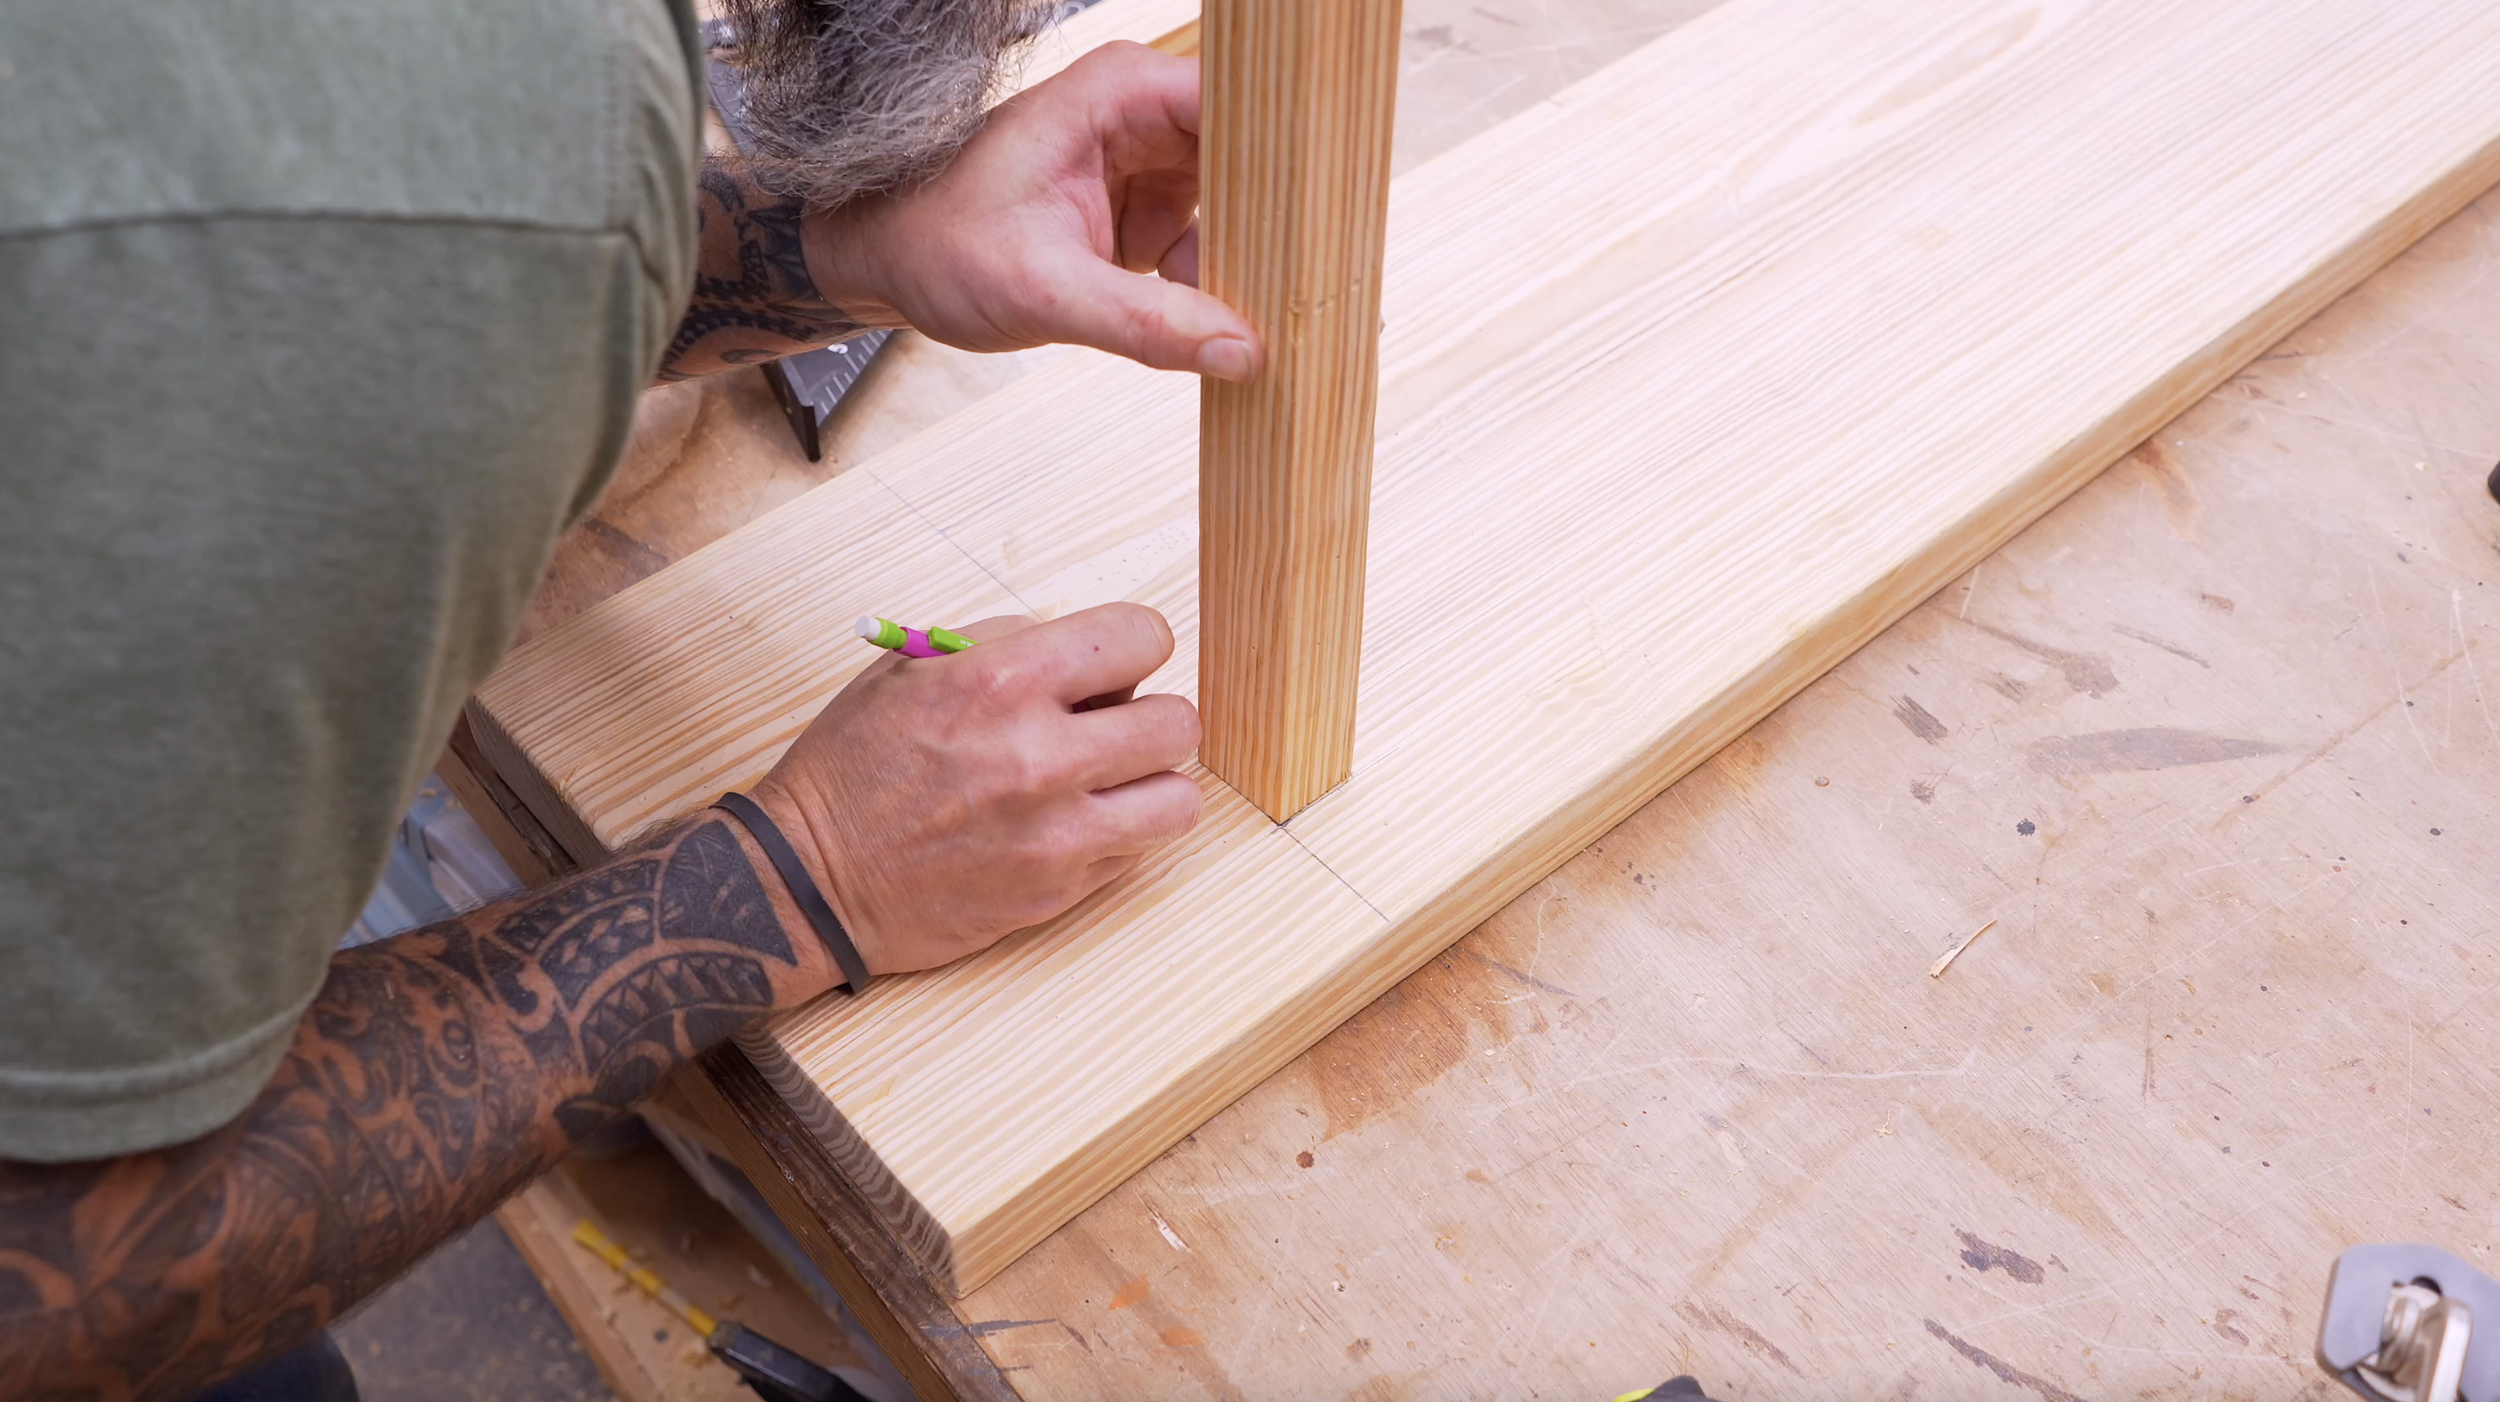
Step 5: Mark the Mortises
Each leg will slot into a mortise cut into the bench top. Measure:
6 ½" from each end
2" from each side
Trace each leg’s footprint where it will sit. Remember, the mortises are angled, so your jigsaw blade needs to be tilted at 15°.
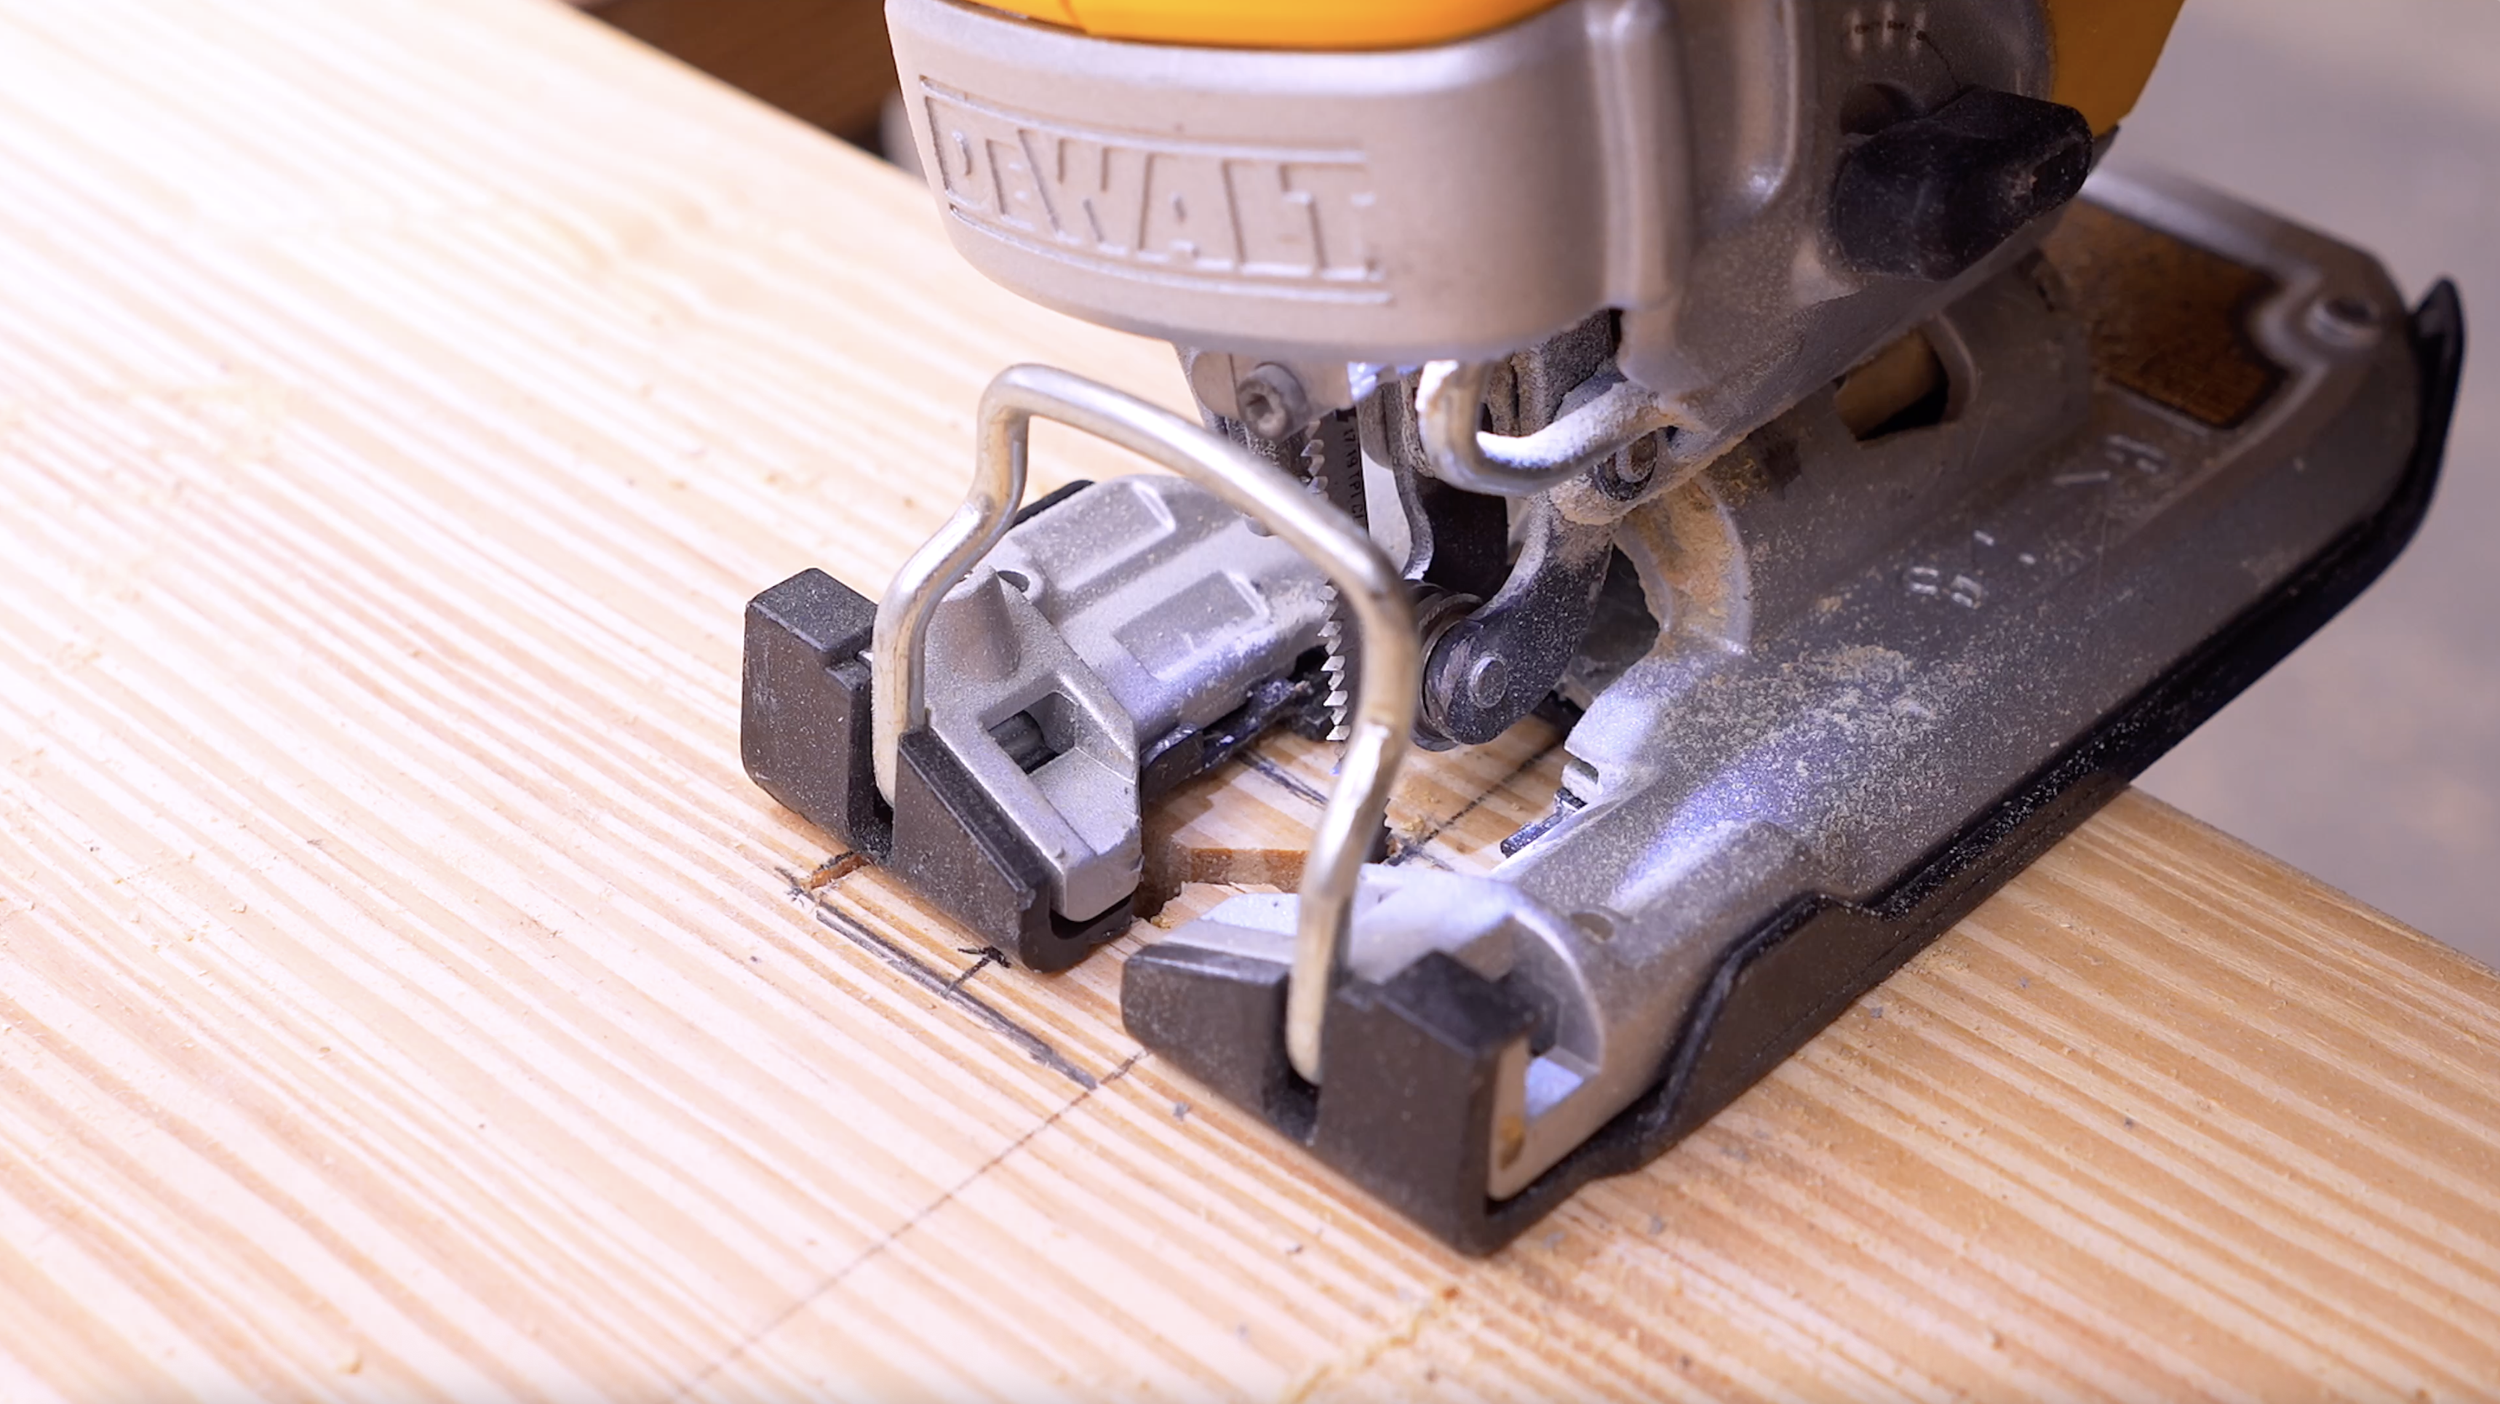
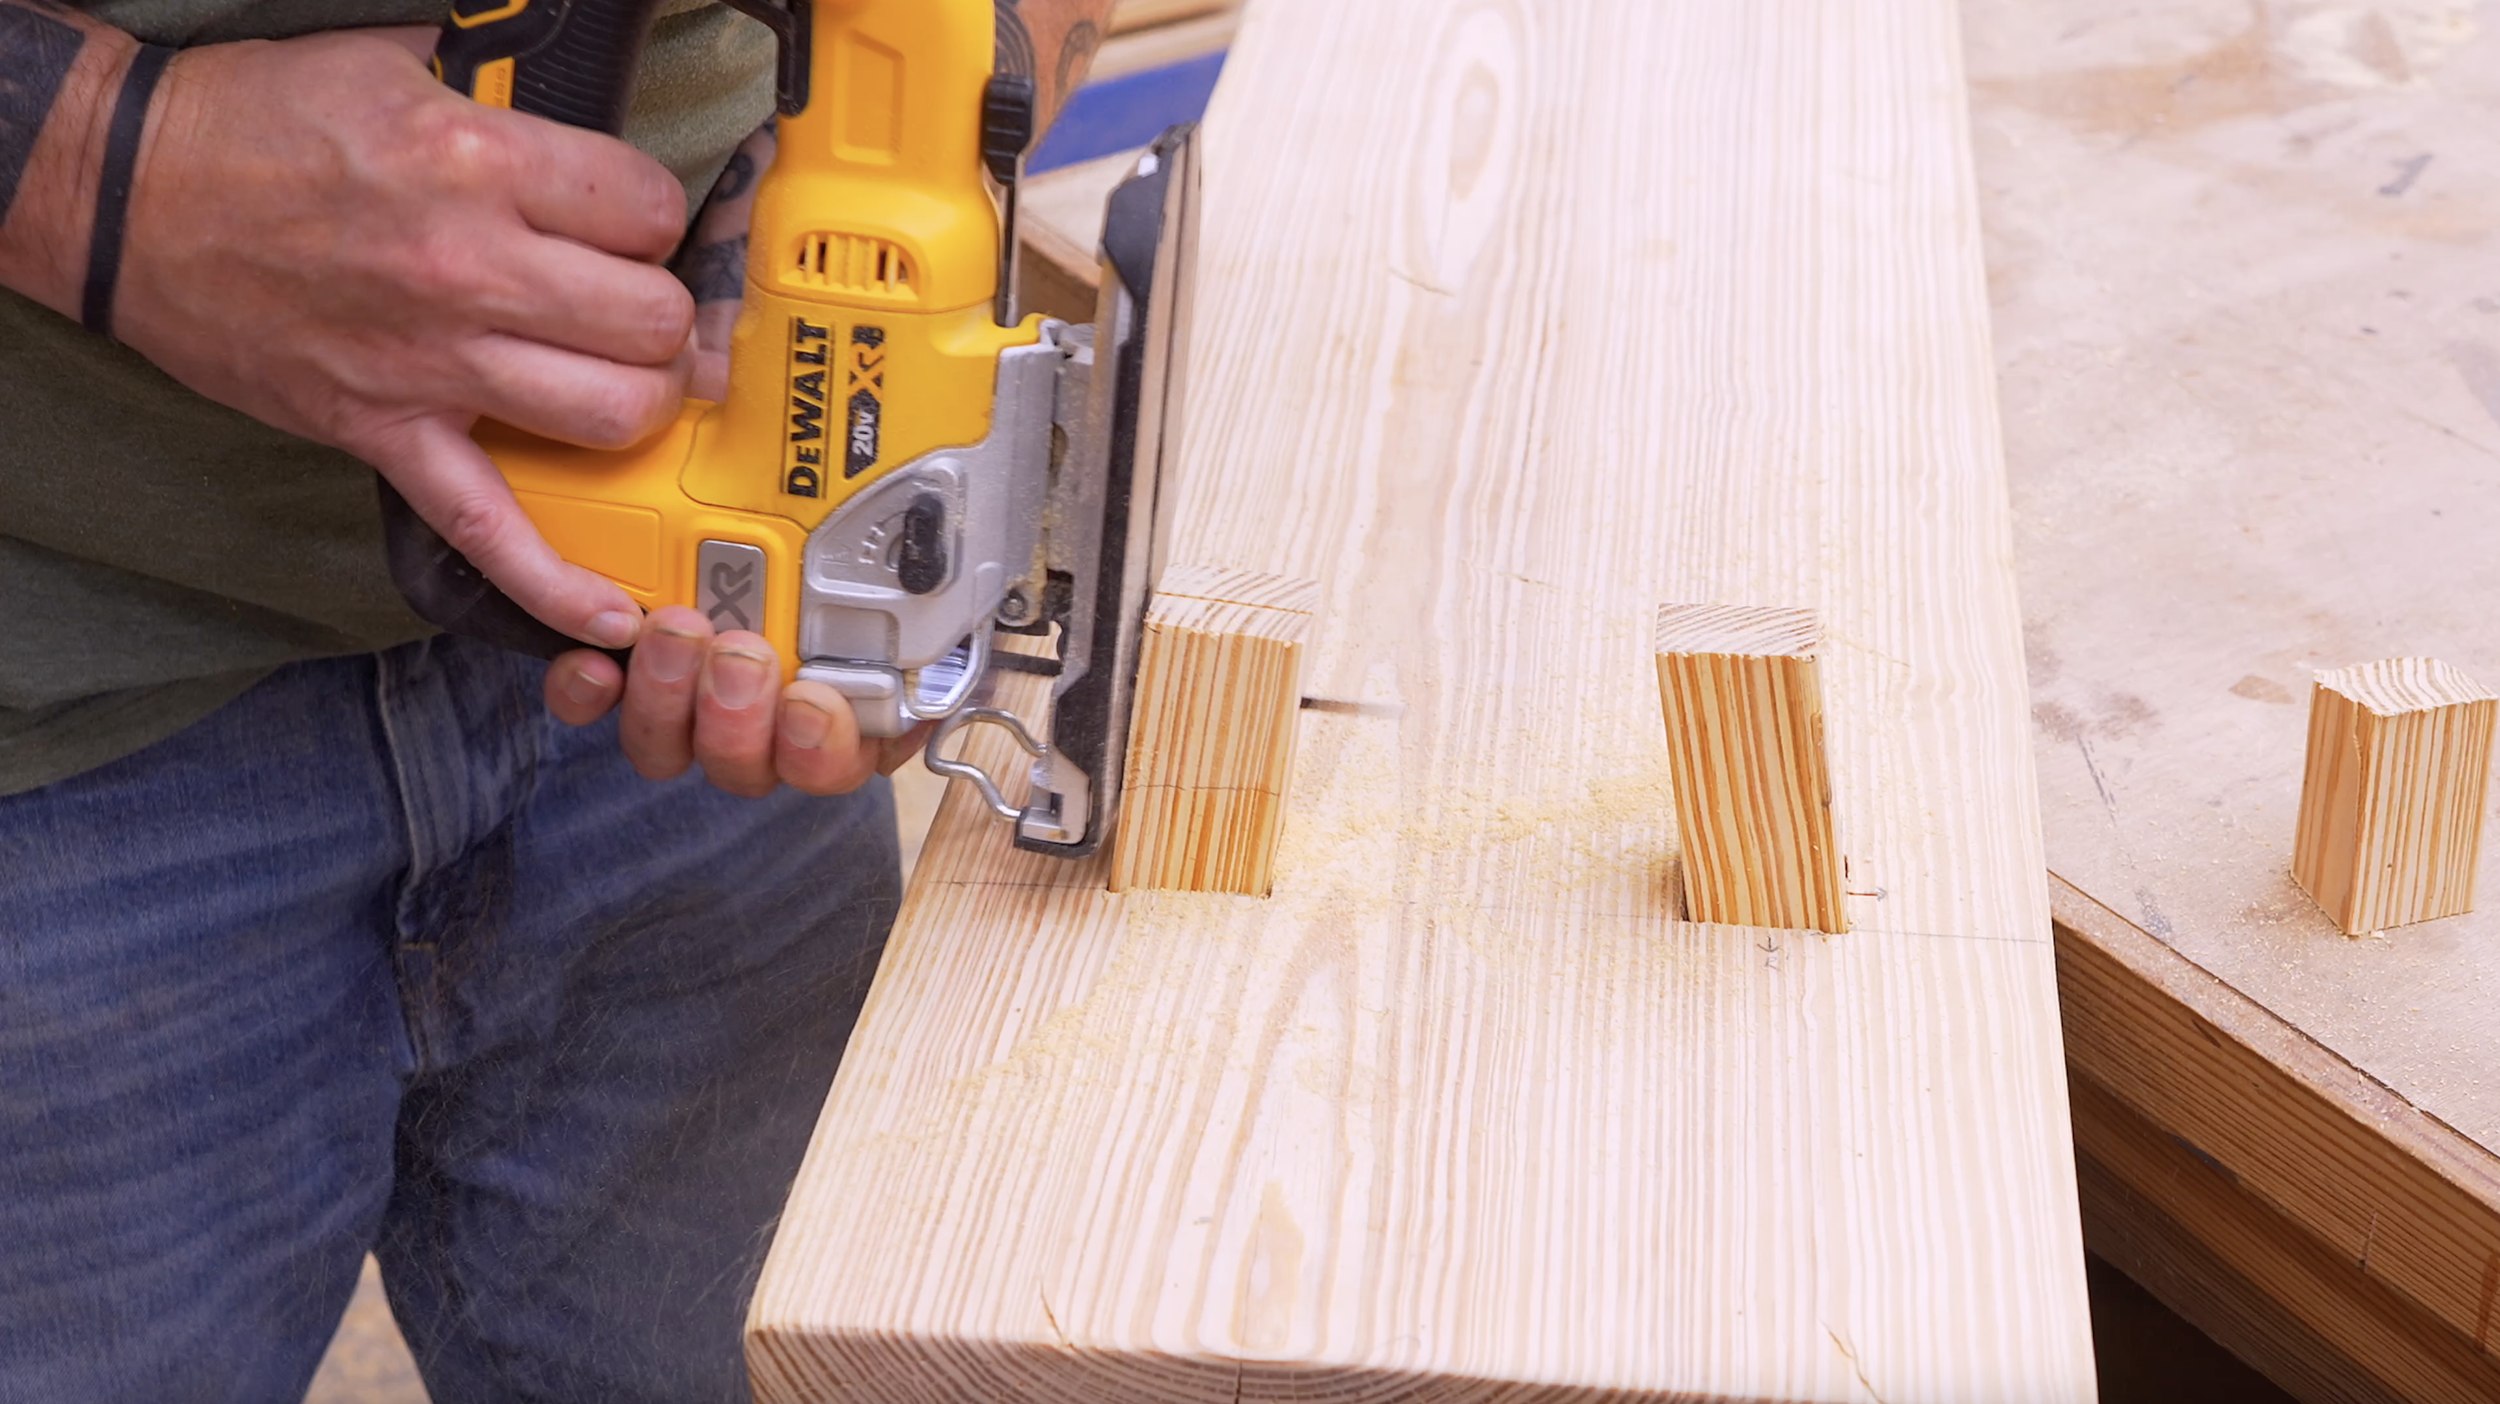
Step 6: Cut the Mortises with a Jigsaw
Drill a pilot hole in the center of your outline, just big enough for your jigsaw blade. Then:
Cut the top and bottom lines with the blade angled outward at 15°.
Rotate your jigsaw as needed to finish the side cuts, always keeping the blade angled toward the outside edge.
Take your time here. Test-fit each leg and trim excess from the underside of the mortise (so mistakes aren’t visible).
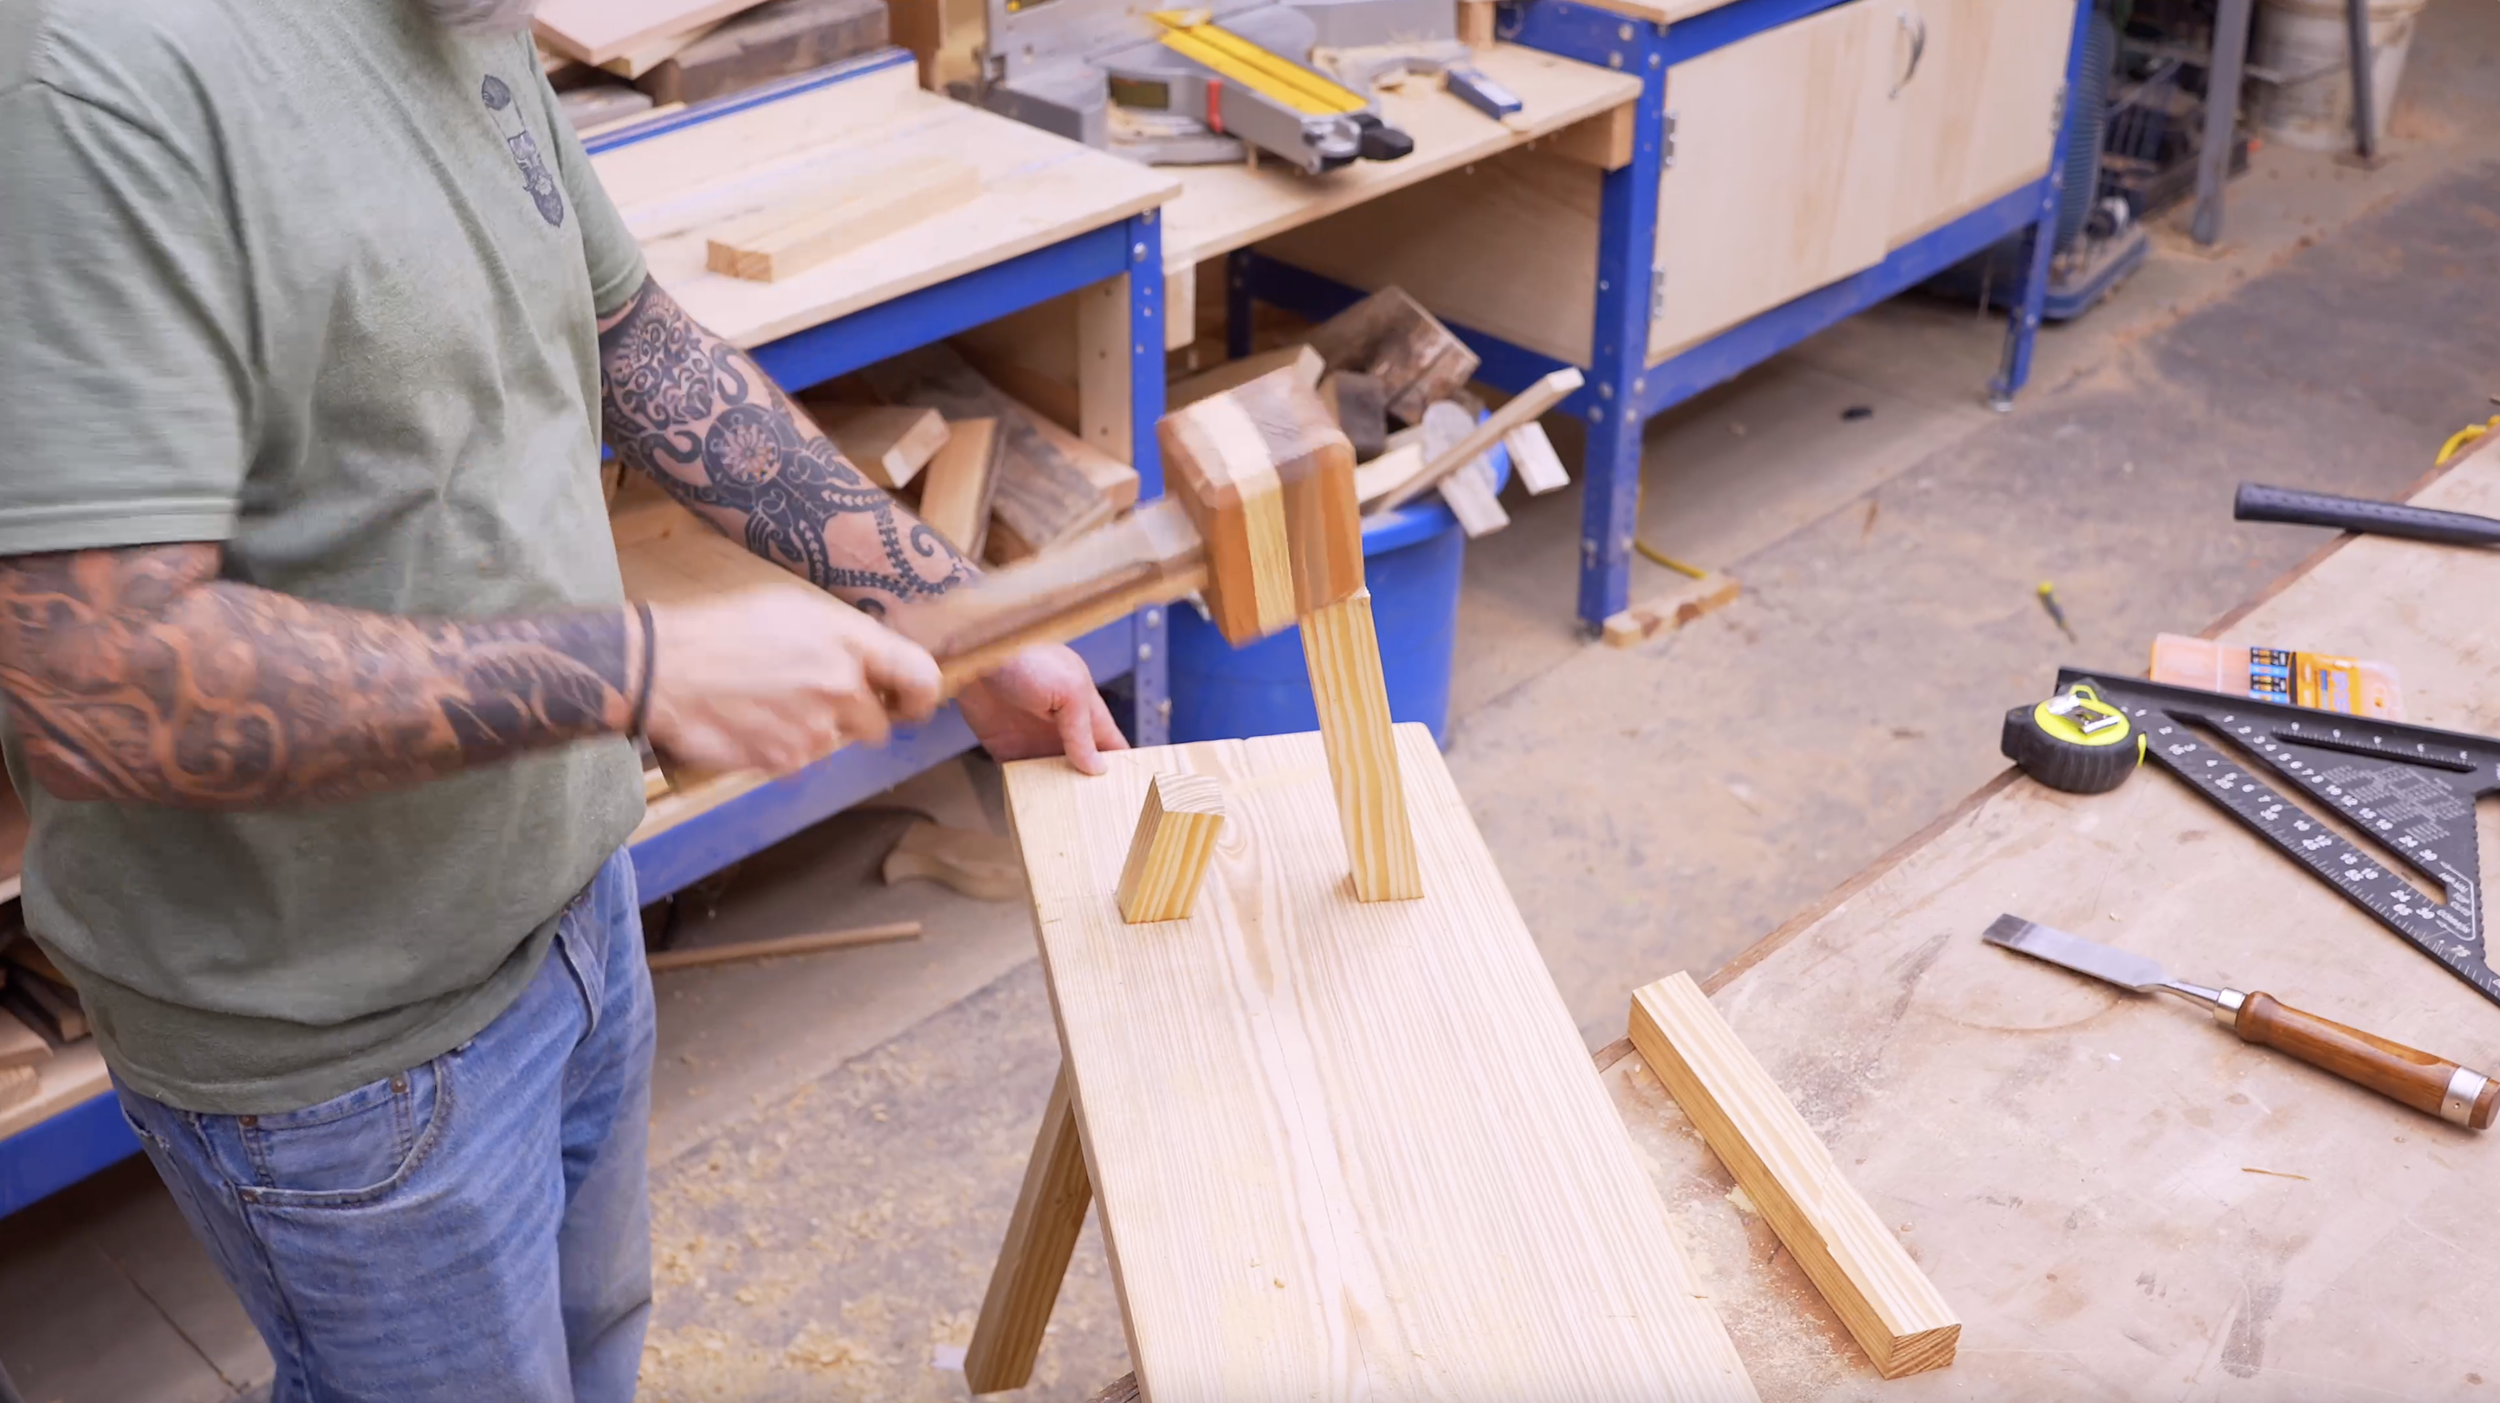
Step 7: Install the Legs
Insert each leg with the longest angle pointing outward. Tap it in with a mallet if needed. Leave a few inches sticking up above the bench for adjustments.
For a standard bench height, mark 19 ½ inches from the bottom of the legs and adjust accordingly.
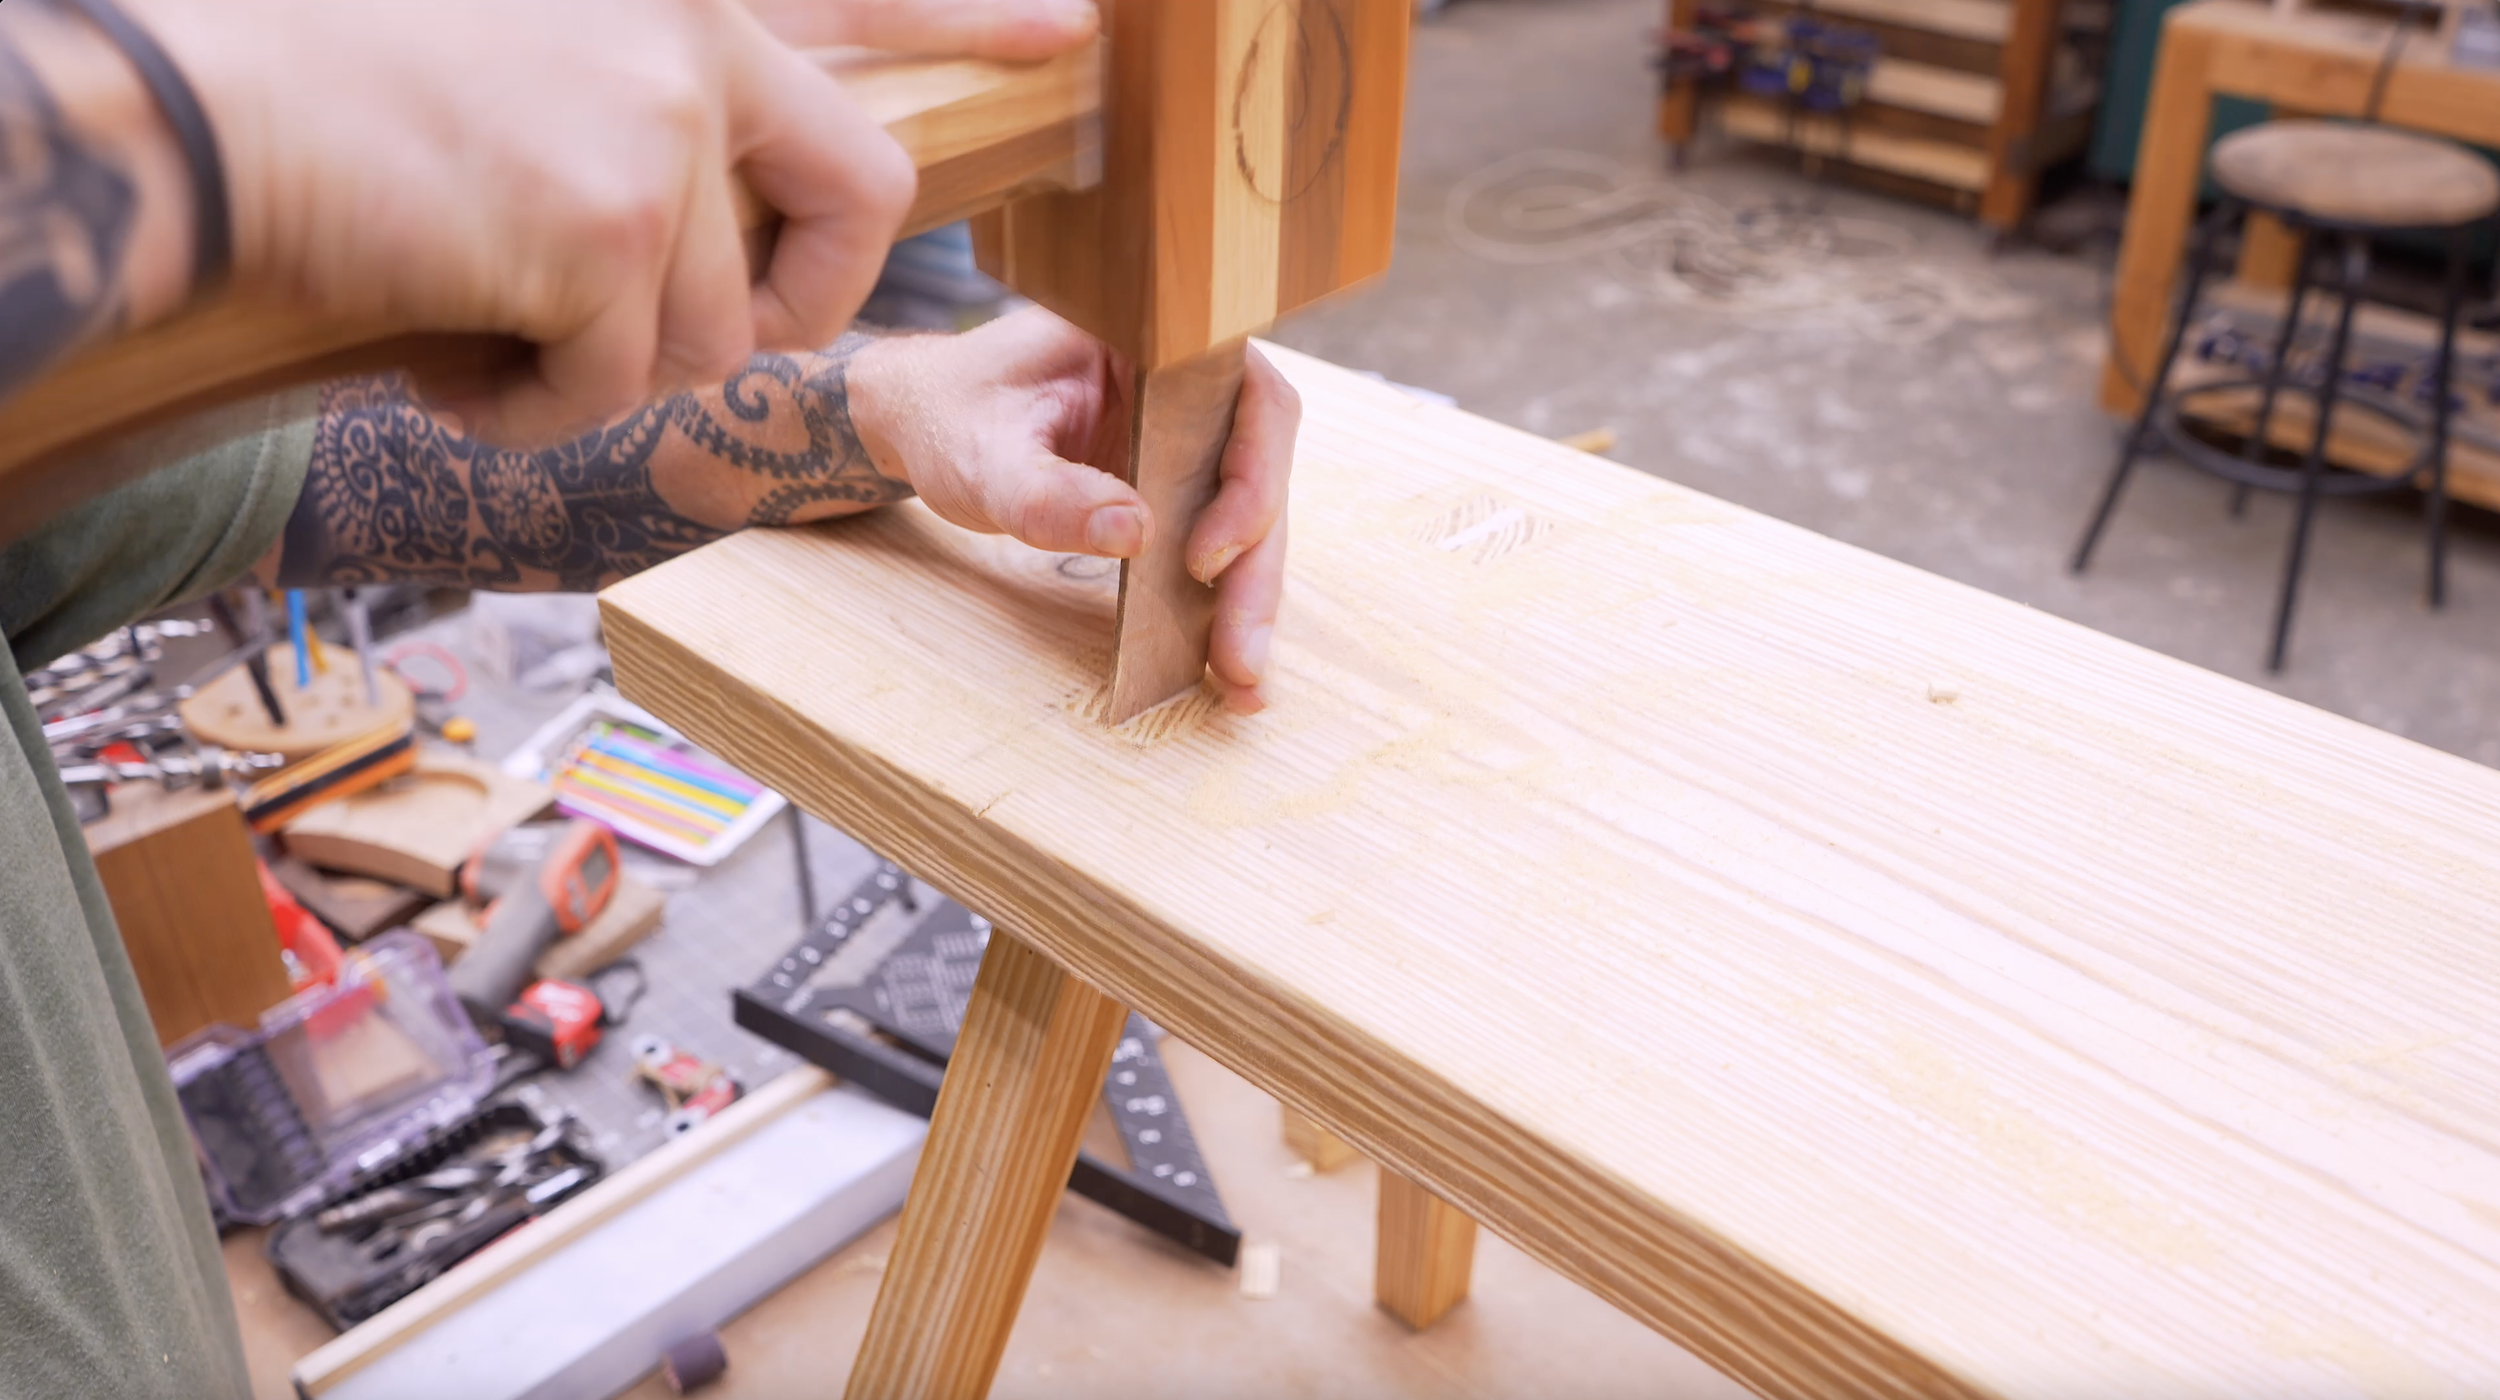
Step 8: Cut Pressure-Wedge Grooves
Here’s the fun part: Old-school joinery!
Tap each leg back out slightly.
Cut a shallow slot in the top of each leg.
When reinstalled, these grooves will accept wedges that lock the legs in place permanently.
Step 9: Add the Wedges
Cut small hardwood wedges (about 1 ½" wide). Spread wood glue on the leg edges, hammer the legs back in, and drive the wedges into the grooves. Trim them flush when dry.
This gives your bench rock-solid strength without screws or brackets.

Step 10: Add Optional Cross Supports
If you’ve got extra scraps, cut two more strips and angle them to fit between the legs on each side. Drill through the legs and attach them with dowels for that authentic hand-crafted look.

Step 11: Finish the Bench
Now comes the fun part—finishing! Sand everything smooth, then:
Stain: I used a honey-colored stain first, then went back with a darker one to bring out the grain.
Or paint: Go for farmhouse white, rustic gray, or whatever matches your style.
Or leave it natural for that raw, rustic vibe.
Ready To Build?
And there you have it—a high-end rustic bench made from a single $10 2x12. You can build this in a single afternoon, and it’s the kind of piece that looks like it came from a boutique furniture shop.
This build is proof that you don’t need fancy tools or expensive wood to make something beautiful and functional. With a little creativity and some elbow grease, you can turn the simplest board into a stunning bench.
So grab a board, dust off that jigsaw, and let’s get your make on!
Whether you’re new to woodworking or a seasoned pro, this project offers the perfect mix of functionality and creativity. Below I have the YouTube video linked for a step-by-step video tutorial for you to follow along with. If you’re a more “plans in the hand” person, click “Get Plan” down below for downloadable instructions. And if you’re ready to dive deeper into woodworking, check out my new course, “Woodworking Kickstart” (which is also linked below). It’s packed with step-by-step lessons to help you build confidence and skills, whether you’re a total beginner or an experienced DIYer. You’ll be building with confidence in no time.
Remember, creativity doesn’t have to be expensive; all you need is a little inspiration and a willingness to try.
Get Easy Step-By-Step Directions to build this by clicking the button below
⭐ 10,044 5 Star Reviews
📚 113 Plans to Choose From
🧩 Lego-Like Assembly Steps
📏 Exact Measurements
📋 Detailed cut and part list
🔍 X-Ray Views
🚀 Instant Delivery
