
Build a Modern Leaning Planter Using Fence Pickets
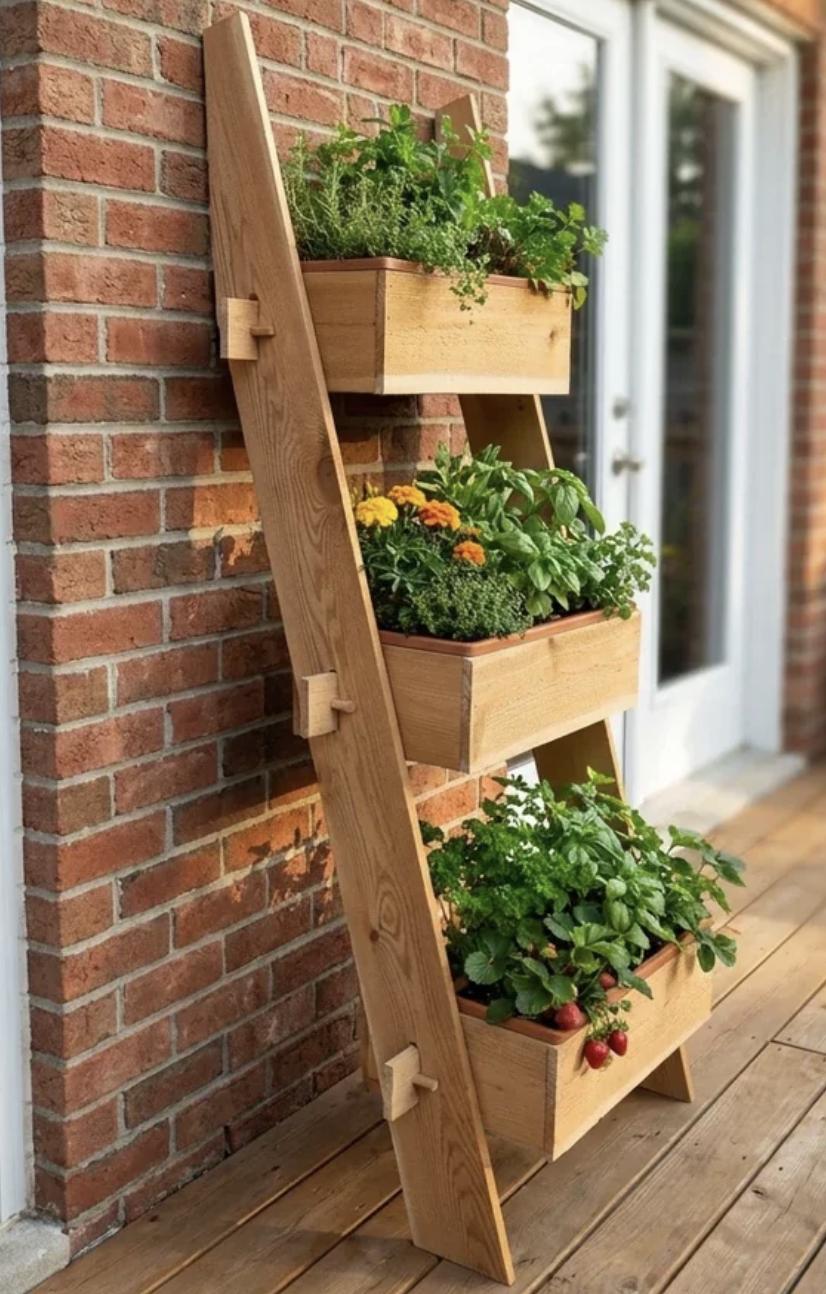
If you've spent much time browsing garden centers, home décor stores, or online marketplaces lately, you've probably noticed one thing—decorative outdoor planters are everywhere.
But one style that really stands out is the leaning planter.
It has a clean, modern look, displays flowers at different heights, and instantly dresses up a porch, patio, or entryway. Best of all, it's a project that's surprisingly easy to build once you understand how the angles work.
In this guide, you'll learn exactly how to build your own leaning planter using simple woodworking techniques and common materials. Even if you've never built anything with angled legs before, this project is much easier than it looks.
Materials You’ll Need
Lumber
Cedar Fence Pickets
Exterior Wood Glue
Hardware
Exterior Screws
Brad Nails (Optional)
Tools
Miter Saw
Circular Saw
Jigsaw
Drill
Tape Measure
Speed Square
Planter Liners
Purchase your planter liners before cutting any material.
Before You Begin
One reason this project intimidates many woodworkers is the number of angles.
Fortunately, you do not need to know the exact angle measurements.
Instead of trying to calculate every angle mathematically, you'll create them based on how the planter naturally sits. This approach is faster, easier, and often more accurate than trying to duplicate unknown dimensions from a photograph.
Let’s Get Going!
Step 1: Purchase Your Planter Liners First
Unlike many planter projects where the box determines the size, this build works the opposite way.
Start by purchasing the three planter liners you want to use.
Once you have those liners, simply build each wooden planter box so the lip of the liner rests securely on the top edge of the frame.
This eliminates all guesswork and ensures the finished planter fits perfectly.
Step 2: Build the Three Planter Boxes
The planter boxes themselves are the easiest part of the project. I recommend using simple butt joints throughout the build.
For each box:
Cut four side pieces sized to fit your liner.
Assemble a rectangular frame.
Install the bottom panel.
Secure everything with exterior screws or brad nails and wood glue.
Because the plastic liner supports the soil and plants, the wooden box mainly serves as an attractive outer shell.
Step 3: Determine the Lean of the Planter
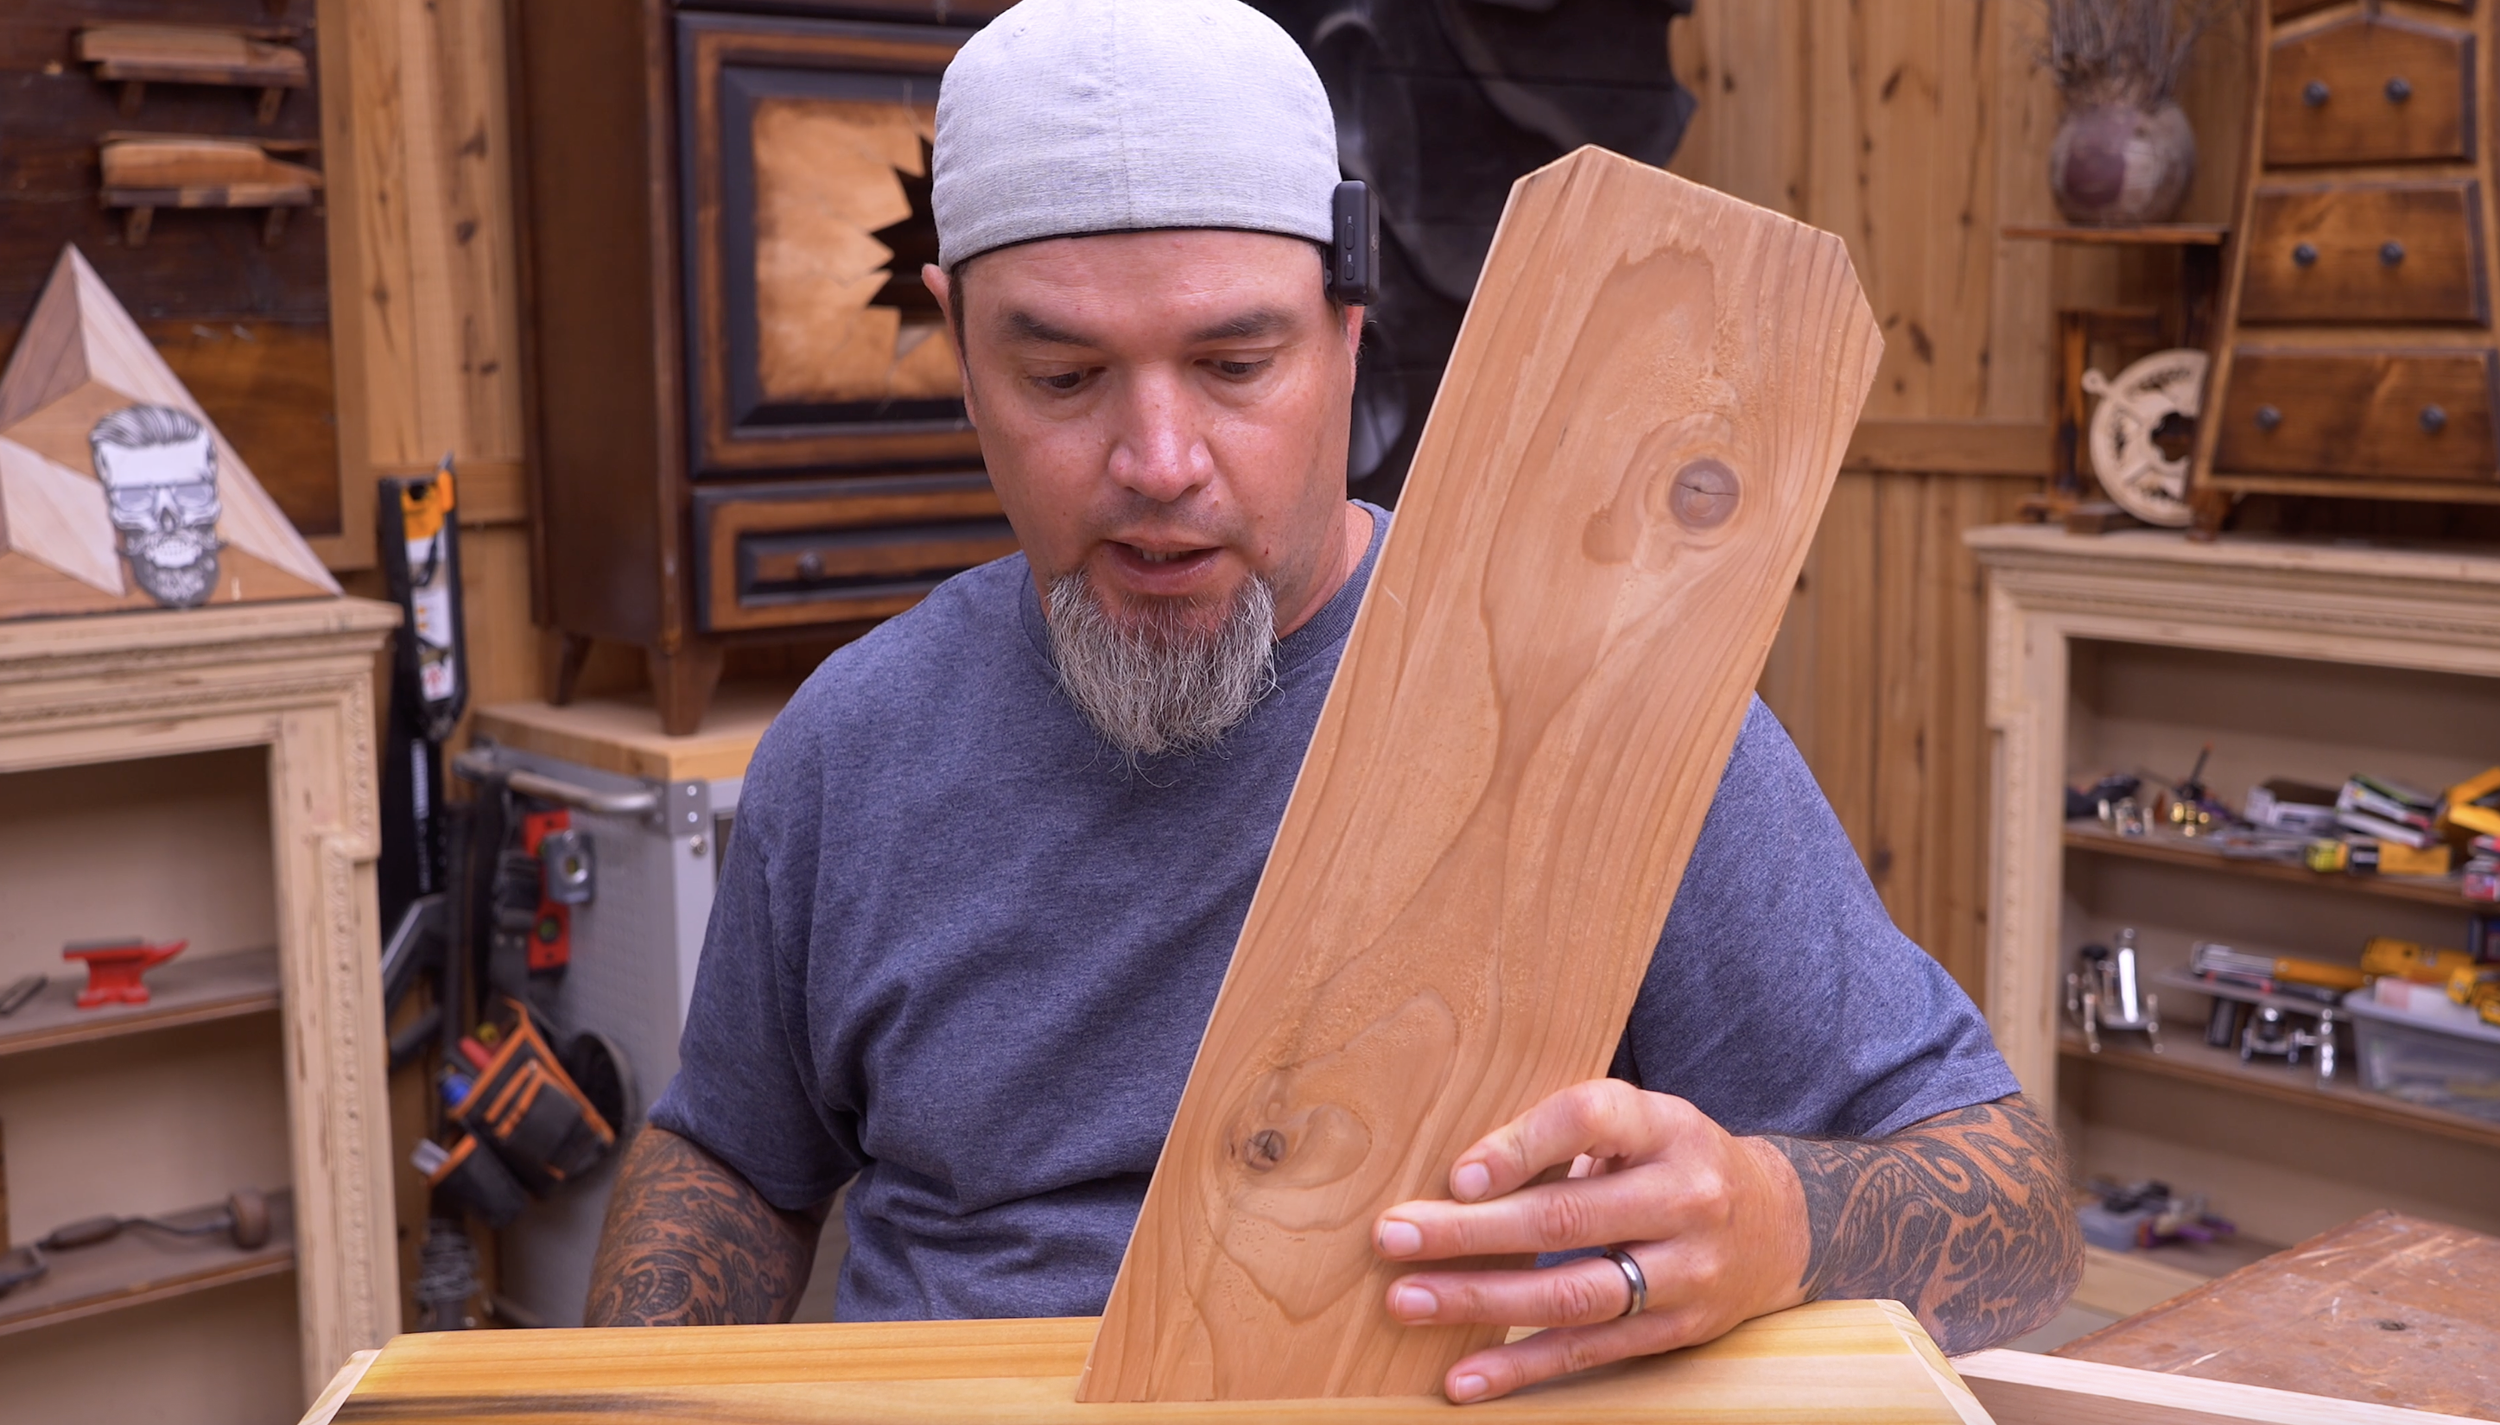
Instead of looking for a specific angle measurement, stand one of your leg boards on the floor and lean it back until it looks right to your eye. My lean ended up approximately around 20 degrees, however the exact angle isn’t important!
Once you're happy with how it looks:
Lay a scrap 2×4 on the floor.
Lean your leg board against it.
Draw a line where the board meets the 2×4.
Take the board to your miter saw and cut along that line.
Congratulations—you've just created the bottom angle without ever measuring the degree.
Step 4: Cut the Top of Each Leg
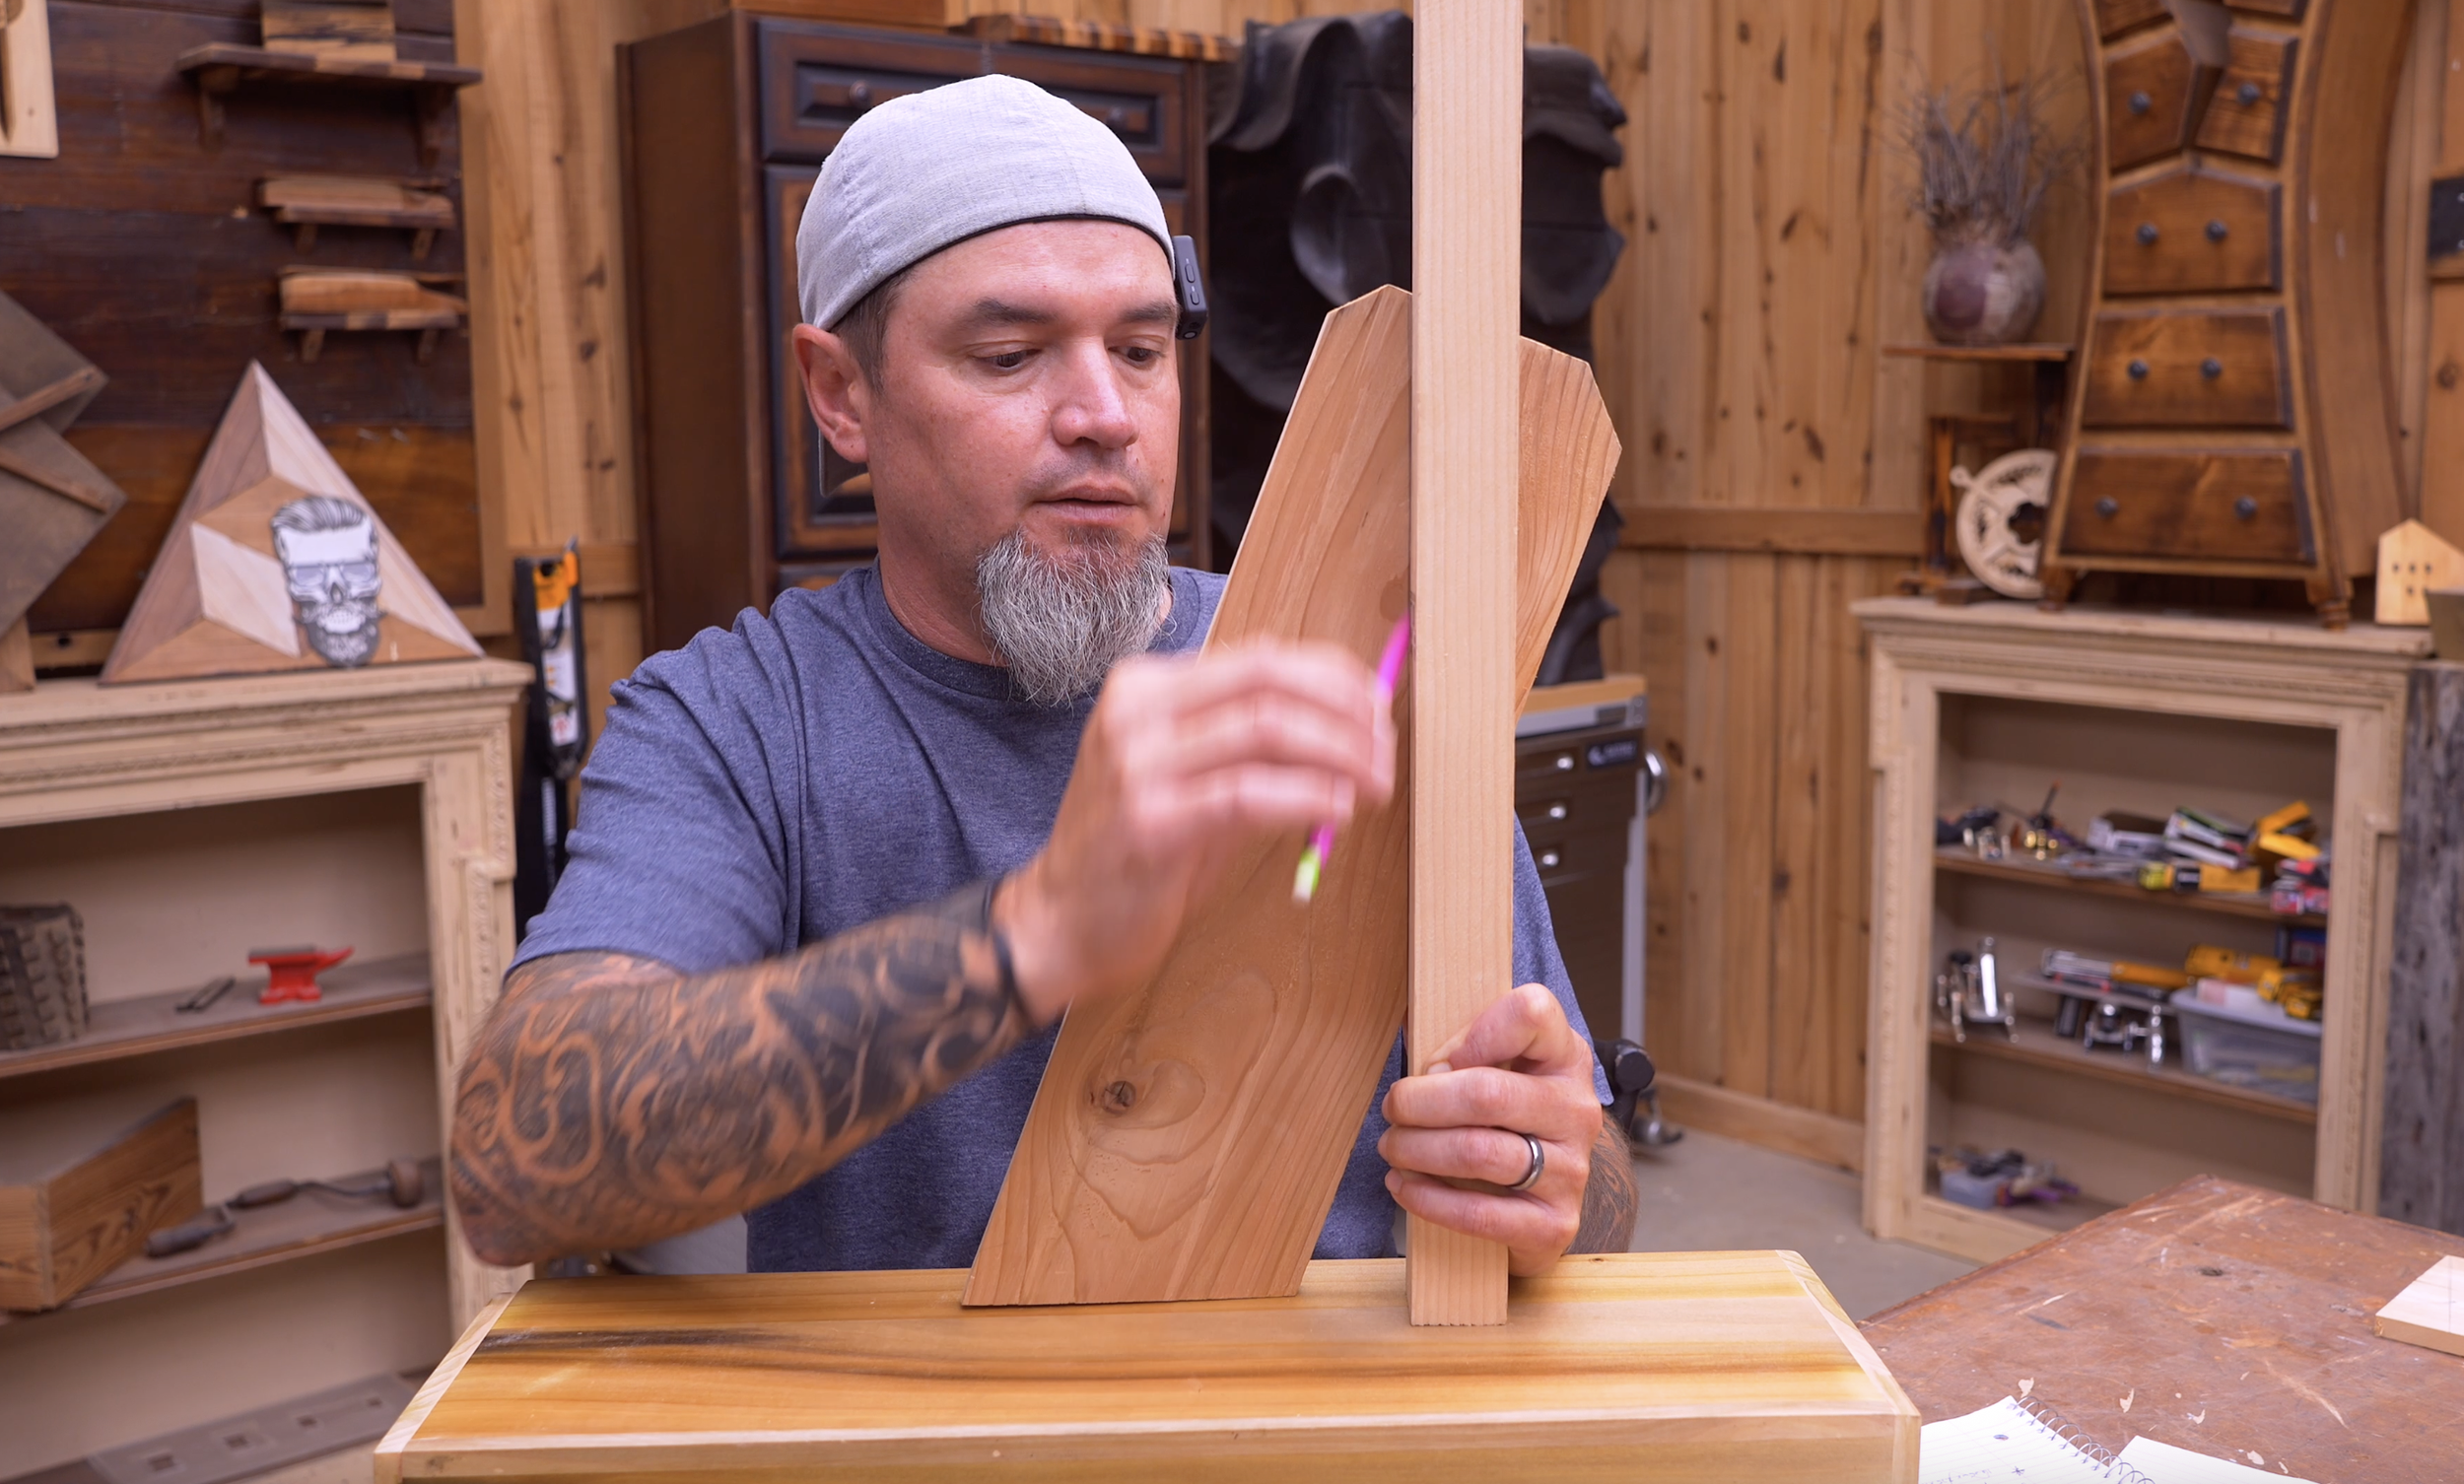
Now, the planter needs to sit flat against a wall or fence. Stand your angled leg on the floor again and decide where you'd like the top of the planter to begin. Mine is roughly 1 inch from the edge.
Next:
Hold a straight board or level vertically to represent the wall.
Draw a line across the top of your leg using that guide.
Cut along the line with a circular saw.
Again, you never need to know the actual angle. You're simply cutting exactly what the project requires.
Step 5: Lay Out the Three Planter Levels
Next you'll decide where each planter box sits on the frame.
A simple layout I followed happened to be:
Bottom planter: 12 inches from the bottom
Middle planter: 30 inches
Upper planter: 12 inches from the top
These measurements can be adjusted to suit your planter liner sizes or your own design preferences. Mark these locations on both leg boards before moving on.
Step 6: Mark the Notches for the Planter Boxes
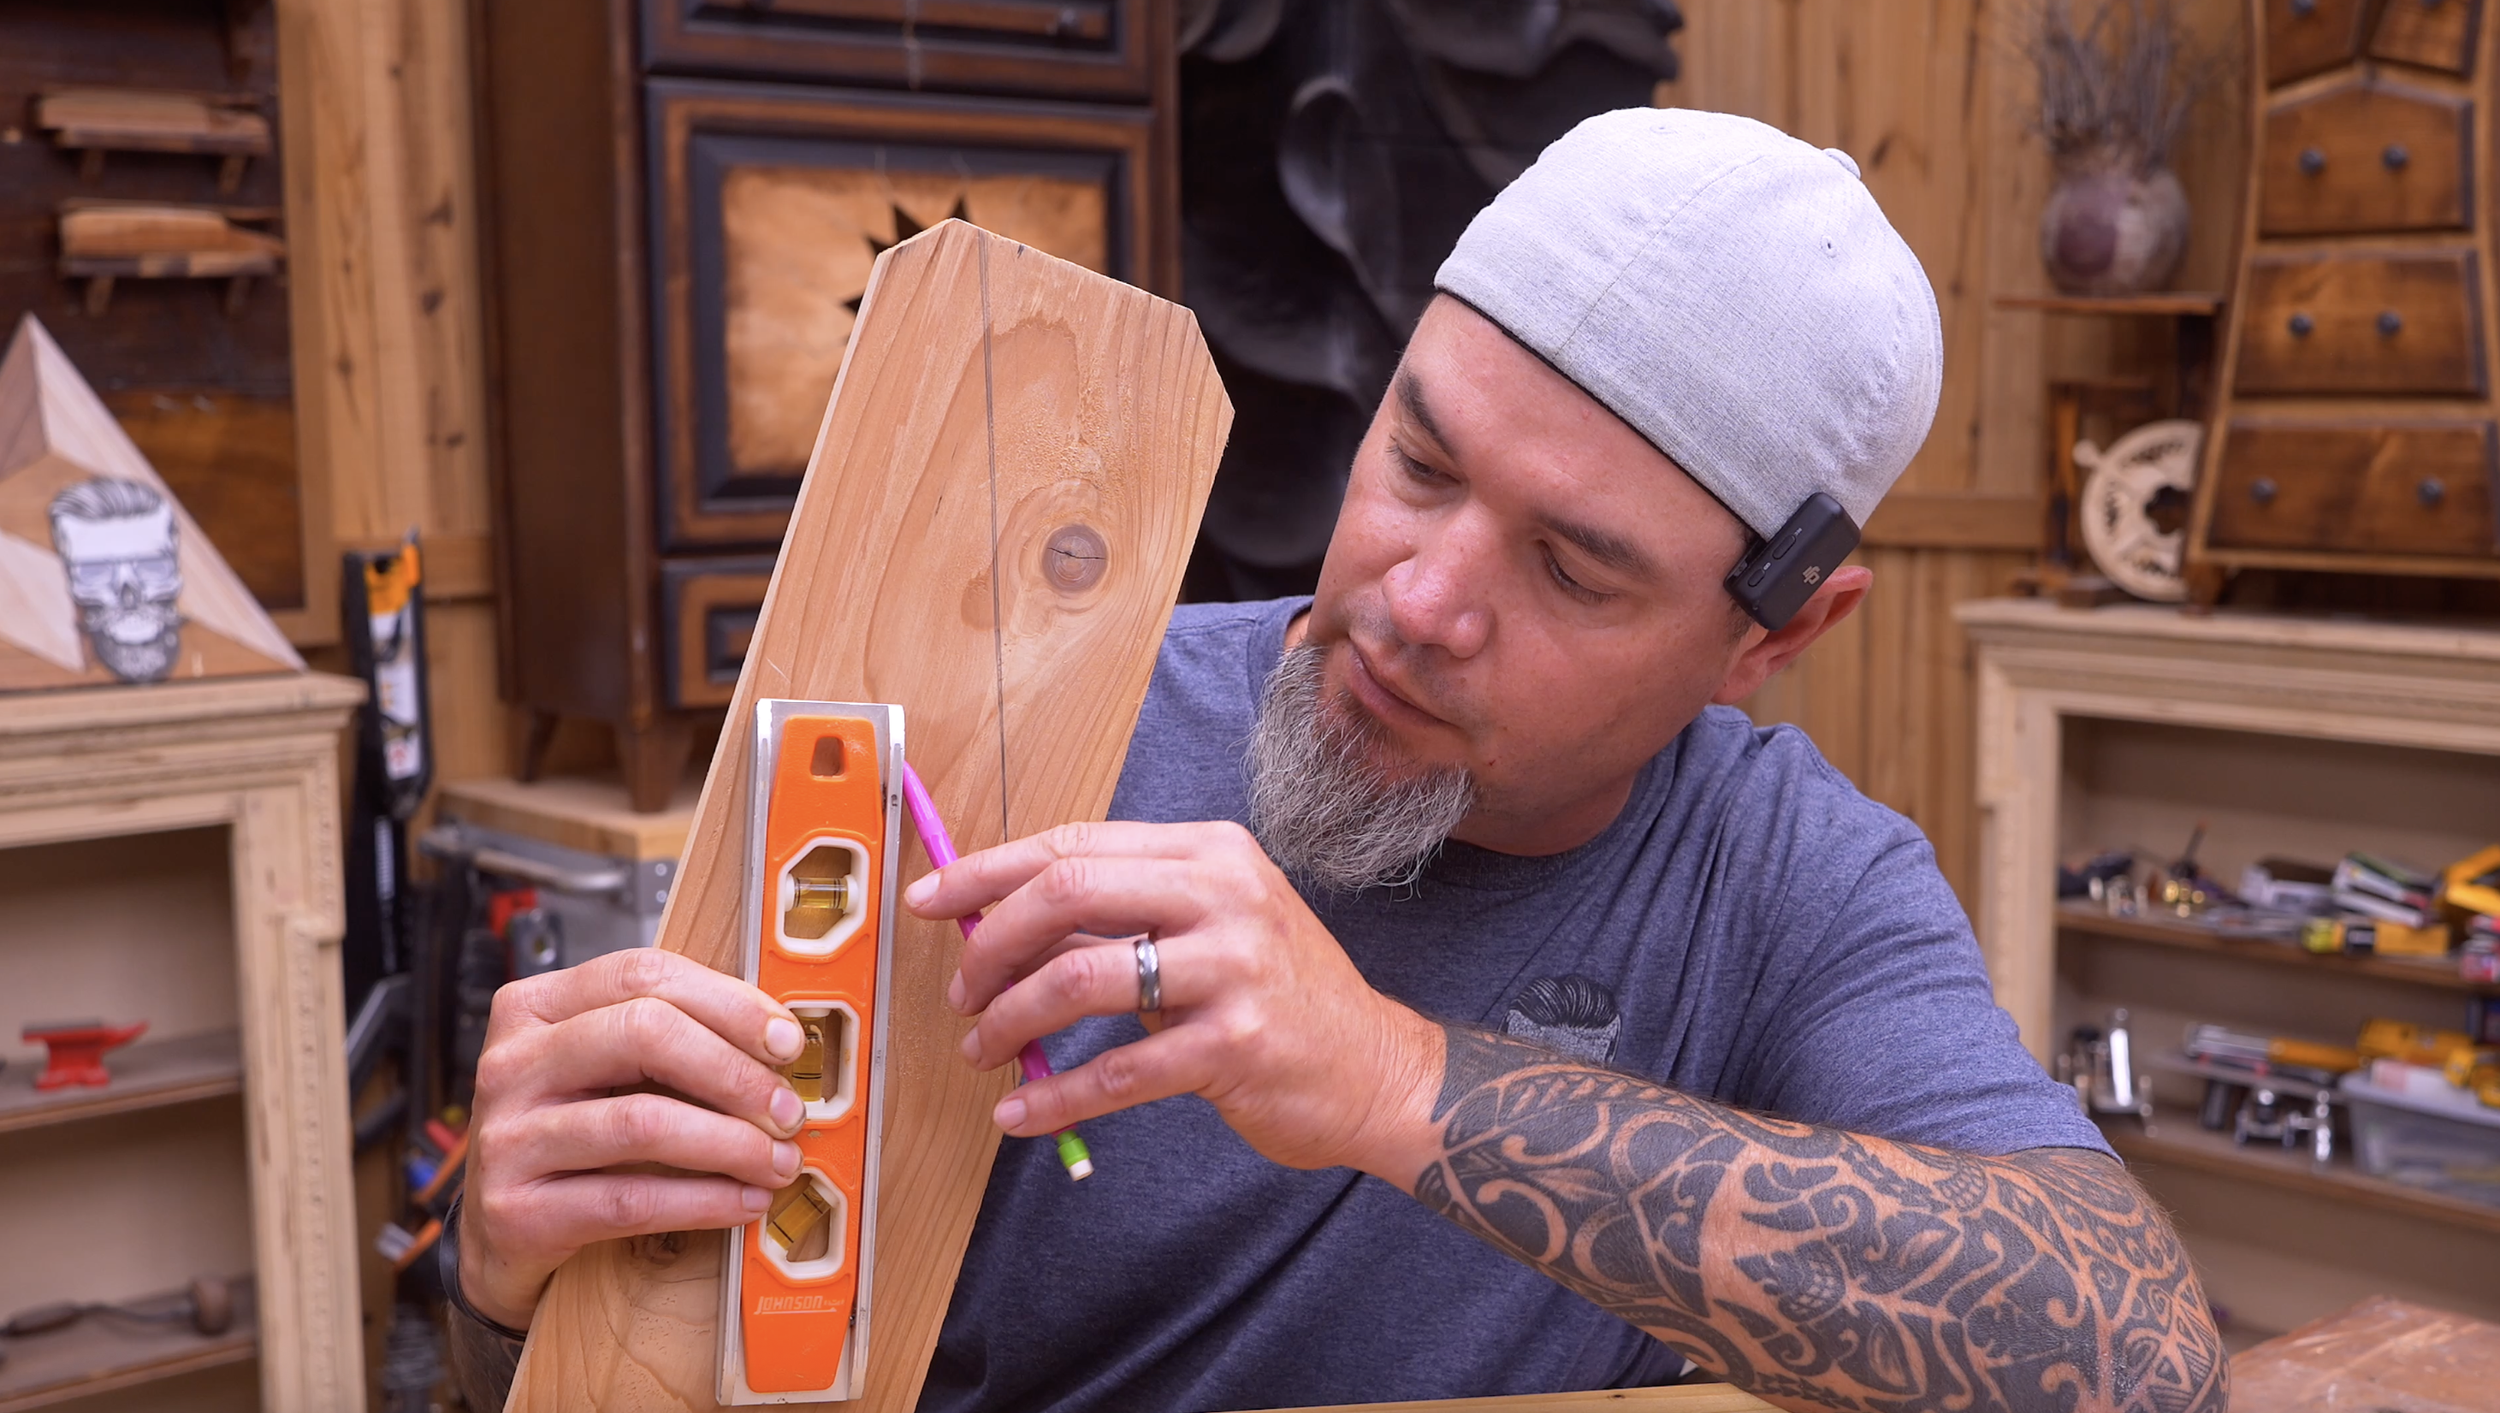
This is another step that looks complicated until you see the trick. Place your leg back on the floor so it sits at its finished angle.
At one of your height marks:
Hold a torpedo level perfectly level.
Draw a line across the face of the leg following the level.
That line now represents the notch for one planter box. Repeat this process for each remaining planter location. Because you're using a level instead of trying to calculate angles, every planter will sit perfectly level after assembly.
Step 7: Cut the Notches
After marking all three openings:
Drill a starter hole inside each layout.
Use a jigsaw to cut along your layout lines.
Test fit each planter box.
Take your time here.
A snug fit makes the finished planter much stronger and cleaner looking.
Step 8: Install the Planter Boxes
Slide each completed planter box into its corresponding notch. Check each one with a level before fastening.
Once satisfied:
Apply exterior wood glue.
Drive screws through the legs into each planter box.
Repeat for all three levels.
At this point, the planter frame is complete.
Step 9: Add the Signature Modern Angles
Before finishing:
Ease all sharp corners.
Fill any noticeable gaps if desired.
Sand the entire project smooth.
Because this planter will live outdoors, pay special attention to rough edges that could trap moisture.
Step 10: Finish the Planter
There are several excellent finishing options.
Natural Cedar
Allow the cedar fence pickets to weather naturally.
Outdoor Stain
Highlight the wood grain while protecting it from moisture.
Painted Finish
A classic white, black, or sage green finish creates a modern farmhouse appearance.
Use an exterior-rated stain or paint for maximum durability.
Step 11: Planting Your New Planter
Once the finish has cured:
Drop the plastic liners into each box.
Fill with quality potting mix.
Add your favorite flowers, herbs, or decorative plants.
Because the liners are removable, changing seasonal flowers becomes quick and easy.
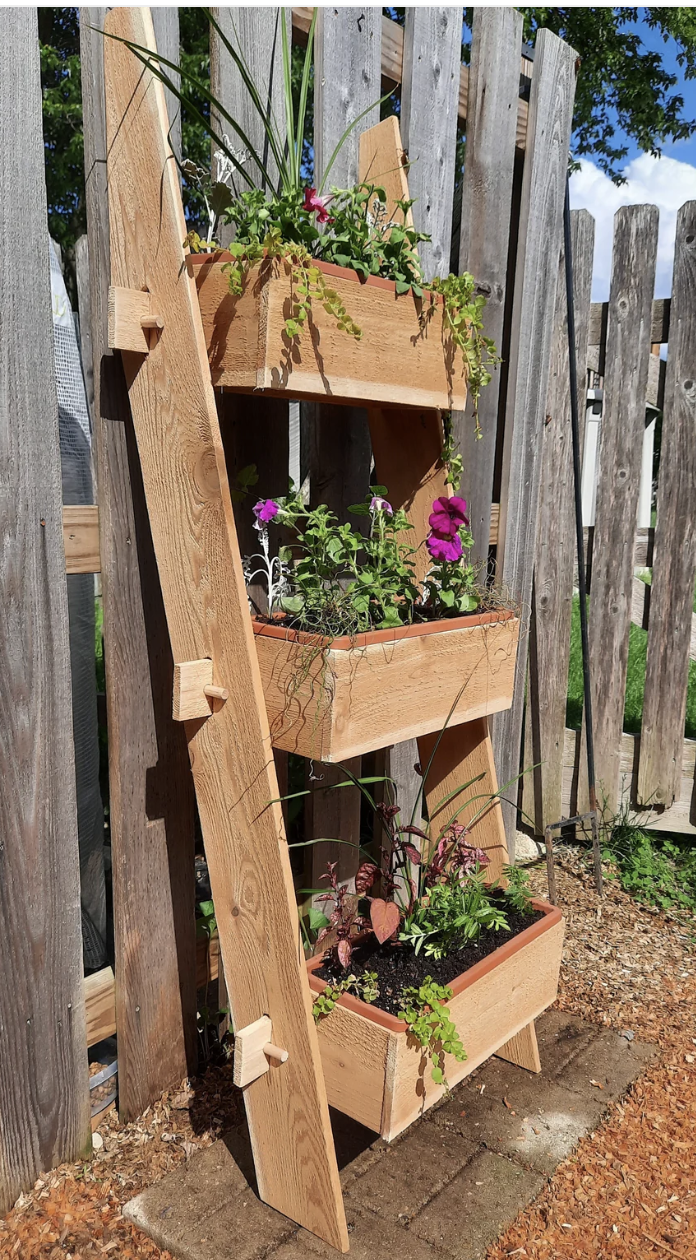
Ready To Build?
This leaning planter combines simple construction with eye-catching design, making it one of those projects that's both enjoyable to build and practical to use.
Using fence pickets keeps material costs low, while the removable planter liners simplify the entire construction process. Even better, the angled layout techniques shown in this build can be applied to dozens of future woodworking projects.
Whether you're building one for your own front porch or creating inventory for your next craft fair, this leaning planter is proof that you don't need complicated joinery or expensive lumber to build something people will admire.
And if you’re ready…
You already know the next step.
👉 Get up, get out, and get your build on.
Whether you’re new to woodworking or a seasoned pro, this project offers the perfect mix of functionality and creativity. Below I have the YouTube video linked for a step-by-step video tutorial for you to follow along with. If you’re a more “plans in the hand” person, click “Get Plan” down below for downloadable instructions. And if you’re ready to dive deeper into woodworking, check out my new course, “Woodworking Kickstart” (which is also linked below). It’s packed with step-by-step lessons to help you build confidence and skills, whether you’re a total beginner or an experienced DIYer. You’ll be building with confidence in no time.
Remember, creativity doesn’t have to be expensive; all you need is a little inspiration and a willingness to try.
Get Easy Step-By-Step Directions to build this by clicking the button below
⭐ 10,044 5 Star Reviews
📚 113 Plans to Choose From
🧩 Lego-Like Assembly Steps
📏 Exact Measurements
📋 Detailed cut and part list
🔍 X-Ray Views
🚀 Instant Delivery
